How to Build an Opt-In Page Using Tailwind CSS and Astro

One of the most important aspects of building any website these days is creating an inspiring Opt-In page for your audience. Using modern CSS frameworks like Tailwind CSS makes it easy to design and implement compelling Opt-In and Landing pages to reach new customers.
In this article I'll show how to create high converting Opt-In page using Tailwind CSS and Astro, one of the fastest growing content-driven frameworks, including:
- How to design and build compelling Opt-In pages for different audiences.
- Create flexible Opt-In layouts in Astro.
- How to leverage marketing automation lists like AWeber or MailChimp.
- How to integrate with marketing automation platforms.
Learn how to design and create Opt-In pages that can vastly improve your website's conversion potential.
What is an Opt-In page?
Opt-In pages are simple web pages that present a user with an option to take a certain action. They are an excellent way to market your brand and build customer relationships using Email marketing.
Here's the design we'll be using to create an attractive Opt-In page using Tailwind CSS.
Why are Opt-In pages important?
Opt-In pages are essential for any businesses looking to grow their potential customer audiences.
There's an old expression that says, If you start a business and say you're in business but you're not marketing your business, then you're not really in business.
So building Opt-In pages are the link to building successful and long term customer audiences for potential sales conversions.
Types of Opt-In pages
In this article we'll focus on an Opt-In page that requests a user's Email but here are some other types you can also apply these strategies too.
Landing Pages
Newsletters
Event Registration
Surveys and Questionaires
Getting started building an Opt-In page
For this article I'll be creating an Opt-In form for a fictitous professional guitar teacher who specializes in online tutorials and guitar techniques.
Prerequisites
For this article I'll be using the following stack:
Astro: A web framework for content-driven websites.Tailwind CSS: Is a great CSS class based utility framework for building fast theme based websites. More info hereFlowbite: A vanilla Javascript compoment library with support for various frameworks.
Installing requirements
If you don't already have Astro installed, let's start there first.
To install Astro simply use the generator in a terminal. It will prompt for a project name and a few other questions just accept all the default options.
npm create astro@latest
Once Astro is installed, switch into your new project directory.
cd [your project name]
We can then add flowbite component library.
npm install flowbite
Lastly, add and configure Tailwind CSS. Astro makes this very simple and will configure all you need by running the add feature.
npx astro add tailwind
Email Automation Services
For this tutorial I'll be using AWeber which is one of my primary Opt-In Email Marketing and automation services.
I highly recommend using an external Email Marketing service to create and manage Opt-In forms and Email Marketing lists.
Most of these services will usually generate an HTML starter form to add to your website, which is what I'll be using as a starting point.
Since we're using AWeber for this example, we'll need to generate a new form using their form builder interface. If you're using an alternative Email Marketing service, you'll need to generate the form on that website.
Here's some quick steps to build a simple form with AWeber:
- Go to
Pages and Forms > Sign Up Forms.
- Click on the right, top button
Create a Sign Up Form and select the For My Website option.
- On the
Design tab, select the Simple form since we'll provide our own styling using Tailwind CSS.
- Use the form editor and delete the
Name field so only the Email and Button fields remains.
- Click on the
Go to Step 2 button.
- On Step 2, the
Settings tab will ask for the redirect URLs, which are optional but we can select the Custom Page option since we'll be creating these pages in the next section. For this example these urls would look something like:
- Thank You:
https://<your-domain-here>/tutorials/thankyou
- Already Subscribed:
https://<your-domain-here>/tutorials/alreadysubscribed
- Click
Save Your Form and then click Go to Step 3.
- On the
Publish tab, select the option I Will Install My Form. It will show some options:
- Select the
Raw HTML Version since we don't need the JavaScript it provides and we only want the raw HTML form.
- Also, Uncheck the checkbox to get the unformatted basic HTML form without any styling.
- Copy and paste the code from the box and save it somewhere locally on your computer.
I'll remove the following sections for this demo:
- Powered by section
- Privacy Policy
- Footer section
- And any unneeded comments
Here's what the form should look like now.
<form
method="post"
class="af-form-wrapper"
accept-charset="UTF-8"
action="https://www.aweber.com/scripts/addlead.pl"
>
<div style="display: none">
<input type="hidden" name="meta_web_form_id" value="444333355" />
<input type="hidden" name="meta_split_id" value="" />
<input type="hidden" name="listname" value="awlist67773398" />
<input
type="hidden"
name="redirect"
value="https://[your-domain-here]/tutorials/thankyou"
id="redirect_0727932f68e651d06b9dcf31c9a75d06"
/>
<input
type="hidden"
name="meta_redirect_onlist"
value="https://[your-domain-here]/tutorials/alreadysubscribed"
/>
<input type="hidden" name="meta_adtracking" value="My_Web_Form" />
<input type="hidden" name="meta_message" value="1" />
<input type="hidden" name="meta_required" value="email" />
<input type="hidden" name="meta_tooltip" value="" />
</div>
<div id="af-form-444333355" class="af-form">
<div id="af-header-444333355" class="af-header">
<div class="bodyText"><p> </p></div>
</div>
<div id="af-body-444333355" class="af-body af-standards">
<div class="af-element">
<label class="previewLabel" for="awf_field-117316662">Email:</label>
<div class="af-textWrap">
<input
class="text"
id="awf_field-117316662"
type="email"
name="email"
value=""
tabindex="500"
onfocus=" if (this.value == '') { this.value = ''; }"
onblur="if (this.value == '') { this.value='';} "
/>
</div>
<div class="af-clear"></div>
</div>
<div class="af-element buttonContainer">
<input
name="submit"
class="submit"
type="submit"
value="Submit"
tabindex="501"
/>
<div class="af-clear"></div>
</div>
</div>
</div>
<div style="display: none">
<img
src="https://forms.aweber.com/form/displays.htm?id=HCwsTGwczKys"
alt=""
/>
</div>
</form>
Now that we have the form code in its raw HTML format, it will be easier to work with and we can provide some new styling using Tailwind CSS to really give it some character.
Project directory structure
Here's an overview of the project structure I'll be using for this demo.
Project file structure
└── project-root
    ├── public
    │   └── img
    │       └── guitar-prs.png
    └── src
        ├── styles
        │   └── styles.css
        ├── components
        │   └── optin
        │       └── MusicOptinForm.astro
        ├── layouts
        │   └── OptinLayout.astro
        └── pages
            └── tutorials
                ├── mastering-pentatonic-scales.astro
                ├── alreadysubscribed.astro
                └── thankyou.astro
Creating an Astro layout
One of the great reasons to use Astro for this tutorial is it's simplified layout templating capabilities.
By default it only uses HTML, CSS and JavaScript without the need for other frameworks.
If you prefer to use a framework like React or Vue, Astro supports all the major frameworks if needed.
Astro code block syntax
If your new to Astro, it uses some simple syntax to build layouts and pages.
Astro uses fencing code blocks delimited by the opening --- and closing --- tag syntax for any JavaScript ESM code. These sections will be used when it builds the static web pages.
It also supports:
<slot>: Using the <slot> tag creates a placeholder for layouts to insert page code.expressions: Embedded variables using the {variable} notation.components: You can use any custom or library components within the code, for example <MyCustomComponent>script: Any client side code needs to be added to a standard <script> tag if it uses the window or document DOM elements which are not available at static build time.
For example:
.astro extension example syntax
---
import MyCustomComponent from './components'

const title = 'My Component Title';
const data = { foo: "bar" };
---

<div>
 <h1 class="some-class">{title}</h2>
 <div id="output">
 <MyCustomComponent data={data} />
 <slot />
</div>

<script>
  const content = window.someWindowVariable;
  const element = document.querySelector('#output');
</script>
I highly recommend using an Astro extension or plugin for your IDE when editing .astro file types so it properly formats the syntax and provides some code intellisense.
Astro Opt-In layout code
Here's the Astro layout for the Opt-In page. It just consists of an <html>, <head>, <body> and <footer>.
Typically you could further extract these pieces into smaller components but for simplicity I've kept all the code inline for the layout.
It defines the page title and description props for all the pages that will use this layout.
The layout also imports the styles.css for all of the Tailwind CSS classes as well.
---
import "../styles/styles.css";
type Props = {
title: string;
description: string;
};
const { title, description } = Astro.props;
---
<html lang="en">
<head>
<meta charset="utf-8" />
<meta name="viewport" content="width=device-width,initial-scale=1" />
<link
href="https://fonts.googleapis.com/css2?family=Inter:wght@100..900&display=swap"
rel="stylesheet"
/>
<title>{title}</title>
<meta name="title" content={title} />
<meta name="description" content={description} />
<link
href="https://cdnjs.cloudflare.com/ajax/libs/font-awesome/5.15.0/css/all.min.css"
rel="stylesheet"
/>
</head>
<body class="font-inter antialiased bg-white text-gray-900 h-screen">
<nav class="bg-white border-gray-200 dark:bg-gray-900">
<div
class="max-w-screen-xl flex flex-wrap items-center justify-between mx-auto p-4"
>
<a
href="#"
class="flex items-center space-x-3 rtl:space-x-reverse"
>
<svg
class="w-8 h-8 text-gray-500 dark:text-white"
aria-hidden="true"
xmlns="http://www.w3.org/2000/svg"
width="24"
height="24"
fill="currentColor"
viewBox="0 0 24 24"
>
<path
fill-rule="evenodd"
d="M5 8a1 1 0 0 1 1 1v3a4.006 4.006 0 0 0 4 4h4a4.006 4.006 0 0 0 4-4V9a1 1 0 1 1 2 0v3.001A6.006 6.006 0 0 1 14.001 18H13v2h2a1 1 0 1 1 0 2H9a1 1 0 1 1 0-2h2v-2H9.999A6.006 6.006 0 0 1 4 12.001V9a1 1 0 0 1 1-1Z"
clip-rule="evenodd"></path>
<path
d="M7 6a4 4 0 0 1 4-4h2a4 4 0 0 1 4 4v5a4 4 0 0 1-4 4h-2a4 4 0 0 1-4-4V6Z"
></path>
</svg>
<span
class="self-center text-4xl font-bold whitespace-nowrap dark:text-white bg-clip-text text-transparent bg-gradient-to-r from-red-600 to-purple-800"
>Ultimate Guitar Licks</span
>
</a>
<button
data-collapse-toggle="navbar-default"
type="button"
class="inline-flex items-center p-2 w-10 h-10 justify-center text-sm text-gray-500 rounded-lg md:hidden hover:bg-gray-100 focus:outline-none focus:ring-2 focus:ring-gray-200 dark:text-gray-400 dark:hover:bg-gray-700 dark:focus:ring-gray-600"
aria-controls="navbar-default"
aria-expanded="false"
>
<span class="sr-only">Open main menu</span>
<svg
class="w-5 h-5"
aria-hidden="true"
xmlns="http://www.w3.org/2000/svg"
fill="none"
viewBox="0 0 17 14"
>
<path
stroke="currentColor"
stroke-linecap="round"
stroke-linejoin="round"
stroke-width="2"
d="M1 1h15M1 7h15M1 13h15"></path>
</svg>
</button>
<div class="hidden w-full md:block md:w-auto" id="navbar-default">
<ul
class="font-medium flex flex-col p-4 md:p-0 mt-4 border border-gray-100 rounded-lg bg-gray-50 md:flex-row md:space-x-8 rtl:space-x-reverse md:mt-0 md:border-0 md:bg-white dark:bg-gray-800 md:dark:bg-gray-900 dark:border-gray-700"
>
<li>
<a
href="#"
class="block py-2 px-3 text-white bg-blue-700 rounded md:bg-transparent md:text-blue-700 md:p-0 dark:text-white md:dark:text-blue-500"
aria-current="page">Home</a
>
</li>
<li>
<a
href="#"
class="block py-2 px-3 text-gray-900 rounded hover:bg-gray-100 md:hover:bg-transparent md:border-0 md:hover:text-blue-700 md:p-0 dark:text-white md:dark:hover:text-blue-500 dark:hover:bg-gray-700 dark:hover:text-white md:dark:hover:bg-transparent"
>About</a
>
</li>
<li>
<a
href="#"
class="block py-2 px-3 text-gray-900 rounded hover:bg-gray-100 md:hover:bg-transparent md:border-0 md:hover:text-blue-700 md:p-0 dark:text-white md:dark:hover:text-blue-500 dark:hover:bg-gray-700 dark:hover:text-white md:dark:hover:bg-transparent"
>Services</a
>
</li>
<li>
<a
href="#"
class="block py-2 px-3 text-gray-900 rounded hover:bg-gray-100 md:hover:bg-transparent md:border-0 md:hover:text-blue-700 md:p-0 dark:text-white md:dark:hover:text-blue-500 dark:hover:bg-gray-700 dark:hover:text-white md:dark:hover:bg-transparent"
>Pricing</a
>
</li>
<li>
<a
href="#"
class="block py-2 px-3 text-gray-900 rounded hover:bg-gray-100 md:hover:bg-transparent md:border-0 md:hover:text-blue-700 md:p-0 dark:text-white md:dark:hover:text-blue-500 dark:hover:bg-gray-700 dark:hover:text-white md:dark:hover:bg-transparent"
>Contact</a
>
</li>
</ul>
</div>
</div>
<div>
<slot />
</div>
<footer
class="fixed bottom-0 left-5 right-5 bg-white rounded-lg shadow m-4 dark:bg-gray-800"
>
<div
class="w-full mx-auto max-w-screen-xl p-4 md:flex md:items-center md:justify-between"
>
<span class="text-sm text-gray-500 sm:text-center dark:text-gray-400"
><a href="#" class="hover:underline">Ultimate Guitar Licks</a>
</span>
<ul
class="flex flex-wrap items-center mt-3 text-sm font-medium text-gray-500 dark:text-gray-400 sm:mt-0"
>
<li>
<a href="#" class="hover:underline me-4 md:me-6">About</a>
</li>
<li>
<a href="#" class="hover:underline me-4 md:me-6">Lessons</a
>
</li>
<li>
<a href="#" class="hover:underline me-4 md:me-6">Pricing</a>
</li>
<li>
<a href="#" class="hover:underline">Contact</a>
</li>
</ul>
</div>
</footer>
<script
is:inline
src="https://cdnjs.cloudflare.com/ajax/libs/flowbite/1.8.0/flowbite.min.js"
></script>
</nav>
</body>
</html>
Here's the code for the styles.css code. It just declares the standard @tailwind declarations and the fonts the layout will use.
@tailwind base;
@tailwind components;
@tailwind utilities;


.inter-normal {
  font-family: 'Inter', sans-serif;
  font-optical-sizing: auto;
  font-weight: 100;
  font-style: normal;
  font-variation-settings: 'slnt' 0;
}

.inter-semibold {
  font-family: 'Inter', sans-serif;
  font-optical-sizing: auto;
  font-weight: 400;
  font-style: normal;
  font-variation-settings: 'slnt' 0;
}

.inter-bold {
  font-family: 'Inter', sans-serif;
  font-optical-sizing: auto;
  font-weight: 700;
  font-style: normal;
  font-variation-settings: 'slnt' 0;
}
How the Astro layout works
The OptinLayout page will define the general structure of an HTML page, including:
- Defines the attributes (props) for the new layout page using a TypeScript
type Props declaration, which lets Astro know what type of props will be passed and required.
- A
<slot> tag placeholder for the actual page content to be inserted.
- Imports the
styles.css which applies the Tailwind CSS to our page.
- Defines an inline script for
Flowbite JavaScript code.
Using TypeScript is optional in Astro but it is highly recommended for better type definitions and code intellisense.
Also by defining the type Props here and making title and description required, we can ensure that each page has the basic header information.
---
import "../styles/styles.css";

type Props = {
  title: string;
  description: string;
};

const { title, description } = Astro.props;
---
Also note, that the Flowbite JavaScript code is being added inline in the body tag so we need to add the is:inline attribute to let Astro know to load it on the client. Without this attribute JavaScript event bindings won't be added and the Modal won't open as expected.
<script
is:inline
src="https://cdnjs.cloudflare.com/ajax/libs/flowbite/1.8.0/flowbite.min.js"
></script>
Creating an Astro page
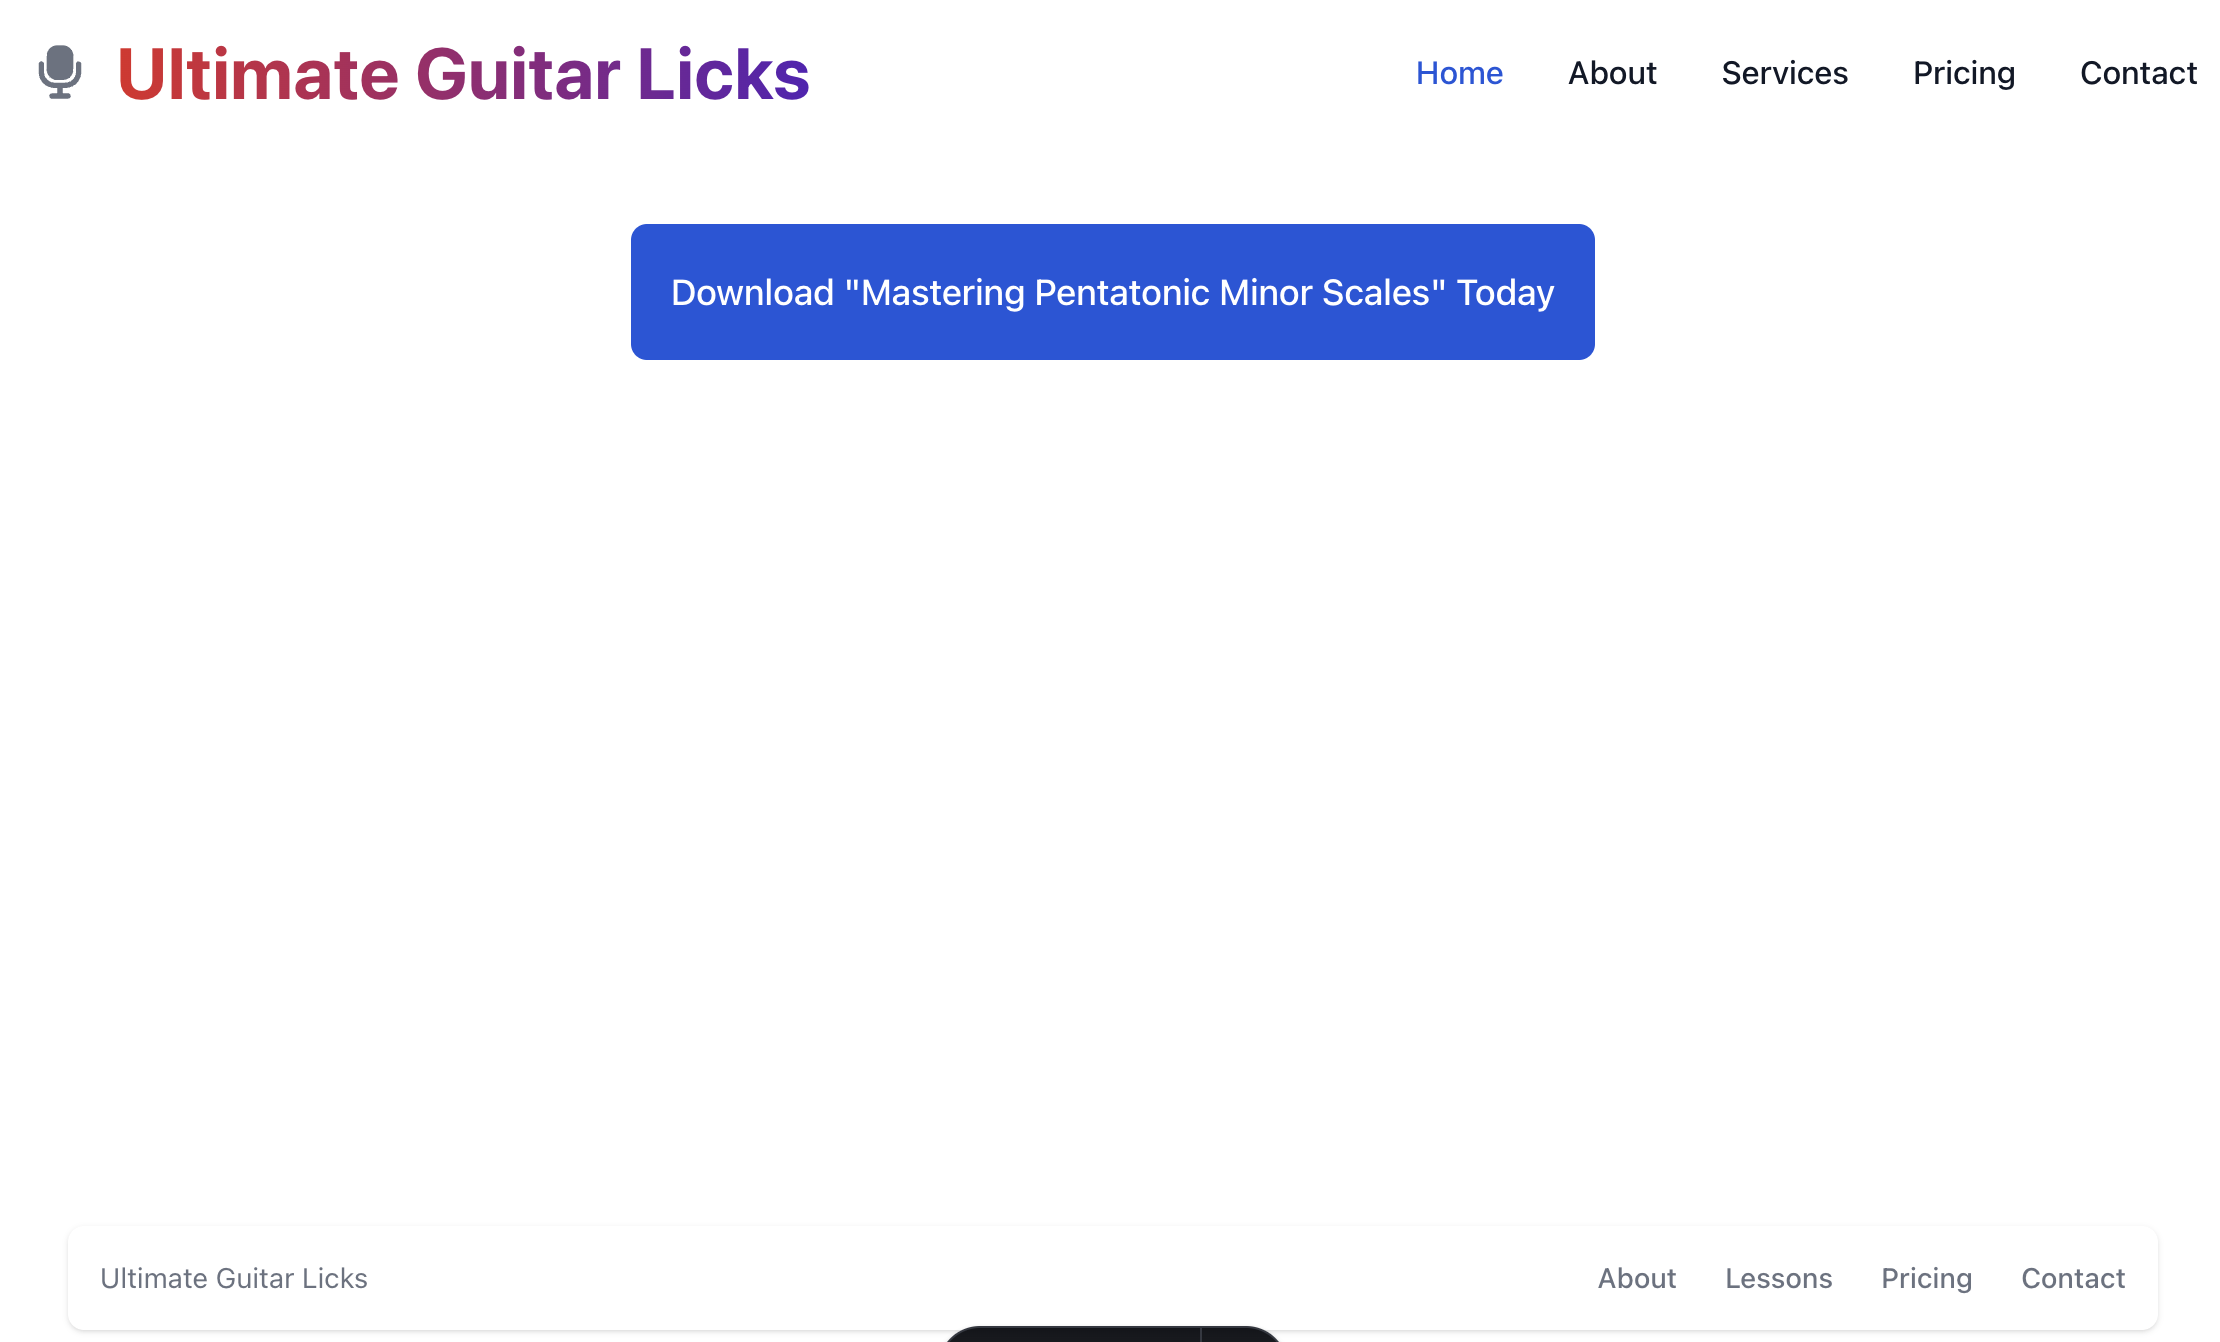
Now that we have the Astro layout page completed, we can add some pages. As you can see from the project structure section that there's three pages in the /src/pages/tutorials directory.
mastering-pentatonic-scales.astro: This page will simply show a button on the page and when clicked, will open a Modal with the Opt-In form insided.alreadysubscribed.astro: A redirect page from AWeber if the Email is already registered in the list.thankyou.astro: A redirect page from AWeber when the email is submitted and successful.
Here's the rest of code for these pages. All of these pages will import and use the <Layout> we just created and pass the acutal page content as child elements where the <slot> tag is located.
This section of code, creates a button that toggles the Flowbite Modal component. It will import and embed the MusicOptinForm.astro component.
---
import Layout from "../../layouts/OptinLayout.astro";
import MusicOptinForm from "../../components/optin/MusicOptinForm.astro";
---
<Layout title="Music Download" description="Welcome">
<div class="flex justify-center flex-row m-10">
<button
id="button"
class="block text-white bg-blue-700 hover:bg-blue-800 focus:ring-4 focus:outline-none focus:ring-blue-300 font-medium rounded-lg text-lg px-5 p-5 text-center dark:bg-blue-600 dark:hover:bg-blue-700 dark:focus:ring-blue-800"
type="button"
>
Download "Mastering Pentatonic Minor Scales" Today
</button>
</div>
<div
id="musicOptinModal"
tabindex="-1"
aria-hidden="true"
class="fixed top-0 left-0 right-0 z-50 hidden w-full p-4 overflow-x-hidden overflow-y-auto md:inset-0 h-[calc(100%-1rem)] max-h-full"
>
<div class="relative w-full max-w-2xl max-h-full">
<div class="relative bg-white rounded-lg shadow dark:bg-gray-700">
<div
class="absolute top-0 right-0 z-[51] p-3"
>
<button
type="button"
class="text-gray-400 bg-transparent hover:bg-gray-200 hover:text-gray-900 rounded-lg text-sm p-1.5 ml-auto inline-flex items-center dark:hover:bg-gray-600 dark:hover:text-white"
data-modal-hide="musicOptinModal"
>
<svg
aria-hidden="true"
class="w-5 h-5"
fill="currentColor"
viewBox="0 0 20 20"
xmlns="http://www.w3.org/2000/svg"
><path
fill-rule="evenodd"
d="M4.293 4.293a1 1 0 011.414 0L10 8.586l4.293-4.293a1 1 0 111.414 1.414L11.414 10l4.293 4.293a1 1 0 01-1.414 1.414L10 11.414l-4.293 4.293a1 1 0 01-1.414-1.414L8.586 10 4.293 5.707a1 1 0 010-1.414z"
clip-rule="evenodd"></path></svg
>
<span class="sr-only">Close modal</span>
</button>
</div>
<div>
<MusicOptinForm />
</div>
</div>
</div>
</div>
</Layout>
<script>
import { Modal } from "flowbite";
const $buttonElement: HTMLElement | null = document.querySelector("#button");
const $modalElement: HTMLElement | null =
document.querySelector("#musicOptinModal");
const modal = new Modal($modalElement);
if ($buttonElement) {
$buttonElement.addEventListener("click", () => modal.toggle());
}
</script>
As you can see from the master-pentatonic-scales.astro file, I'm adding a Flowbite Modal component and toggle button in the <script> tag.
The main thing to remember about Astro is that JavaScript within the fencing --- sections, runs at build time, and the <script> tag exectutes at runtime in the browser.
This is just basic JavaScript at this stage, which is what's really nice about using Astro.
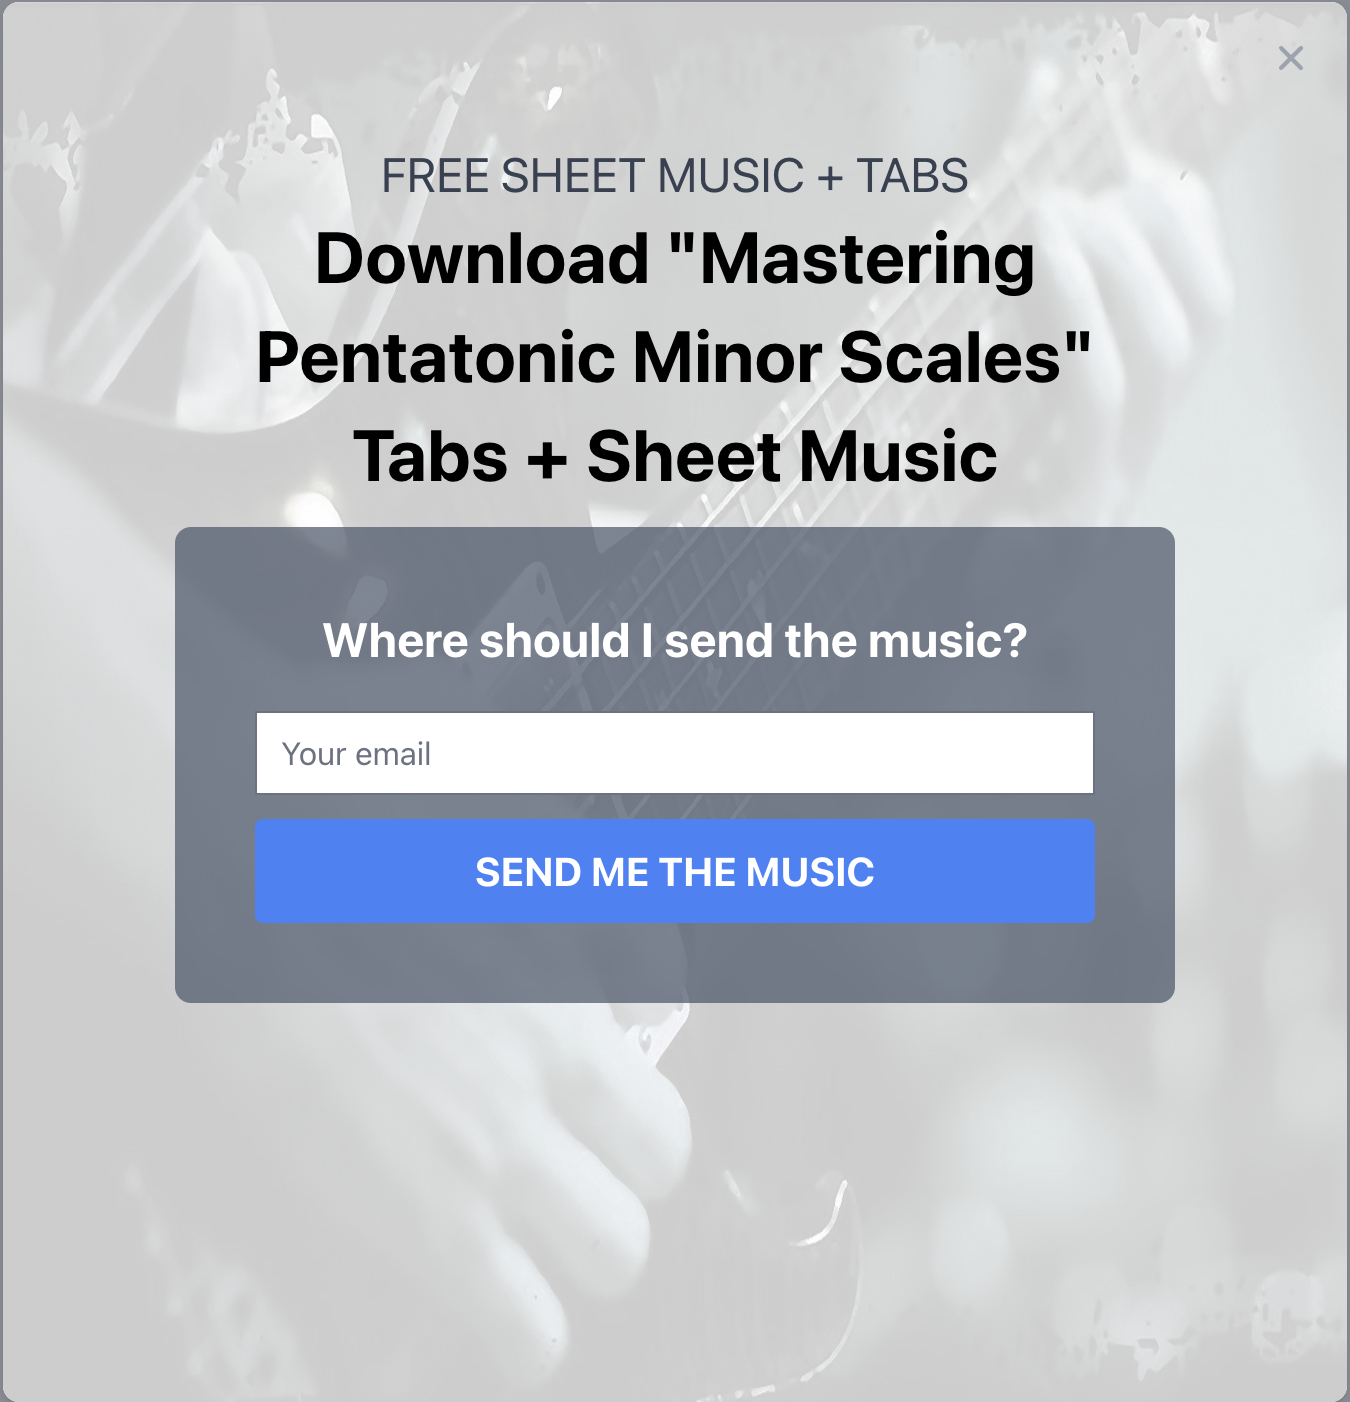
Here's the modified and restyled AWeber form content we created earlier. This form component is something that can be reused for other lessons since any of the subscibers will most likely be added to the same Email Marketing list.
The outer <section> content can then be modifed for other types of lessons depending on your marketing strategy.
This is one of the best strategies for building an Email Marketing list is by offering free stuff, like lessons, tutorials, recipes, you name it. It is an excellent way to promote your skills and talents.
<section class="relative">
  <img src="/img/assets/guitar-prs.png" class="w-full min-h-[700px] rounded-lg" />
  <div
    class="absolute top-[10%] left-0 right-0 xs:w-full sm:w-[500px] ml-auto mr-auto flex justify-center items-center flex-col"
  >
    <div class="text-gray-700 text-2xl text-center">FREE SHEET MUSIC + TABS</div>
    <h2 class="font-fredoka text-4xl font-bold text-black leading-snug text-center mb-3">
      Download "Mastering Pentatonic Minor Scales" Tabs + Sheet Music
    </h2>

    <div class="xs:w-[90%] sm:w-full bg-slate-600 p-10 rounded-lg bg-opacity-70">

    <!-- form starts here -->
      <form
        method="post"
        class="af-form-wrapper"
        accept-charset="UTF-8"
        action="https://www.aweber.com/scripts/addlead.pl"
      >
        <div class="hidden">
          <input type="hidden" name="meta_web_form_id" value="114033596" />
          <input type="hidden" name="meta_split_id" value="" />
          <input type="hidden" name="listname" value="awlist6775798" />
          <input
            type="hidden"
            name="redirect"
            value="https://ultimateguitarlicks.co/newsletter/thankyou"
            id="redirect_6bbb8cfbb10cf25e785689622982fa13"
          />
          <input
            type="hidden"
            name="meta_redirect_onlist"
            value="https://ultimateguitarlicks.co/newsletter/alreadysubscribed"
          />
          <input
            type="hidden"
            name="meta_adtracking"
            value="Troubadour_Music_Subscribe"
          />
          <input type="hidden" name="meta_message" value="1" />
          <input type="hidden" name="meta_required" value="email" />
          <input type="hidden" name="meta_tooltip" value="" />
        </div>
        <div id="af-form-114033596" class="af-form">
          <div id="af-body-114033596" class="af-body af-standards">
            <div class="af-element">
              <div class="flex flex-wrap">
                <div class="w-full">
                  <div
                    class="text-white font-fredoka text-2xl font-bold pb-5 px-5 text-center"
                  >
                    Where should I send the music?
                  </div>

                  <label
                    class="block text-sm sr-only"
                    html-for="awf_field-117232600"
                  >
                    Email:
                  </label>
                  <div
                    class="w-full relative flex flex-col justify-center items-center"
                  >
                    <input
                      class="form-input w-full text-gray-800px-3py-2pr-12"
                      placeholder="Your email"
                      id="awf_field-117232600"
                      type="email"
                      name="email"
                      tabindex="500"
                      onfocus=" if (this.value == '') { this.value = ''; }"
                      onblur=" if (this.value == '') { this.value = ''; }"
                    />

                    <button
                      name="submit"
                      type="submit"
                      tabindex="501"
                      aria-label="Subscribe"
                      class="w-full mt-3 rounded bg-blue-500 py-3 px-9 text-xl font-bold text-white transition duration-300 ease-in-out hover:bg-opacity-80 no-underline"
                    >
                      SEND ME THE MUSIC
                    </button>
                  </div>
                </div>
              </div>
            </div>
          </div>
        </div>
        <div class="hidden">
          <img
            src="https://forms.aweber.com/form/displays.htm?id=jIzr45DEycrJxs"
            alt=""
          />
        </div>
      </form>

      <!-- form here here -->
    </div>
  </div>
</section>
Adding the redirect pages
Here are the two static redirect URL pages we added when creating the AWeber Opt-In form.
---
import Layout from "../../layouts/OptinLayout.astro";
---

<Layout title="Already Subscribed" description="Your already subscribed">
  <section class="relative">
    <img
      src="/img/assets/guitar-prs.png"
      class="w-full min-h-[700px] rounded-lg"
    />
    <div
      class="absolute top-[10%] left-0 right-0 xs:w-full sm:w-[500px] ml-auto mr-auto flex justify-center items-center flex-col"
    >
      <h2
        class="font-fredoka text-4xl text-black leading-snug text-center mb-3"
      >
        Your already subscribed to this channel.
      </h2>

      <div
        class="xs:w-[90%] sm:w-full text-xl text-white bg-slate-600 p-10 rounded-lg bg-opacity-70"
      >
        <div class="flex justify-center items-center py-3">
          The music has been sent to your email. Enjoy!
        </div>
        <a
          id="button"
          class="w-full block text-white no-underline bg-blue-700 hover:bg-blue-800 focus:ring-4 focus:outline-none focus:ring-blue-300 font-medium rounded-lg text-lg px-5 p-5 text-center dark:bg-blue-600 dark:hover:bg-blue-700 dark:focus:ring-blue-800"
          type="button"
          href="/"
        >
          Click Here to Return Home
        </a>
      </div>
    </div>
  </section>
</Layout>
---
import Layout from "../../layouts/OptinLayout.astro";
---

<Layout title="Thank You" description="Thank you page">
  <section class="relative">
    <img
      src="/img/assets/guitar-prs.png"
      class="w-full min-h-[700px] rounded-lg"
    />
    <div
      class="absolute top-[10%] left-0 right-0 xs:w-full sm:w-[500px] ml-auto mr-auto flex justify-center items-center flex-col"
    >
      <h2
        class="font-fredoka text-4xl text-black leading-snug text-center mb-3"
      >
        Thank you!
      </h2>

      <div
        class="xs:w-[90%] sm:w-full text-xl text-white bg-slate-600 p-10 rounded-lg bg-opacity-70"
      >
        <div class="flex justify-center items-center py-3">
          The music has been sent to your email. Enjoy!
        </div>
        <a
          id="button"
          class="w-full block text-white no-underline bg-blue-700 hover:bg-blue-800 focus:ring-4 focus:outline-none focus:ring-blue-300 font-medium rounded-lg text-lg px-5 p-5 text-center dark:bg-blue-600 dark:hover:bg-blue-700 dark:focus:ring-blue-800"
          type="button"
          href="/"
        >
          Click Here to Return Home
        </a>
      </div>
    </div>
  </section>
</Layout>
These fencing blocks can also be used for MDX frontmatter when a page has a .md or .mdx extension. This topic is beyond the scope of this article but for more information you can go to Markdown & MDX
SEO URL friendly paths
These pages are named in an SEO friendly way using a slug name convention. This let's users know what the page content is about and is just good practice.
So when the page is running live, the URL path to the Opt-In page will be as follows:
localhost:4321/tutorials/mastering-pentatonic-scales
Astro will use the directory path as the URL path and omit the .astro entension. So you could think of the path as follows.
/src/pages/tutorials/mastering-pentatonic-scales
The other redirect pages alreadysubscribed.astro and thankyou.astro are just static content and could be referenced in the same way.
localhost:4321/tutorials/thankyou
localhost:4321/tutorials/alreadysubscribed
In Conclusion
I hope this article has been helpful and has at least given a high level view of what's possible using this stack.
As simple as Opt-In pages are to put together they are certainly essential to any businesses success. Using Tailwind CSS makes it easy to make great looking pages to quickly build confidence in what you're promoting.
These techniques can also be expanded for things like Newsletters, Landing pages, Social Media Ads, A/B Testing and more.
Good luck in your coding!