Maximizing Efficiency: The Power of Payload CMS Blocks
Posted on: August 11 2025
By David Becker


A quick guide tutorial on how to use the media upload and query features in Payload CMS.
A step-by-step tutorial on how to install and use the Payload CMS search plugin to boost your search.
A tutorial on how to build a server-side pagination component using Payload CMS API
A full tutorial on how to use the new Payload CMS join relationship field.
Get the latest articles delivered to your inbox. No spam, unsubscribe anytime.
One of the primary benefits of a Headless CMS solution is the ability to create manageable content blocks for fast content delivery and updates. Enter Payload CMS content blocks — a game-changing feature that helps streamline the way content is structured and delivered on websites and applications.
Payload CMS supports flexible and modular blocks to allow designers, content managers and developers to create reusable content.
In this article I'll cover the following:
Whether you’re new to Headless CMS or have some experience, understanding the power of these blocks will be a game-changer.
Let's get started and learn how to use them in a creative and meaningful way.
If you would like to follow along, you can generate a Payload project with the following command.
1npx create-payload-app
Payload provides a special built-in field type called blocks for creating resuable and modular blocks of content.
This is really at the heart of what makes Payload a powerful framework and Headless CMS system.
By using the blocks field type in your Collection, you can create an array of custom blocks.
1{2 name: 'layouts',3 type: 'blocks',4 blocks: [5 // array of blocks here6 ]7 }
Each block can have any number of the other built-in field types within it to define the needed structure for your data.
Like the other built-in field types, Payload will automicatally generate the corresponding Admin UI form for managing and editing content blocks.
Having this capability in Payload CMS makes it a great tool for building manageable content authoring solutions.
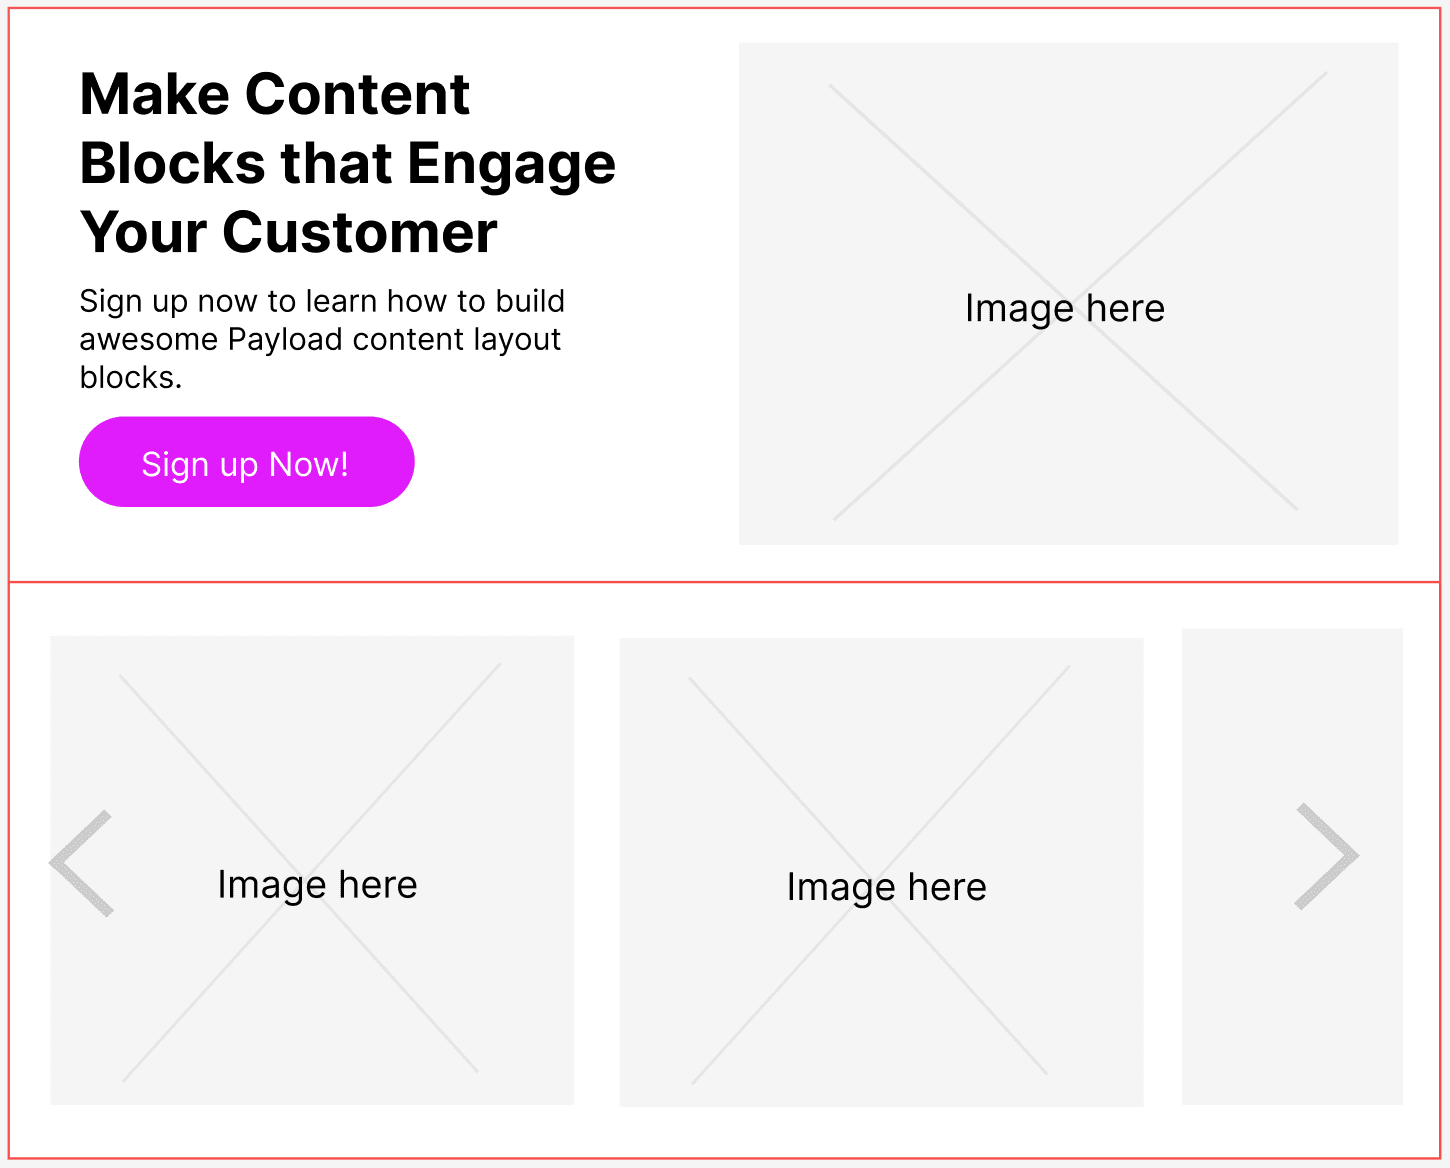
To get a better idea of what blocks actually are, here's an illustration. In the design concept below, you'll see two vertically stacked blocks.
Each is highlghted with a red border to make it easier to see.
There are only two content blocks in this design example but you could create any number of blocks for all types of purposes and audiences.
Payload uses the concept of blocks to create page layout builders, which include the following benefits:
In my own experience, blocks are an excellent choice for building rich marketing content. When used with a team or on a project the benefits include:
For this example, I'll use a simple pages Collection and add the blocks under the field section. I'll build two content blocks:
1import type { CollectionConfig } from 'payload'2import Banner from '../../blocks/Banner/config'3import Content from '../../blocks/Content/config'45export const Pages: CollectionConfig = {6 slug: 'pages',7 admin: {8 useAsTitle: 'title',9 },10 access: {11 read: () => true12 },13 fields: [14 {15 name: 'slug',16 label: 'Slug',17 type: 'text',18 index: true,19 admin: {20 position: 'sidebar',21 },22 },23 {24 name: 'title',25 type: 'text',26 required: true,27 },28 {29 name: 'description',30 type: 'text',31 },32 {33 name: 'layouts',34 type: 'blocks',35 required: false,36 blocks: [Banner, Content],37 },38 ],39}
The pages Collection contains the following fields:
Having a consistent way of creating blocks, makes things easier to manage over time.
Here's a simple directory pattern that you can use to get started.
Create a /payload folder, with two subdirectories, blocks and components.
These directories have the following benefits:
Note: Try to maximize server side rendering for 'blocks' and 'components' by separating component parts into server and client components using 'use client' supported by Next.js.
The two blocks that I'll add will have the following format:
1/src/payload/2 ├── blocks3 │ ├── Banner4 │ │ ├── config.ts5 │ │ ├── Component.tsx6 │ │ └── index.ts // an index to export any UI7 │ └── Content8 │ ├── config.ts9 │ ├── Component.tsx10 │ └── index.ts // an index to export any UI11 └── components
Let's break down the Banner block. It has the following fields added:
Let's take a look at the typing that Payload provides, which includes:
Payload will generate a type with the interfaceName, which can also be used as the props type base for React components.
1import type { Block } from 'payload'23import { lexicalEditor } from '@payloadcms/richtext-lexical'45const Banner: Block = {6 slug: 'banner',7 interfaceName: 'BannerBlock',8 fields: [9 {10 name: 'media',11 label: 'Background Image',12 type: 'upload',13 relationTo: 'media',14 required: true,15 },16 {17 name: 'richText',18 type: 'richText',19 editor: lexicalEditor(),20 label: 'Content',21 },22 {23 name: 'links',24 interfaceName: 'LinkGroupType',25 label: 'Links',26 type: 'array',27 fields: [28 {29 name: 'link',30 interfaceName: 'LinkType',31 type: 'group',32 admin: {33 hideGutter: true,34 },35 fields: [36 {37 name: 'displayText',38 label: 'Link Text',39 type: 'text',40 required: true41 },42 {43 type: 'row',44 fields: [45 {46 name: 'type',47 type: 'radio',48 admin: {49 layout: 'horizontal',50 width: '50%',51 },52 defaultValue: 'reference',53 options: [54 {55 label: 'Internal link',56 value: 'reference',57 },58 {59 label: 'Custom URL',60 value: 'custom',61 },62 ],63 },64 {65 name: 'reference',66 type: 'relationship',67 admin: {68 condition: (_, siblingData) => siblingData?.type === 'reference',69 },70 label: 'Document to link to',71 relationTo: ['pages'],72 required: true,73 },74 {75 name: 'url',76 type: 'text',77 admin: {78 condition: (_, siblingData) => siblingData?.type === 'custom',79 },80 label: 'Custom URL',81 required: true,82 },8384 {85 name: 'newTab',86 type: 'checkbox',87 admin: {88 style: {89 alignSelf: 'flex-end',90 },91 width: '50%',92 },93 label: 'Open in new tab',94 },95 ],96 },97 ],98 },99 ],100 },101 ],102}103104export default Banner
The admin section is using a conditional check on the type field value, to toggle which field type to show based on user selection.
This is a powerful feature in Payload and can be used to check any sibling data in your Collection or Block.
1admin: {2 condition: (_, siblingData) => siblingData?.type === 'reference',3},
Let's break down the Content block. It only has a single field added:
1import type { Block } from 'payload'23import {4 lexicalEditor,5} from '@payloadcms/richtext-lexical'678const Content: Block = {9 slug: 'content',10 interfaceName: 'ContentBlock',11 fields: [12 {13 name: 'richText',14 type: 'richText',15 editor: lexicalEditor(),16 label: false,17 },18 ],19}2021export default Content;
At this stage all you need to do is add the Pages Collection to the main payload.config.ts file and start up the server.
The Users and Media Collections are already defined when you generate a new Payload project with the npx create-payload-app command.
1import { Users } from './payload/collections/Users'2import { Media } from './payload/collections/Media'3import { Pages } from './payload/collections/Pages'45export default buildConfig({6 // ...7 collections: [Users, Media, Pages],8 // ...9})
After starting up the dev server, head over to the Admin UI section and locate the Pages section.
Click on the Create New button and you'll see the following in the Admin UI.
I've provided some details for the title, description and slug fields.
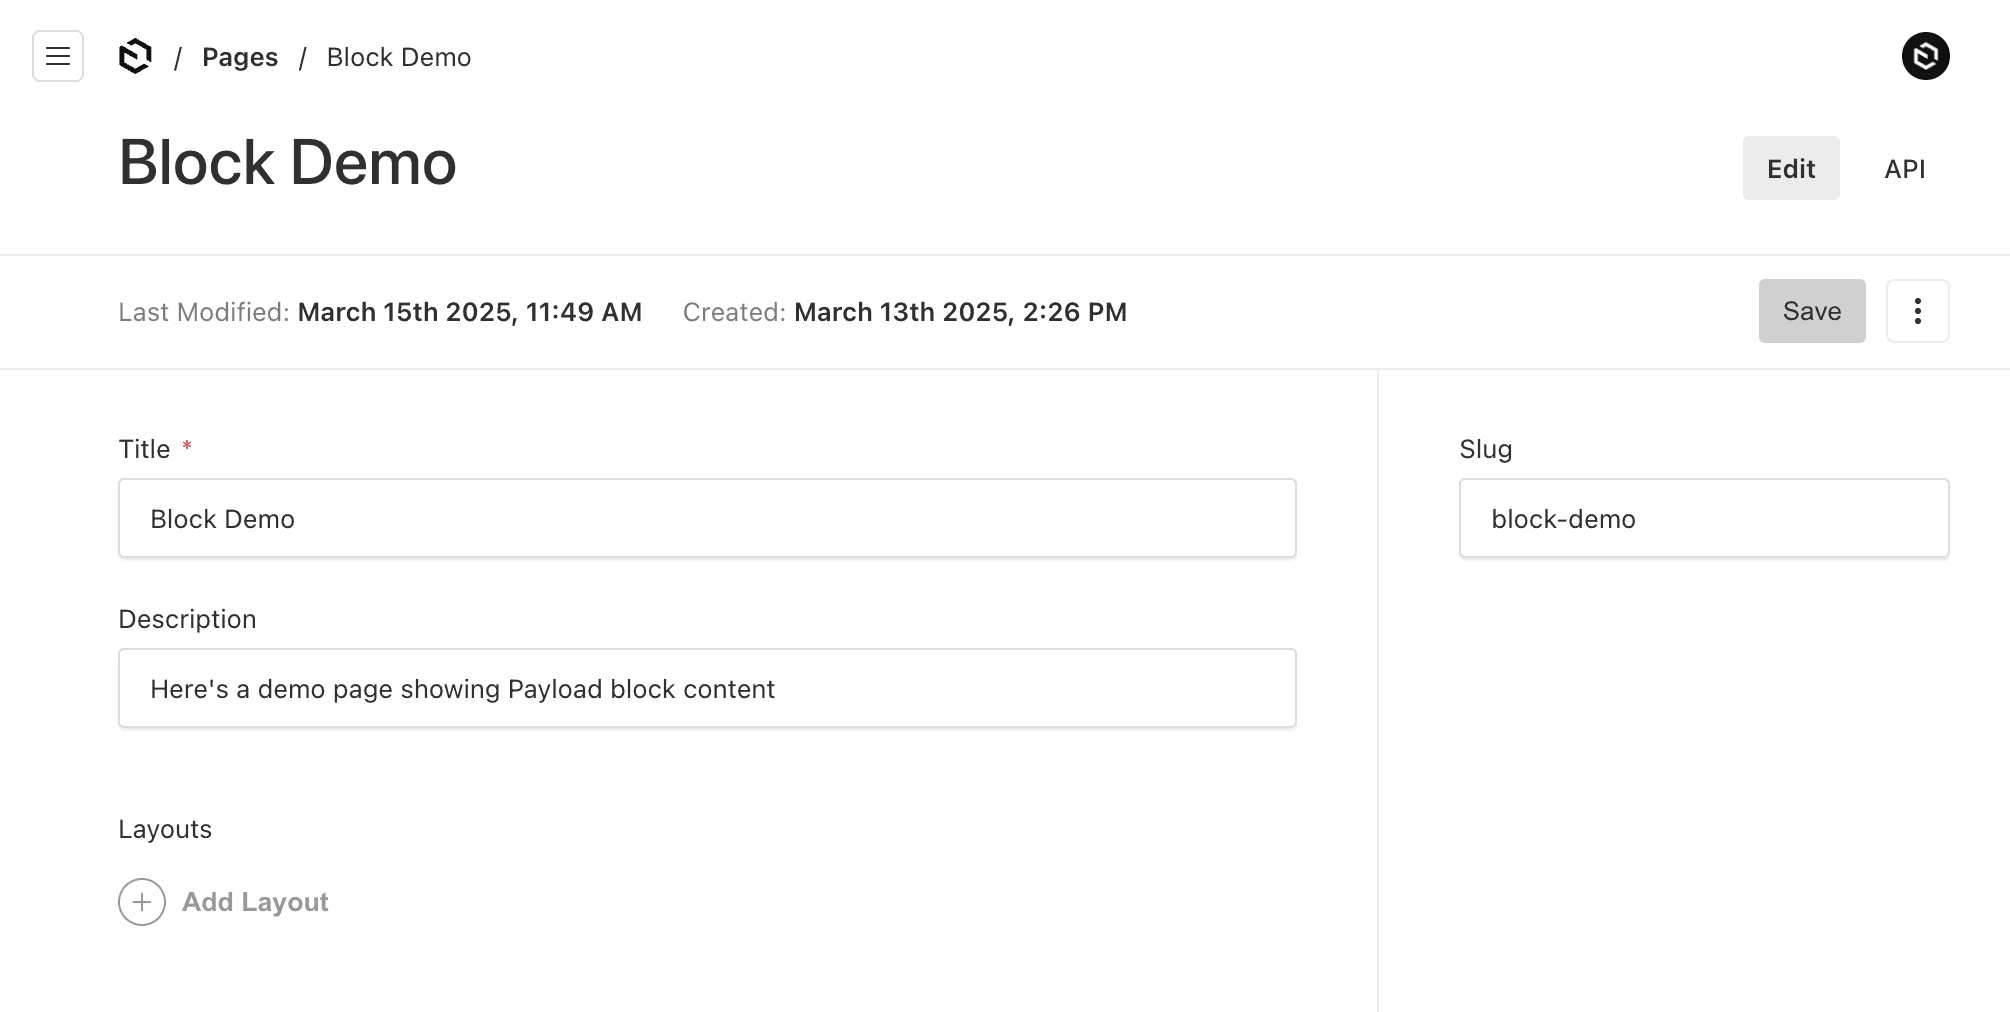
Notice the Add Layout link at the bottom. This is where you can start adding blocks.
By clicking on the Add Layout link, you'll see the following blocks we defined in the blocks field listed.
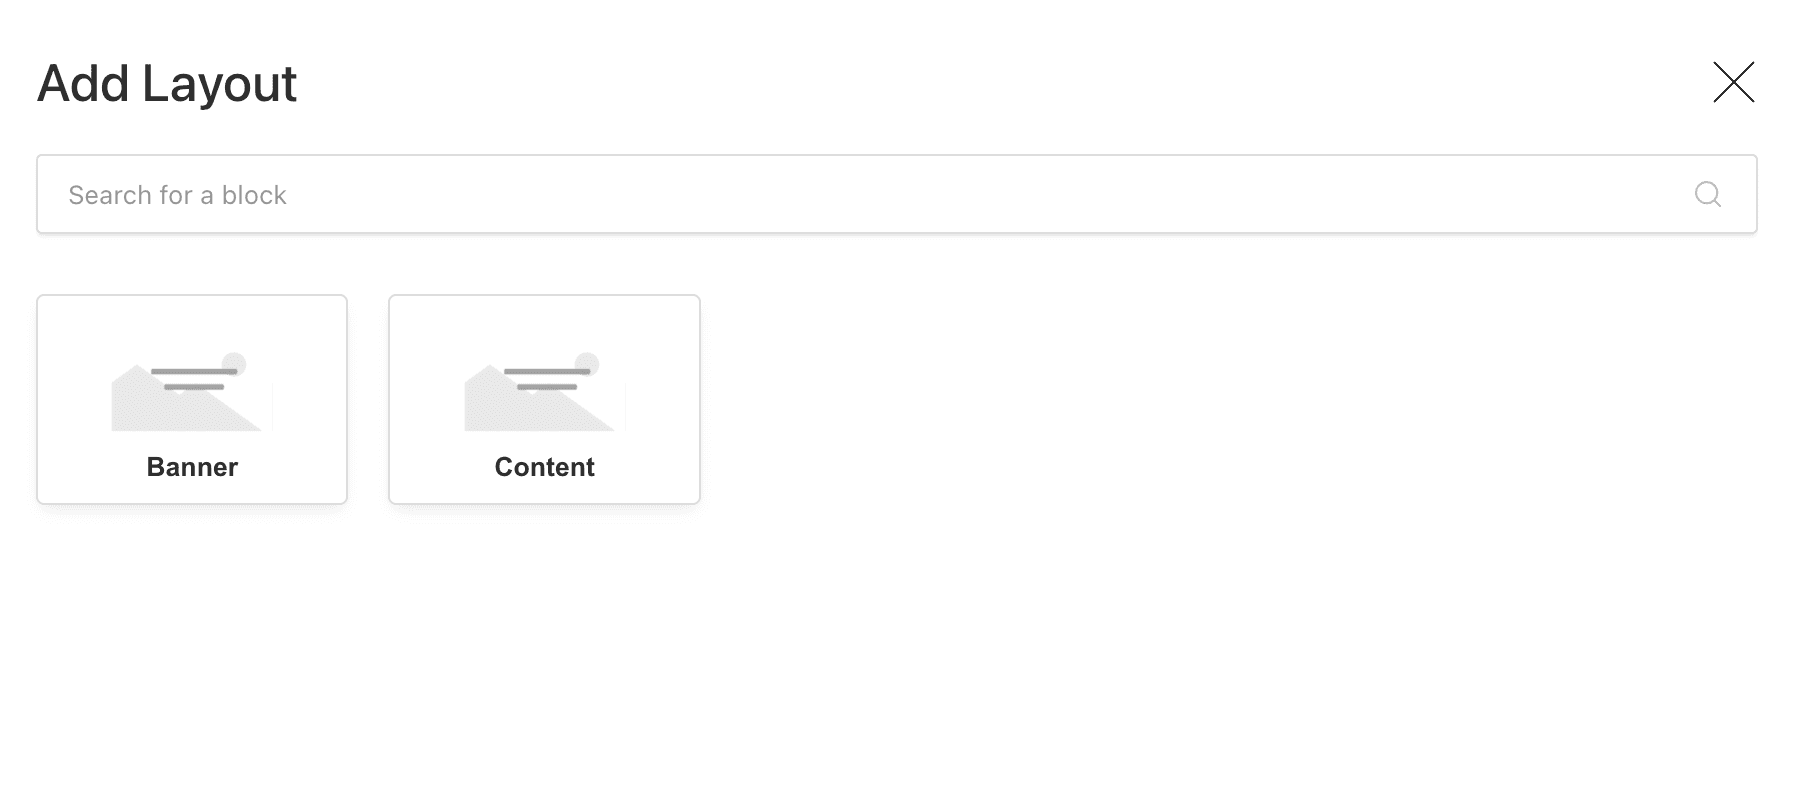
Adding a Banner layout block will show the following screen.
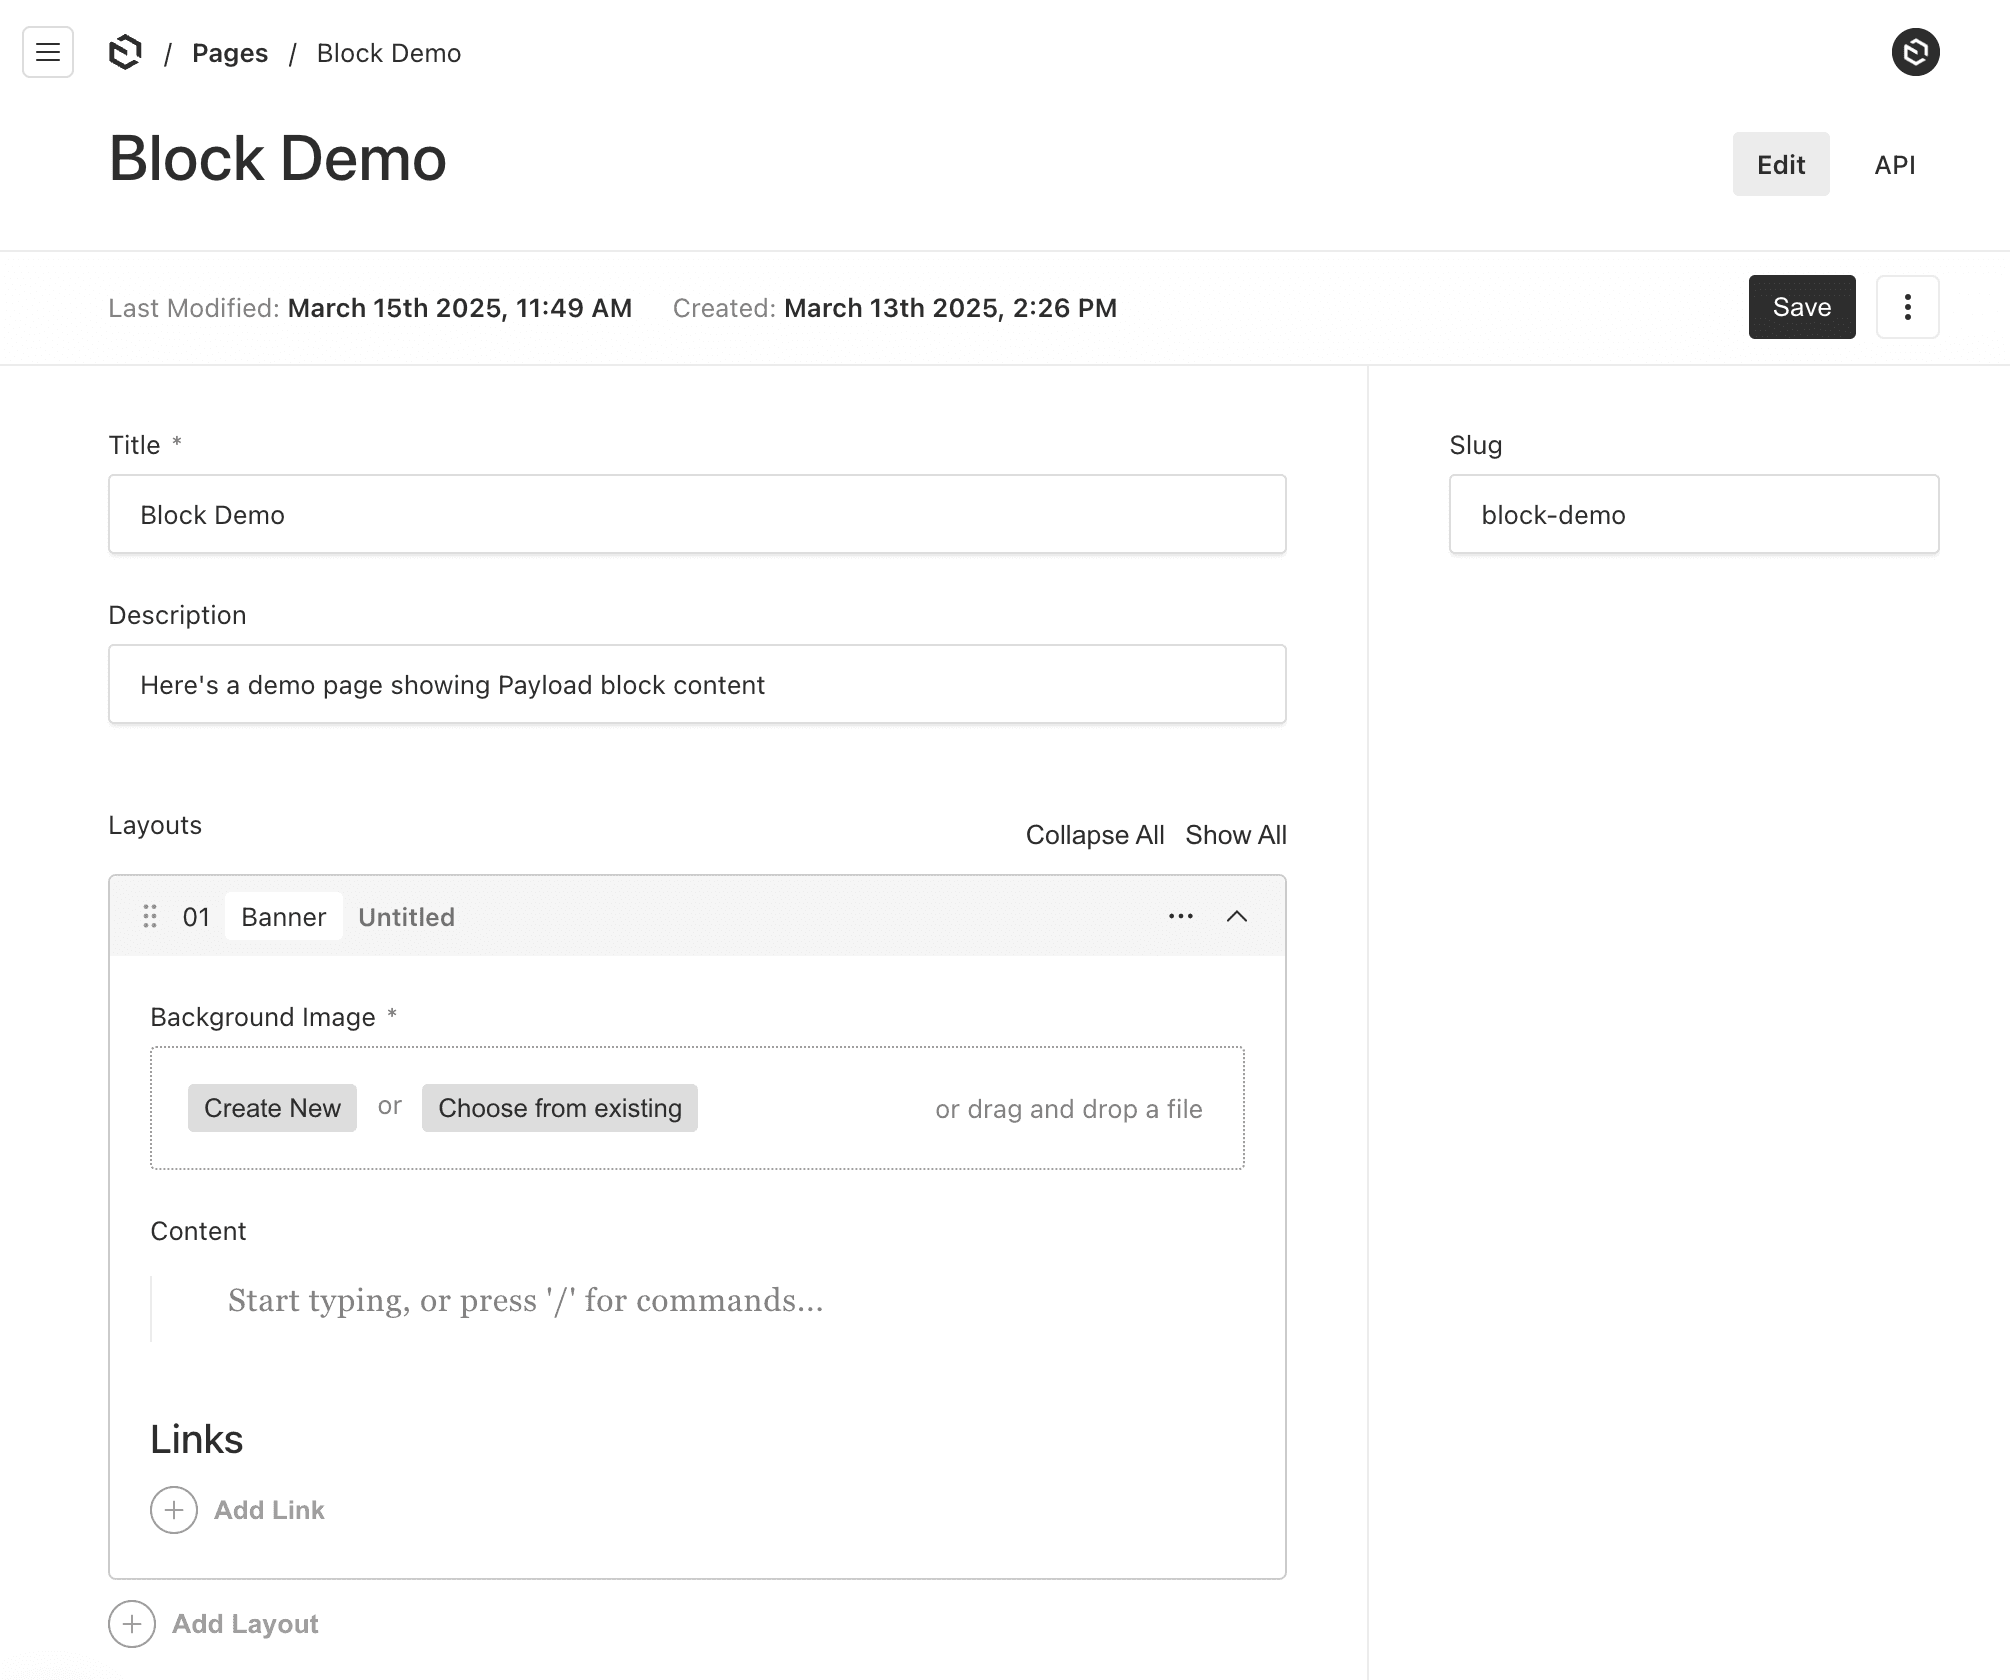
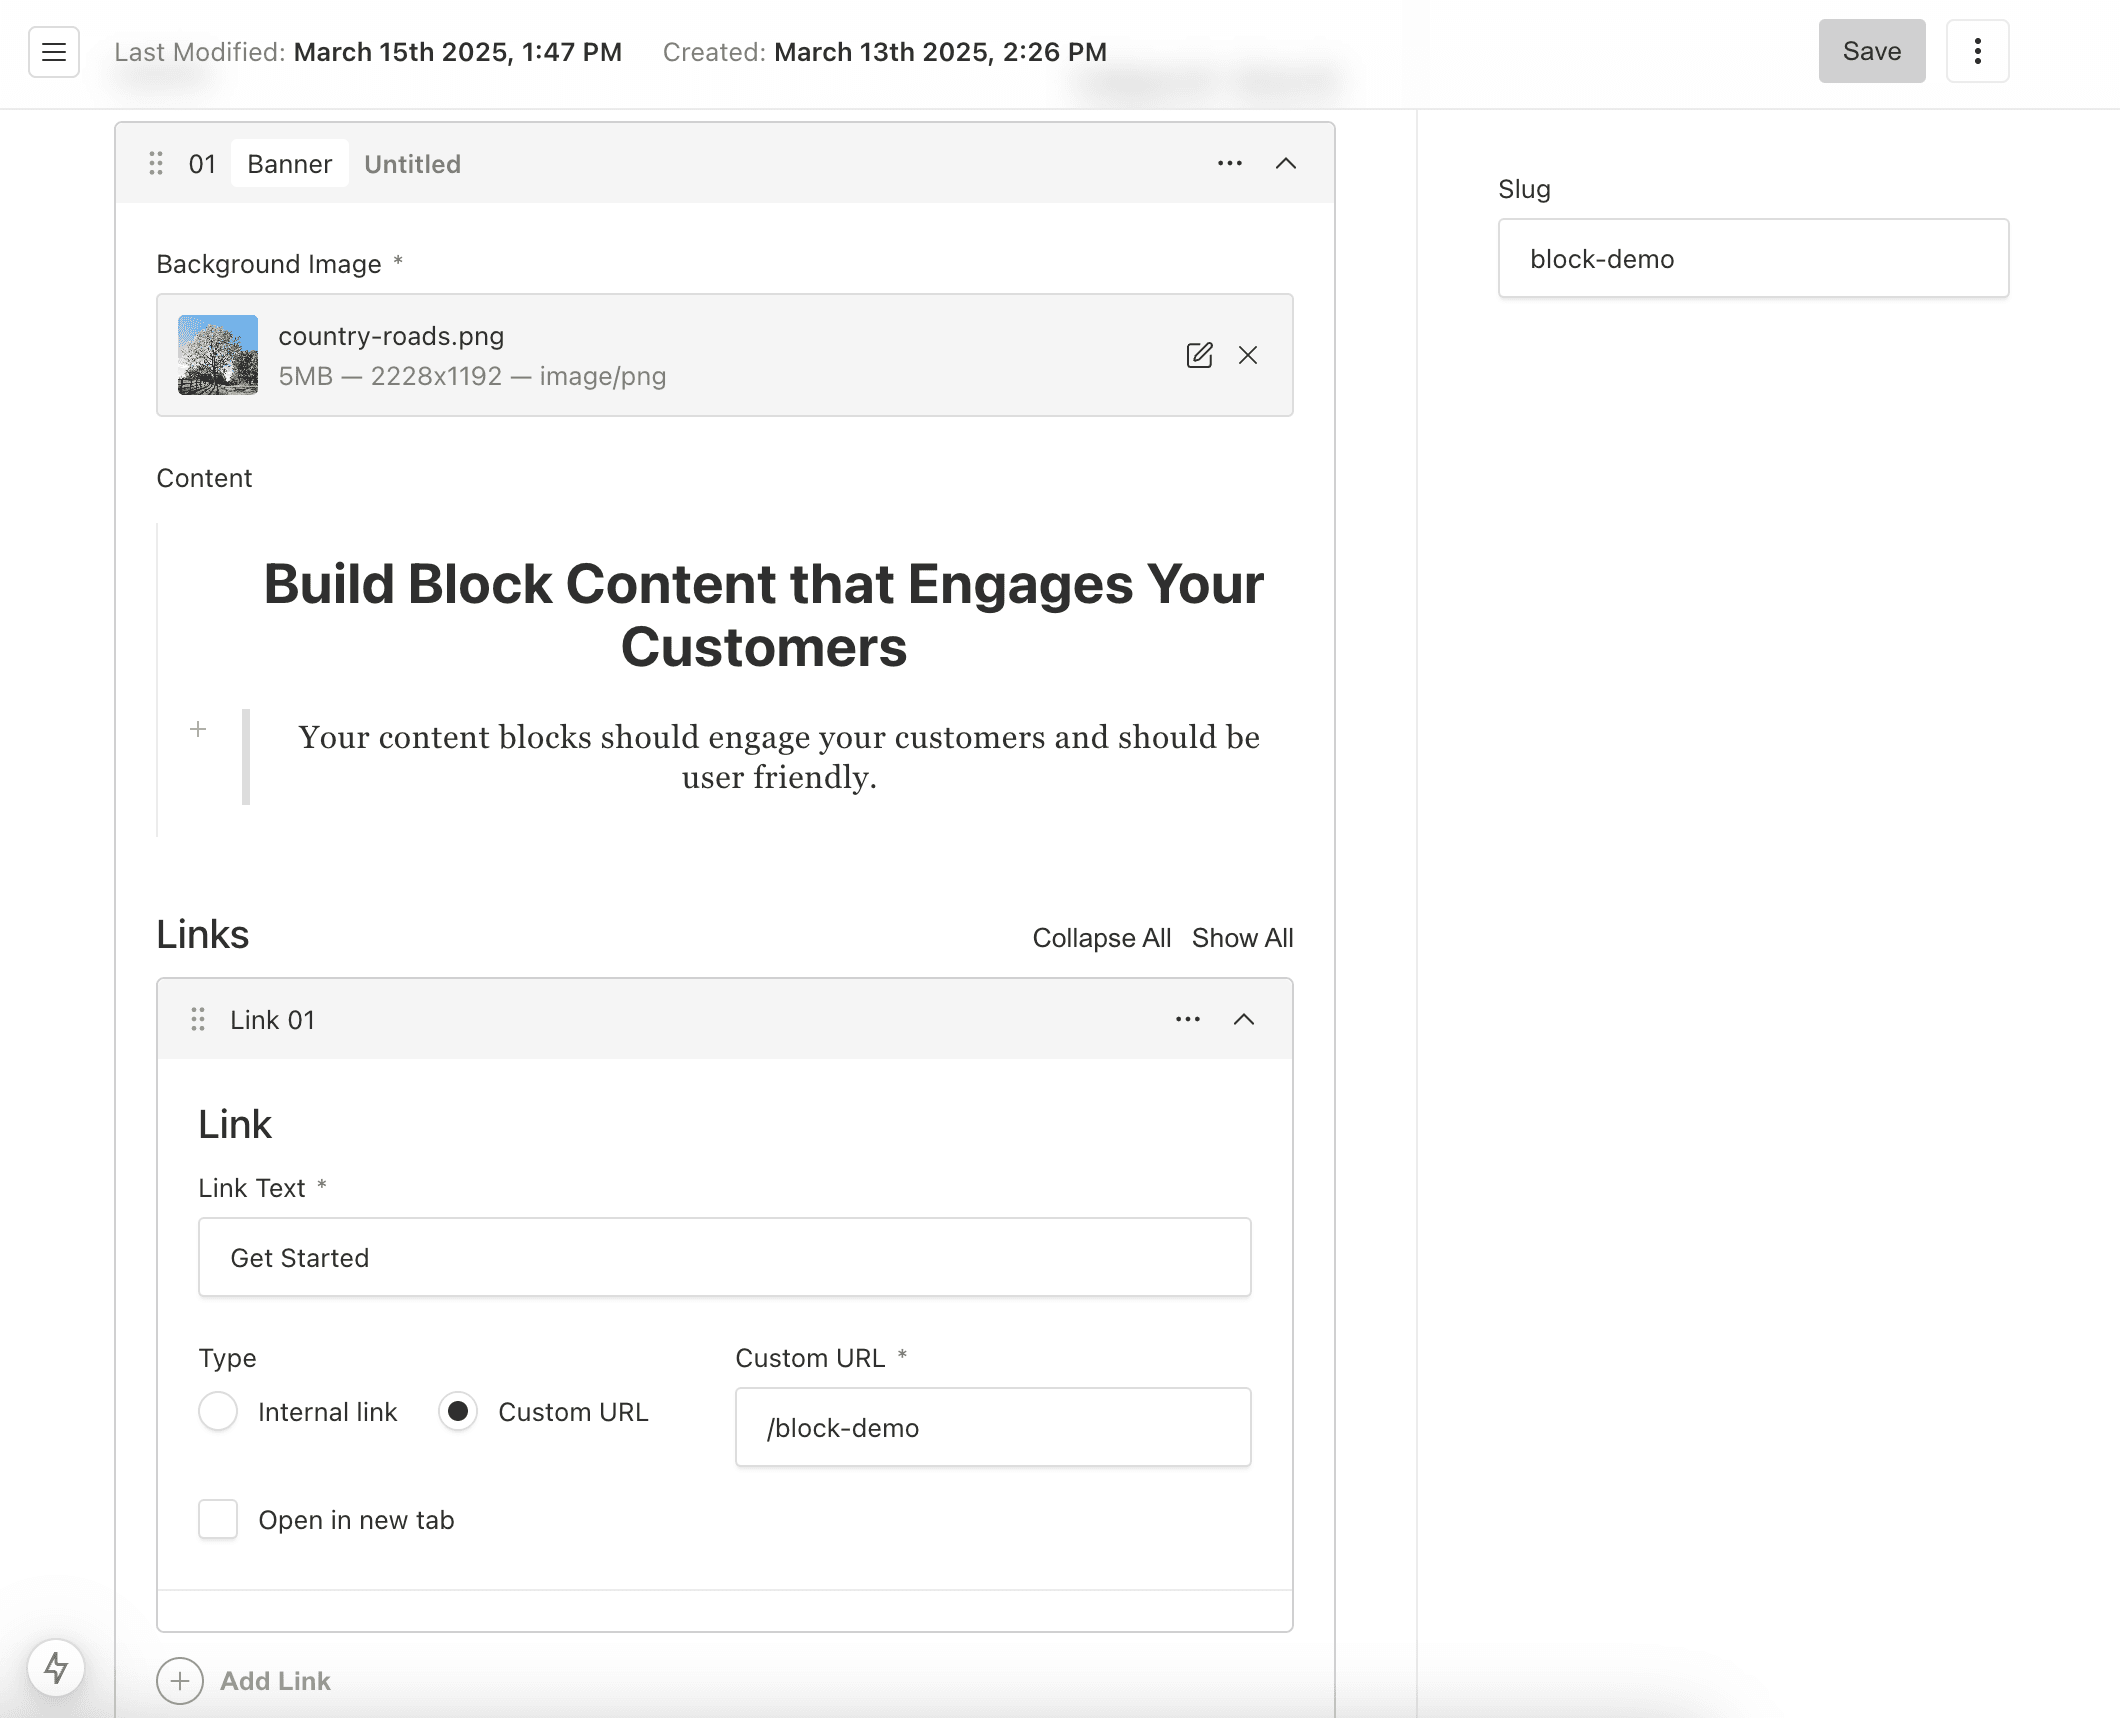
For this demo I'll select and upload a new background image and set some rich text for the overlay.
I'll also add a single CTA link.
Next I'll add another layout block for the Content block. I'll provide some simple rich text as follows.
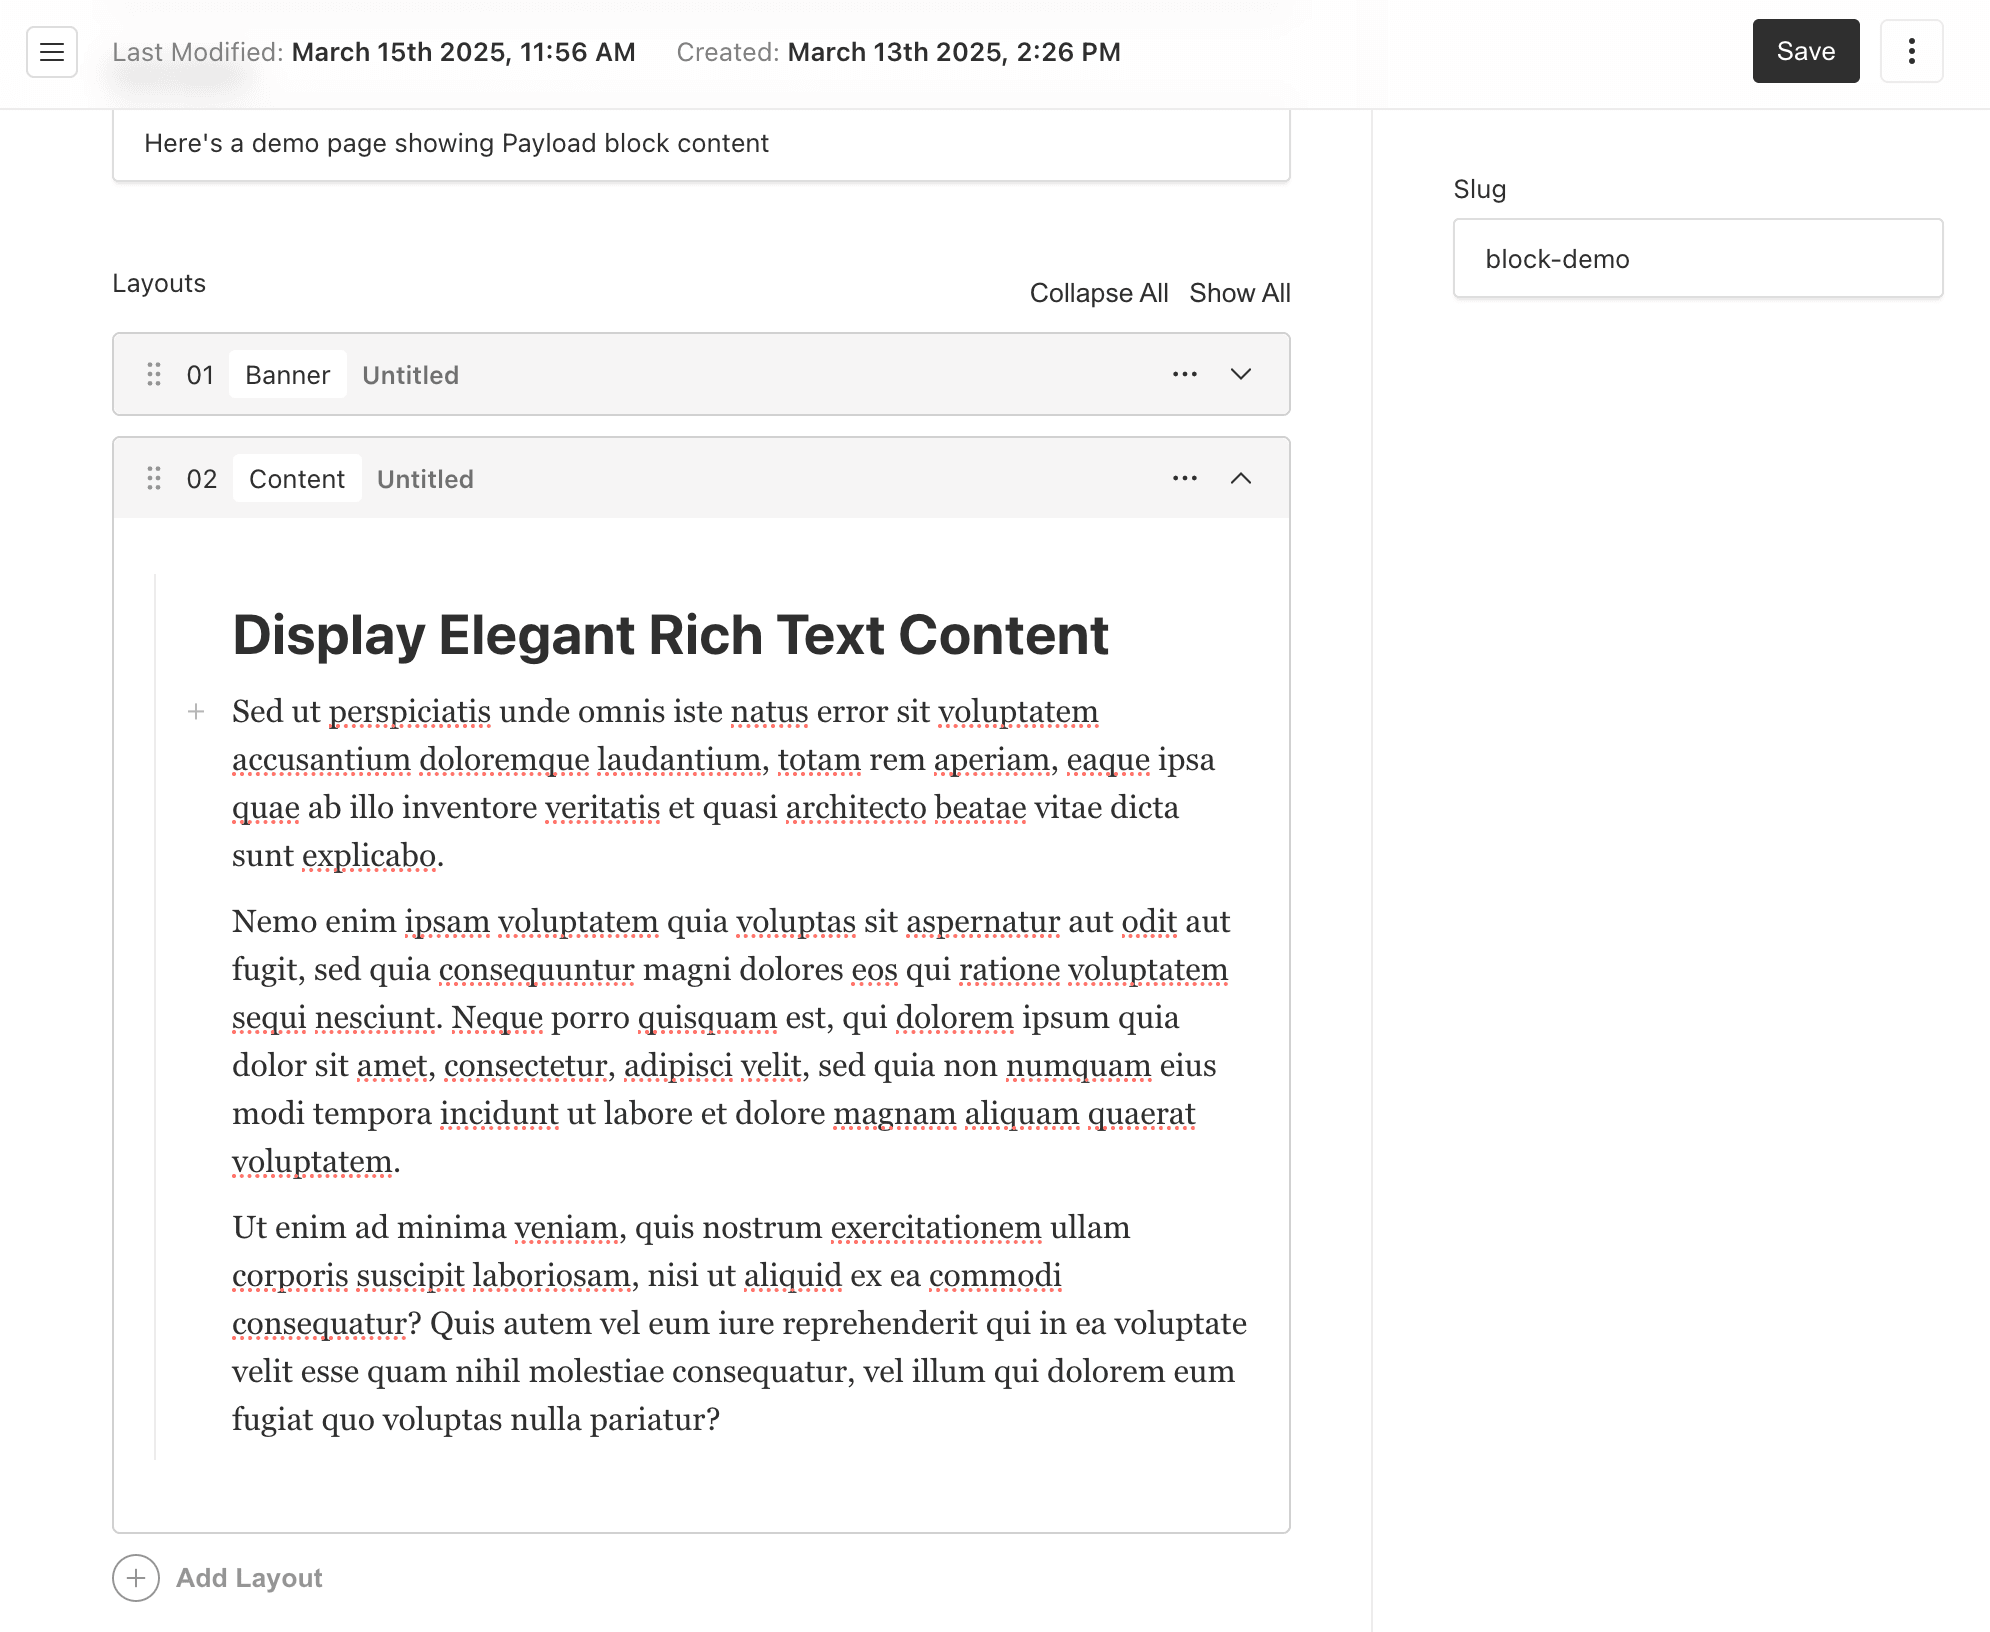
Make sure to Save all of the details added so far.
At this point the data is now saved in the database and ready to be consumed.
Now that the data is saved, it's ready to be queried using Payloads API's.
I will be using the REST API for this example but as your content blocks become more complex and even nested, you might want to use GraphQL for more control over the query and response.
For a more in-depth article on using GraphQL GraphQL Optimization in Payload CMS
Since the page is now identified with a slug, we can query on the slug field versus the ID which is good SEO practice.
Remember, the pages Collection security access is set to public read for now, just be sure to adjust the access control to your requirements before deploying to a public server.
Run the following query in the browser window.
1http://localhost:3000/api/pages?[where][slug][equals]=block-demo
Response:
1{2 "docs": [3 {4 "id": 1,5 "slug": "block-demo",6 "title": "Block Demo",7 "description": "Here's a demo page showing Payload block content",8 "layouts": [9 {10 "id": "67d5cc675a144daf52e5b7ea",11 "media": {12 "id": 4,13 "alt": "Country roads",14 "updatedAt": "2025-03-15T00:56:35.026Z",15 "createdAt": "2025-03-15T00:56:35.026Z",16 "url": "/api/media/file/country-roads.png",17 "thumbnailURL": null,18 "filename": "country-roads.png",19 "mimeType": "image/png",20 "filesize": 5734340,21 "width": 2228,22 "height": 1192,23 "focalX": 50,24 "focalY": 5025 },26 "richText": {27 "root": {28 "children": [29 {30 "children": [31 {32 "detail": 0,33 "format": 0,34 "mode": "normal",35 "style": "",36 "text": "Build Block Content that Engages Your Customers",37 "type": "text",38 "version": 139 }40 ],41 "direction": "ltr",42 "format": "center",43 "indent": 0,44 "type": "heading",45 "version": 1,46 "tag": "h1"47 },48 {49 "children": [50 {51 "detail": 0,52 "format": 0,53 "mode": "normal",54 "style": "",55 "text": "Your content blocks should engage your customers and should be user friendly.",56 "type": "text",57 "version": 158 }59 ],60 "direction": "ltr",61 "format": "center",62 "indent": 0,63 "type": "quote",64 "version": 165 }66 ],67 "direction": "ltr",68 "format": "",69 "indent": 0,70 "type": "root",71 "version": 172 }73 },74 "blockName": null,75 "links": [76 {77 "id": "67d5f2f86dc32bbf52e01293",78 "link": {79 "displayText": "Get Started",80 "type": "custom",81 "url": "/block-demo",82 "newTab": null83 }84 }85 ],86 "blockType": "banner"87 },88 {89 "id": "67d5f3146dc32bbf52e01295",90 "richText": {91 "root": {92 "children": [93 {94 "children": [95 {96 "detail": 0,97 "format": 0,98 "mode": "normal",99 "style": "",100 "text": "Display Elegant Rich Text Content",101 "type": "text",102 "version": 1103 }104 ],105 "direction": "ltr",106 "format": "",107 "indent": 0,108 "type": "heading",109 "version": 1,110 "tag": "h1"111 },112 {113 "children": [114 {115 "detail": 0,116 "format": 0,117 "mode": "normal",118 "style": "",119 "text": "Sed ut perspiciatis unde omnis iste natus error sit voluptatem accusantium doloremque laudantium, totam rem aperiam, eaque ipsa quae ab illo inventore veritatis et quasi architecto beatae vitae dicta sunt explicabo.",120 "type": "text",121 "version": 1122 }123 ],124 "direction": "ltr",125 "format": "",126 "indent": 0,127 "type": "paragraph",128 "version": 1,129 "textFormat": 0,130 "textStyle": ""131 },132 {133 "children": [134 {135 "detail": 0,136 "format": 0,137 "mode": "normal",138 "style": "",139 "text": "Nemo enim ipsam voluptatem quia voluptas sit aspernatur aut odit aut fugit, sed quia consequuntur magni dolores eos qui ratione voluptatem sequi nesciunt. Neque porro quisquam est, qui dolorem ipsum quia dolor sit amet, consectetur, adipisci velit, sed quia non numquam eius modi tempora incidunt ut labore et dolore magnam aliquam quaerat voluptatem.",140 "type": "text",141 "version": 1142 }143 ],144 "direction": "ltr",145 "format": "",146 "indent": 0,147 "type": "paragraph",148 "version": 1,149 "textFormat": 0,150 "textStyle": ""151 },152 {153 "children": [154 {155 "detail": 0,156 "format": 0,157 "mode": "normal",158 "style": "",159 "text": "Ut enim ad minima veniam, quis nostrum exercitationem ullam corporis suscipit laboriosam, nisi ut aliquid ex ea commodi consequatur? Quis autem vel eum iure reprehenderit qui in ea voluptate velit esse quam nihil molestiae consequatur, vel illum qui dolorem eum fugiat quo voluptas nulla pariatur?",160 "type": "text",161 "version": 1162 }163 ],164 "direction": "ltr",165 "format": "",166 "indent": 0,167 "type": "paragraph",168 "version": 1,169 "textFormat": 0,170 "textStyle": ""171 }172 ],173 "direction": "ltr",174 "format": "",175 "indent": 0,176 "type": "root",177 "version": 1178 }179 },180 "blockName": null,181 "blockType": "content"182 }183 ],184 "updatedAt": "2025-03-15T21:37:45.999Z",185 "createdAt": "2025-03-13T21:26:20.462Z"186 }187 ],188 "hasNextPage": false,189 "hasPrevPage": false,190 "limit": 10,191 "nextPage": null,192 "page": 1,193 "pagingCounter": 1,194 "prevPage": null,195 "totalDocs": 1,196 "totalPages": 1197}
In order to render this data in a meaningful way, we'll need a Next.js page and some React UI components.
I'll also use TailwindCSS to add some styling.
Now that Payload is fully Next.js native, the app directory is separated using route groups in Next.js using the (...) notation.
I'll add a [slug] to catch all of the path params for the page routes.
1/src/app/2 ├── (frontend)3 │ └── [slug]4 │ └── page.tsx5 └── (payload)
Here's a simple example of the Next.js page which will be fully rendered on the server side for this example.
1import React from 'react'23import { Page as PageType } from '@payload-types'4import { Blocks } from '@/payload/components/Blocks'56type Args = {7 params: Promise<{8 slug?: string9 }>10}1112export default async function Page({ params: paramsPromise }: Args) {13 const { slug } = await paramsPromise1415 const res = await fetch(`http://localhost:3000/api/pages?[where][slug][equals]=${slug}`, {16 method: 'GET',17 })18 const data = await res.json()19 const page: PageType = data?.docs?.[0]2021 const { layouts } = page2223 return <article className="">{layouts && layouts.length && <Blocks blocks={layout} />}</article>24}
Since the layouts field in the pages Collection is an array, we'll need a way to loop through and render the Payload content blocks.
1import React, { Fragment } from 'react'23import { Page } from '@payload-types'4import { Banner } from '../../blocks/Banner'5import { Content } from '../../blocks/Content'67const componentsMapping = {8 'banner': Banner,9 'content': Content,10}1112export const Blocks: React.FC<{13 blocks?: Page['layouts']14}> = (props) => {15 const { blocks } = props1617 const hasBlocks = blocks && Array.isArray(blocks) && blocks.length > 01819 if (hasBlocks) {20 return (21 <React.Fragment>22 {blocks.map((block, index) => {23 const blockType = block.blockType24 const blockName = block.blockName || `${index}`2526 if (blockType && componentsMapping[blockType]) {27 const Block: any = componentsMapping[blockType]2829 return (30 <div key={`${blockType}-${index}`} id={`${blockType}-${blockName}`} className="min-h-[400px]">31 <Block {...block} />32 </div>33 )34 }35 return null36 })}37 </React.Fragment>38 )39 }4041 return null42}
Each block will need a React UI component to actually render the content block data.
Here's the Banner content block UI component.
1import React from 'react'2import { BannerBlock } from '@payload-types'3import RichText from '@/payload/components/RichText'4import { SerializedEditorState } from '@payloadcms/richtext-lexical/lexical'56type BannerProps = BannerBlock78export const getClientSideURL = () => {9 return process.env.NEXT_PUBLIC_SERVER_URL || 'http://localhost:3000'10}1112export const Banner: React.FC<BannerProps> = ({ media, richText, links }) => {13 let alt: string = ''14 let src: string = ''15 if (media && typeof media === 'object') {16 const { alt: mediaAlt, url } = media1718 alt = mediaAlt || ''19 src = `${getClientSideURL()}${url}`20 }2122 return (23 <div className="relative h-full">24 <img alt={alt} className="absolute inline h-full w-full aspect-video -z-50" src={src} />25 <div className="absolute opacity-50 h-full w-full bg-gray-600 -z-20"></div>26 <div className="relative mx-auto px-4 py-20 flex justify-center">27 <div className="mx-auto max-w-xl text-center text-white!">28 <RichText data={richText as SerializedEditorState} />2930 <div className="mt-8 flex flex-wrap justify-center gap-4">31 {links &&32 links.map(({ link: { url, displayText } }) => {33 return (34 <a35 className="block w-full rounded-sm bg-green-600 px-12 py-3 font-medium text-white shadow-sm hover:bg-green-700 focus:ring-3 focus:outline-hidden sm:w-auto"36 href={url as string}37 >38 {displayText}39 </a>40 )41 })}42 </div>43 </div>44 </div>45 </div>46 )47}
And here's the Content block UI component.
1import React from 'react'2import RichText from '../../components/RichText'3import { ContentBlock } from '@payload-types'45type ContentProps = ContentBlock6export const Content: React.FC<ContentProps> = (props) => {7 const { richText: content } = props89 return (10 <div className="flex p-10">11 <div>{content && <RichText data={content} className="prose" />}</div>12 </div>13 )14}
And lastly, here's a helper component for displaying rich text content.
This is a pretty basic rich text component but it can always be enhanced.
1import React from 'react';23import { SerializedEditorState } from '@payloadcms/richtext-lexical/lexical';45import {6 RichText as RichTextWithoutBlocks,7} from '@payloadcms/richtext-lexical/react';89type Props = {10 data: SerializedEditorState;11 className?: string;12} & React.HTMLAttributes<HTMLDivElement>;1314export default function RichText(props: Props) {15 const { data, className = '' } = props;16 return (17 <RichTextWithoutBlocks18 className={className}19 data={data}20 />21 );22}
Here's the result of the example as it would be rendered in the actual browser.
1http://localhost:3000/block-demo
As you can see, using blocks is a very powerful way to create reusable content blocks without the complexity.

Most marketing companies are switching to block level content authoring solutions.
Using Payload Headless CMS is a great way to achieve those goals in a very short period of time. Payload provides all of the support to build dynamically managed page content.
Despite the learning curve that comes with any new technology, using Payload has streamlined the process of building block content.
I hope that you found value in this article and that it might help you on your next development project. Cheers!