How To Create an Email Opt-In Form Using AWeber

As the web continues to evolve, so does the way we need to think about marketing. Building an Email Marketing list has become the primary strategy for building organic audiences specifically tailored to your business model.
In this article I'll walk through the steps for creating an Email Marketing Opt-In form. This is the most essential and minimal form you can create to start building audiences.
In this guide, you'll find everything you need to know to get started with creating an Opt-In page, including:
- What an Opt-In page is and why it's important.
- The different types of Opt-In pages and how they work.
- Tips, tools, and best practices to succeed with Opt-In pages.
- How to add your own branding to your Opt-In pages.
Read on so you can start building your Email Marketing list today.
What is an Opt-In Page?
An Opt-In page and often referred to as a Squeeze page, is a simple way to invite users to subscribe to promotional email message updates. In technical terms, it's a modern strategy for allowing people to follow you, your interests or even your business.
Why is an Opt-In Page important?
The most beneficial reasons to create Opt-In pages are:
- One of best ways to organically build subscription lists of audiences
- Long term customer relationships, with long term benefits.
- Potential leads that can drive new sales.
- Very cost effective compared to paid promotional strategies.
When using Opt-In pages, there should be a mutual interest and exchange of benefit for your subscribers, including:
- Provide free information, courses, white papers, ebooks and more in exchange for email subscription.
- Promote newsletters, articles of iterest or even new product awareness.
- Create audience segmentation to better tailor marketing to certain interests.
How to create an Opt-In page successfully
Creating the actual Opt-In page form is very easy is most cases but in order to have success, it's highly recommended that you use an Email Marketing service like AWeber service to handle all of the backend automation and campaign management for you.
There's several Email Marketing services to choose from but for this article I'm going to use AWeber to demonstrate.
Get started with creating an Opt-In page form
There's two ways to create Opt-In forms.
- Use an available pre-designed template.
- Use a template without any styles and provide your own styles and branding.
Either way, we'll need to create a simple form to get started.
Here are the steps to create an Opt-In form with AWeber:
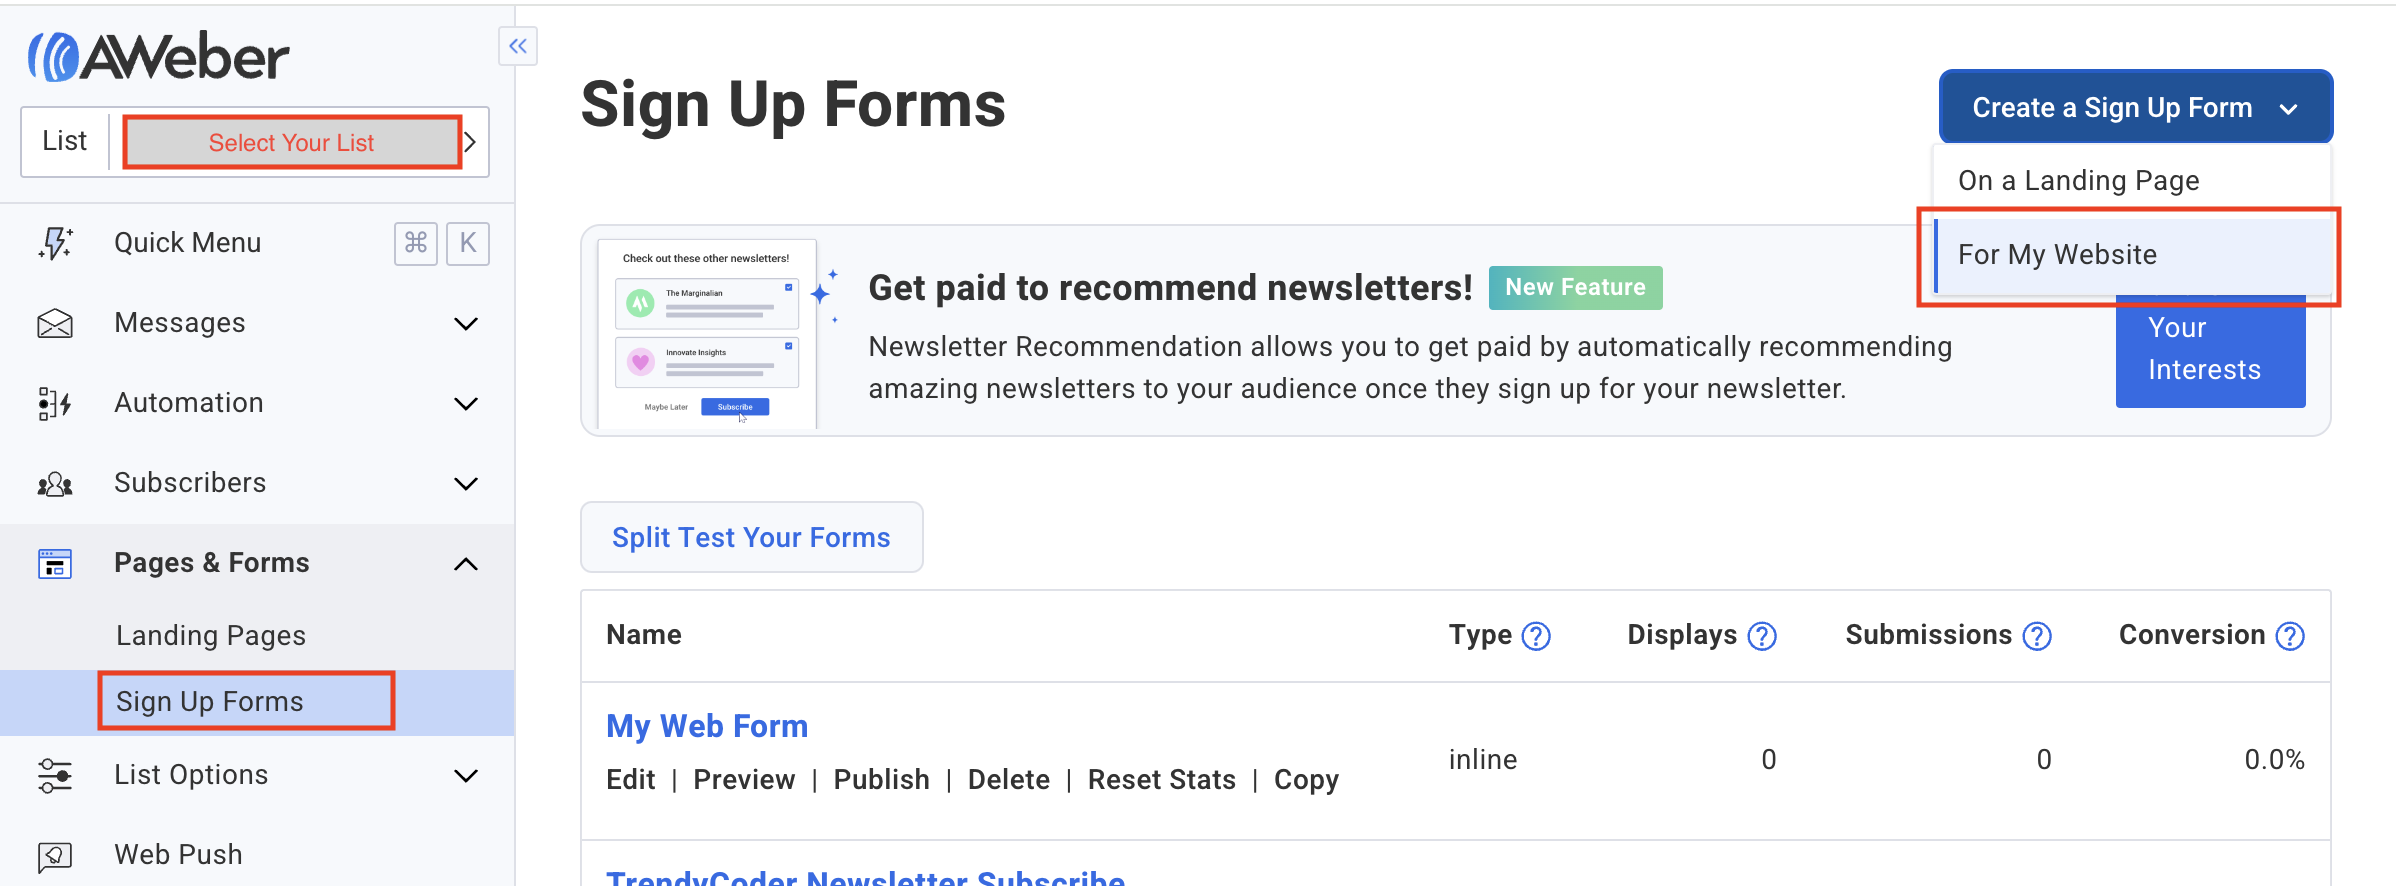
Step 1
Go to Pages and Forms > Sign Up Forms left menu option. Click on the right, top button Create a Sign Up Form and select the For My Website option.
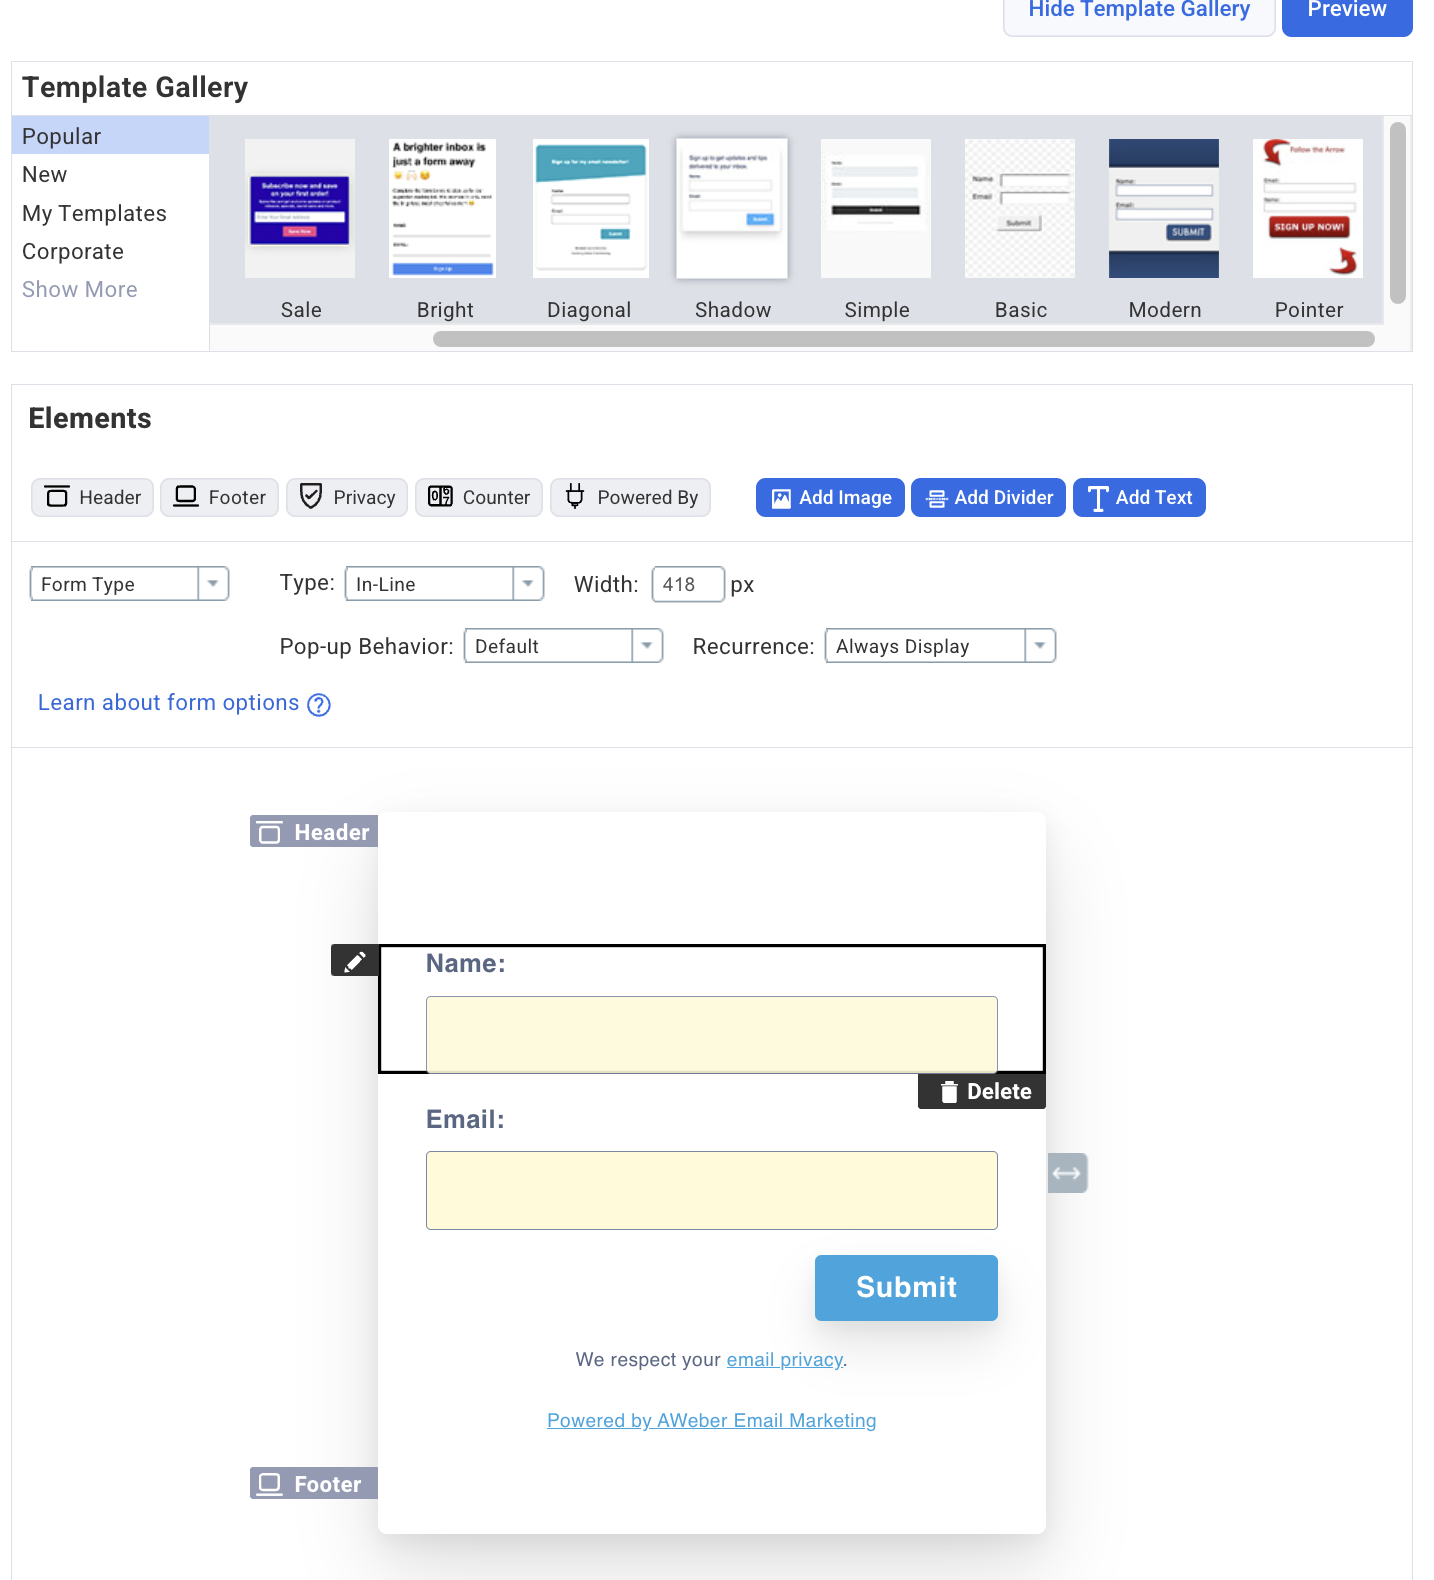
Step 2
On the Design tab, select one of the forms in the Template Gallery. I'll select Shadow for this example.
Step 3
You can use the form editor to delete the Name field if you only want to capture a user's Email. Sometimes it's easier to just capture an email.
You can optionally remove the Header, Footer,privacy policy and powered by if needed.
Step 4
After editing the form, click on the Go to Step 2 button, which takes you to Settings.
On the Settings tab it will ask for the redirect URLs, which are optional but it's always best to use custom pages using the Custom Page option and provide the page URL's for these pages.
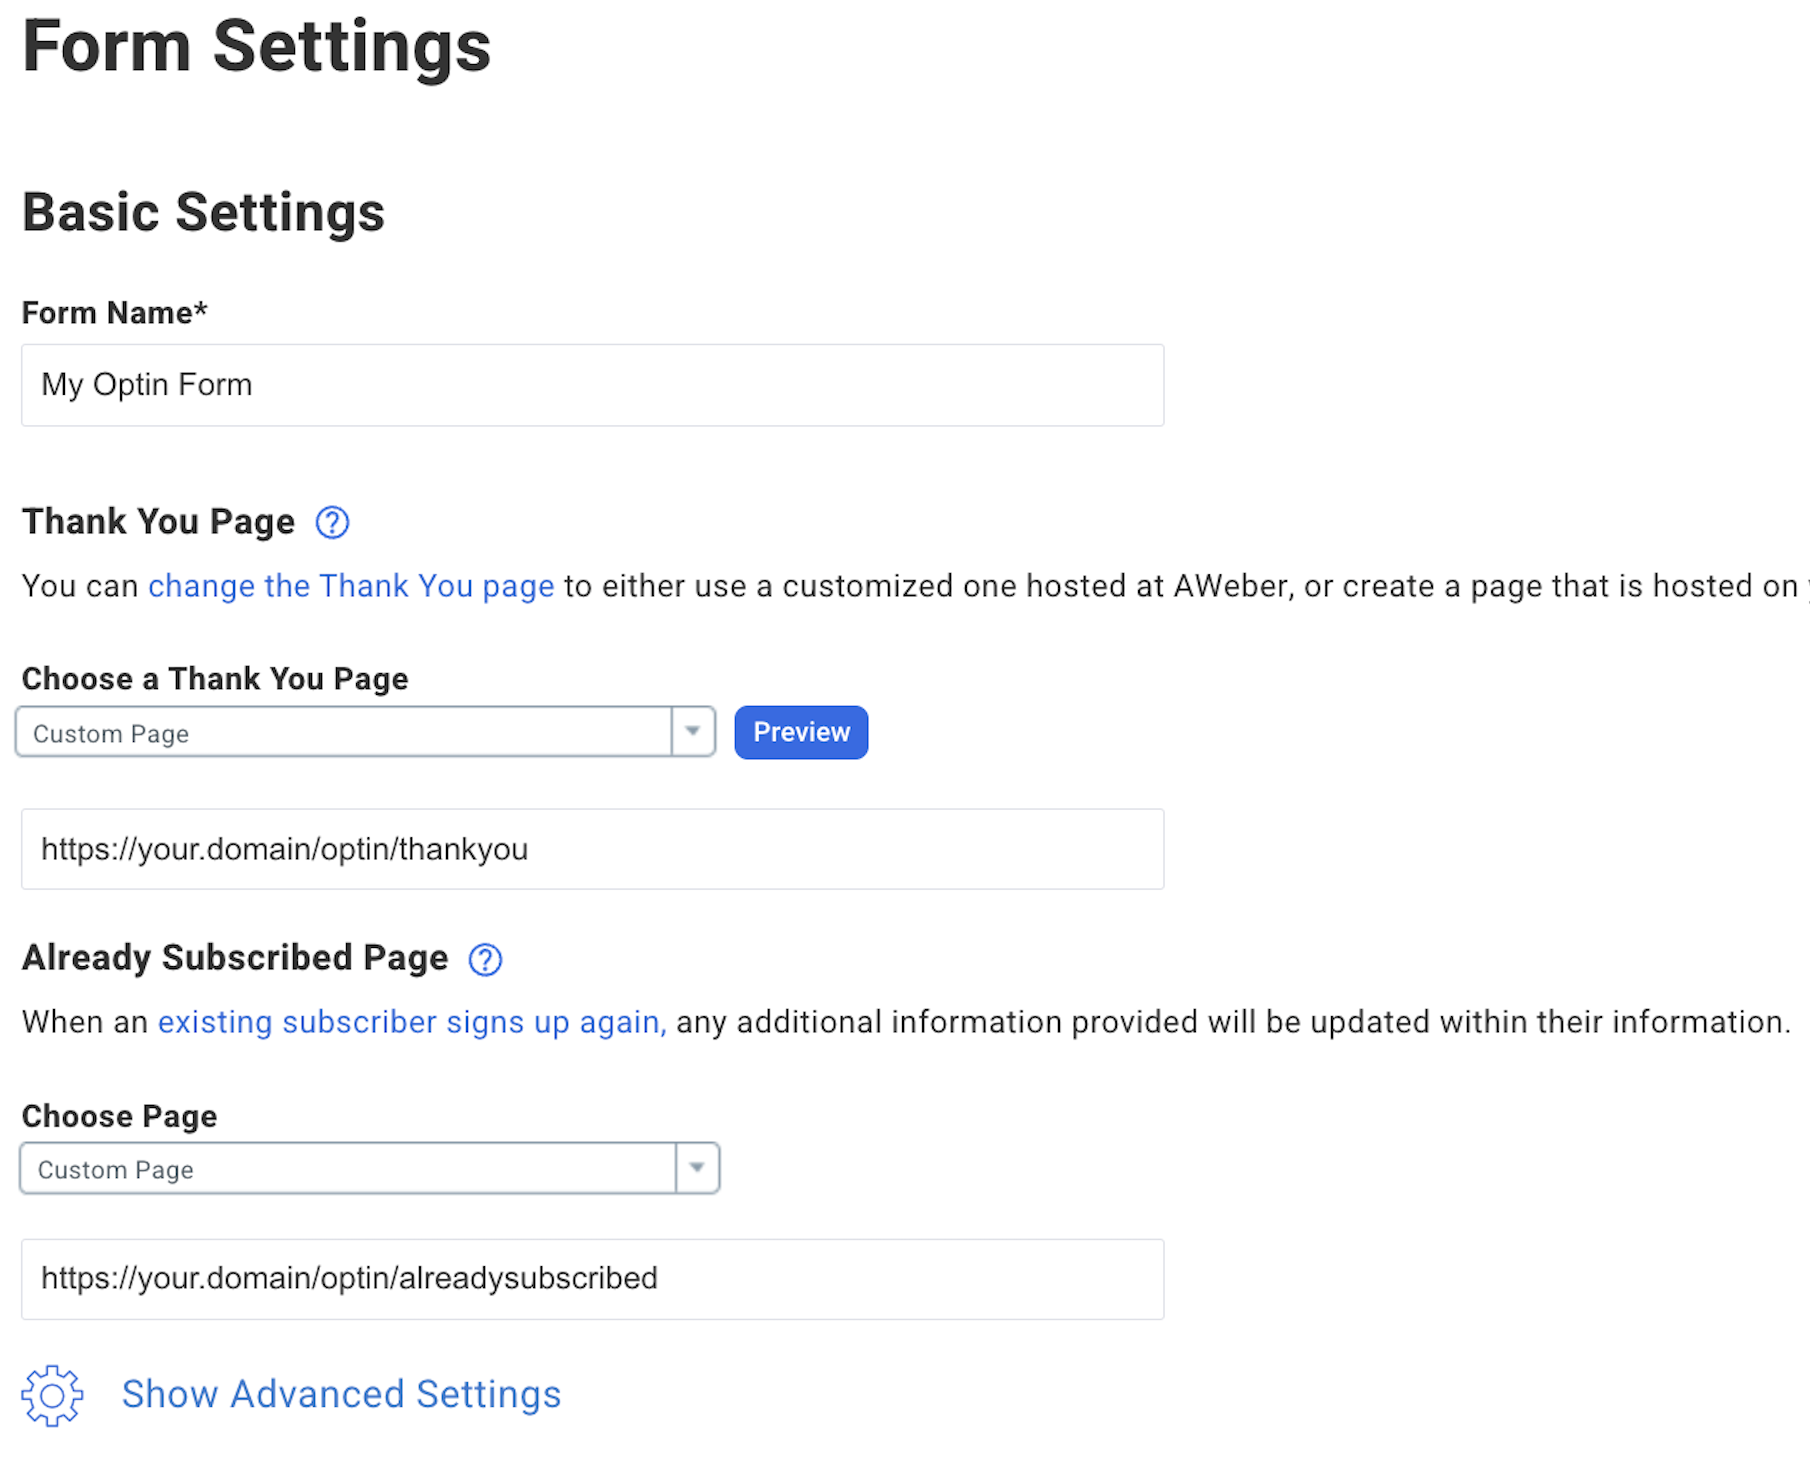
They should look something like this. The URL paths will change according to the location of the redirect pages on your website.
- Thank You:
https://your.domain/optin/thankyou
- Already Subscribed:
https://your.domain/optin/alreadysubscribed
Provide a Form Name and click Save Your Form before continuing. Click on the Go to Step 3 button.
Step 5
On the Publish tab, select one of the following options. If you don't have a form, then click on I Will Install My Form which will give you some additional options.
Option 1 - JavaScript Snippet
If you just want to insert some code on your webiste, then select JavaScript Snippet copy and paste the code somewhere on your website within the HTML page body.
Option 2 - Full HTML customization
However, if you're planning on customizing the form with your own styles, then click on the Raw HTML Version and uncheck the checkbox to just get the absolutely raw HTML form.
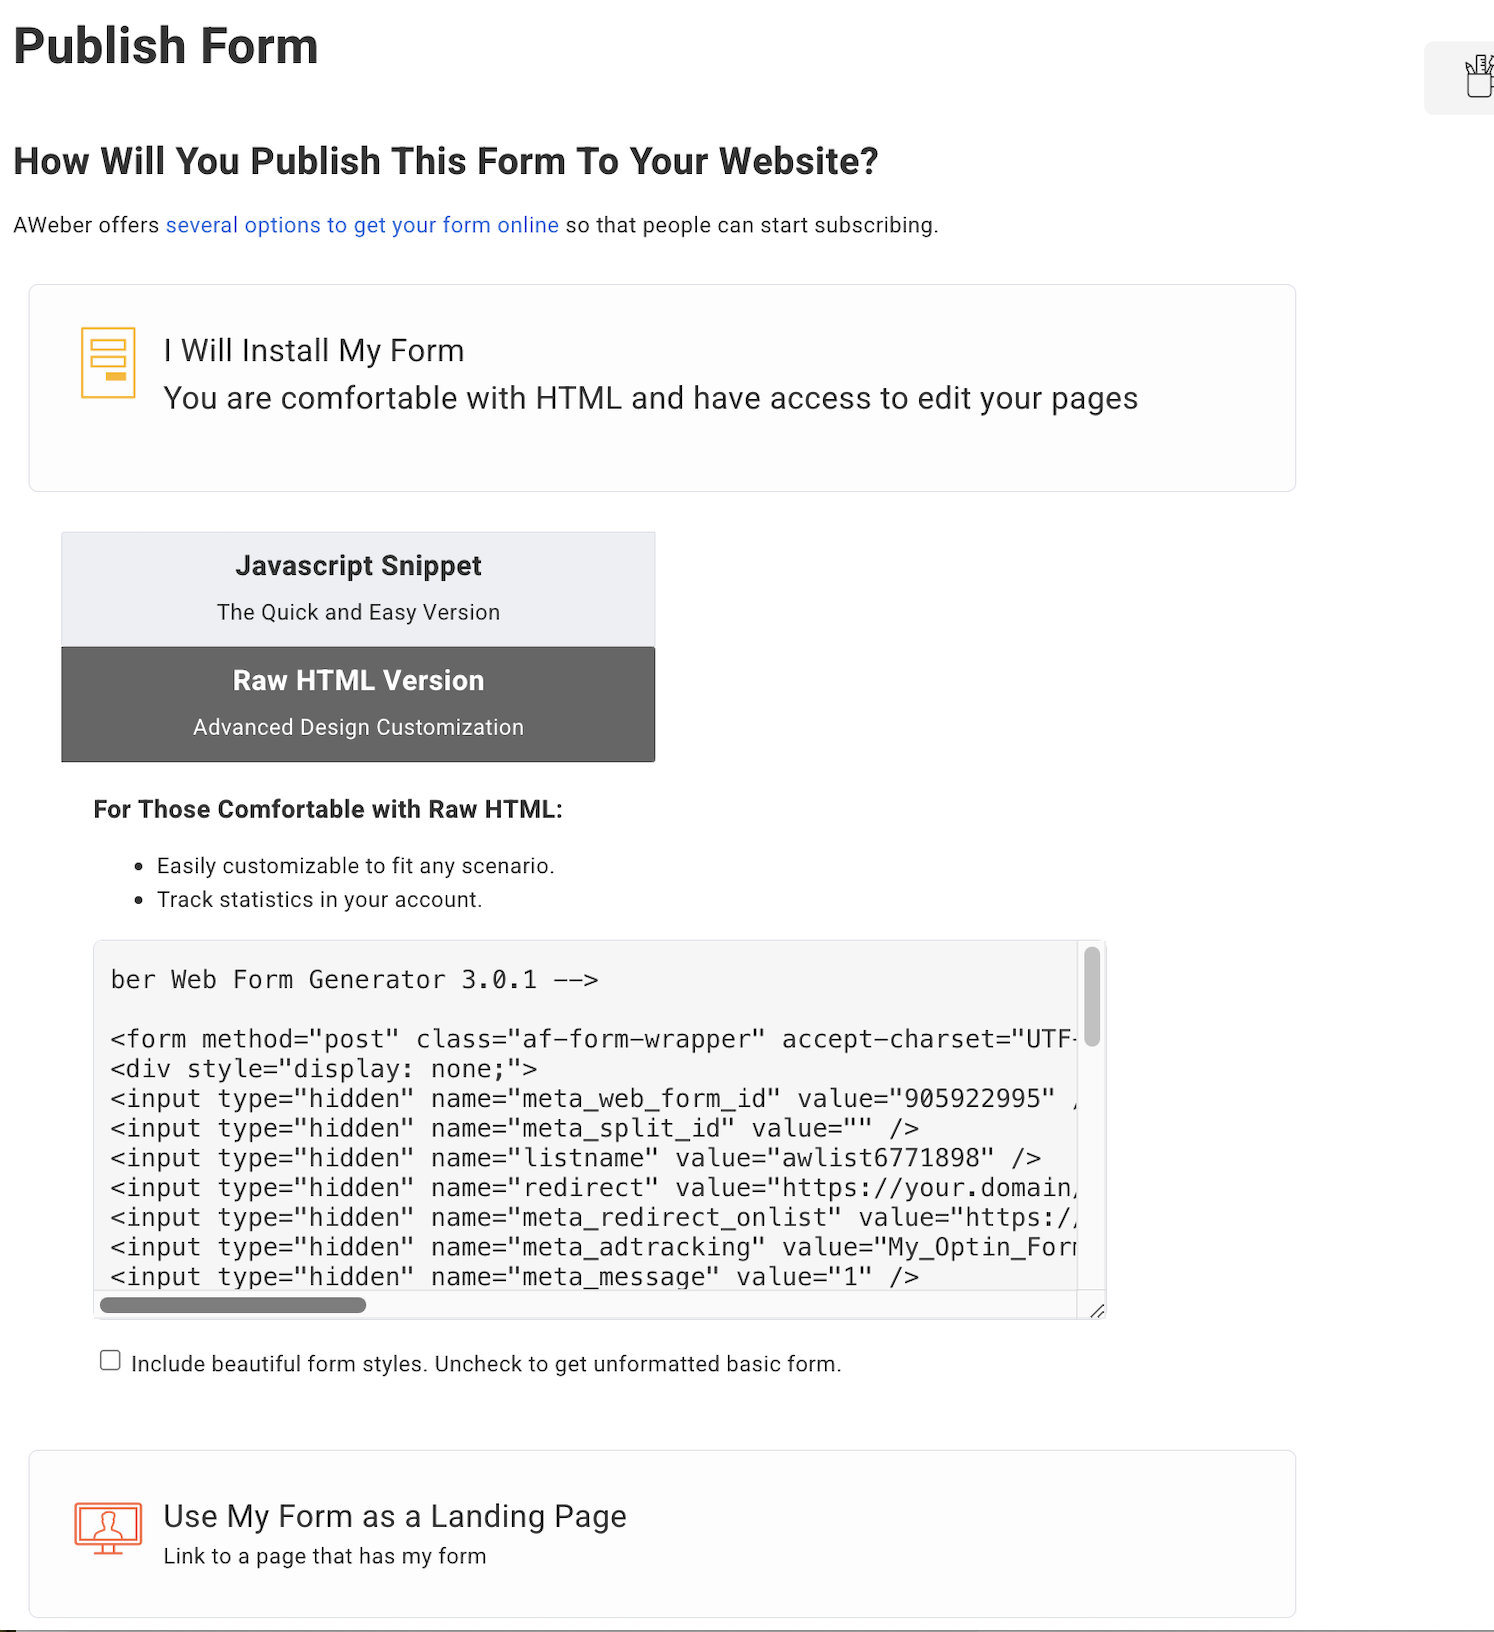
Just make sure that whatever option you choose, to copy and paste the form code and save it for later when you're ready to actually use it.
You can always go back and repeat the process to get the code again if needed.
How to use the new Opt-In page form
So at this stage you are ready to use the code and how you install it can vary depending on what type of website you have.
If you generated the Raw HTML Form then you'll need to add your styles and any customization before installing.
Here's an article with examples of styling using Tailwind CSS and Astro framework. This article will show how to really customize your Opt-In forms with your own particular branding and styles.
Build an Opt-In page using Tailwind CSS and Astro
It's best to either embed the code snippet form on a certain page or in a modal or popup dialog window. If you're using Wordpress, you can find a wide variety of plugins to do the job.
Install on Wordpress
If you want to add it to social media pages then you can follow and use the following method.
Install on Facebook
If you're using Wix you can follow this method to install the form.
Install on Wix
This approach would be the most advanced approach and would require some development experience but would provide the most flexibility.
You could just embed the Opt-In form anywhere in your application code and use any CSS framework to style.
In Conclusion
I hope this article has been informative. Now we've seen how easy it is to create Email Opt-In forms using an Email Marketing service. These are some of the most important ways to grow and market any business large or small.
Just remember that the subscription should be a win-win for both parties. There should be a creative exchange of valuable information and services to be successfull.