Getting Started with MDX on Next.js

If you've been developing React applications for some time now, you've probably used some Markdown to document some source code since just about every git repo supports it. Since the arrival of MDX, I began to wonder if it could be used for more than just basic help documentation.
I found that MDX goes way beyond just simple Markup and is an excellent way to enhance all types of web content. In this article, In this article you'll find everything you need to get started with MDX, including:
- Setting up MDX on Next.js
- Local MDX
- Remote MDX
- MDX Layout tempates
- Creating MDX components
- Customizing Themes
What is MDX?
MDX is an extension of basic Markdown syntax we know and love and let's you add React JSX components within Markdown content. So if you're using React, this opens up a whole new realm of possibilities for interactive Markdown content.
Why is MDX important?
MDX can now be used for more than just simple README files, in fact, it can now be used in areas like marketing, sales, blogs and other forms of commercial presentation.
- SEO Optimization: MDX can be SEO optimized and statically generated for optimal performance.
- Theming and Styles: MDX can be themed and styled in endless ways, transforming simple Markdown syntax into elegant presentations.
- No CSS Hassle: No need to deal with tedious CSS and styles to make your HTML pages look great, focus should be on content.
- Easy To Read: MDX Mardown is easy to read. No need to sift through tons of HTML tags to edit page content.
- Front Matter: A persistent YAML based meta data section, which allows for flexible content meta definitions without the need of a database or external system.
- Showcase: Better documentation for showcase applications like Storybook that fully support MDX in v7.
Types of MDX on Next.js
Next.js supports two types of MDX for different development strategies. Both can be used for different cases so it's not just one over the other.
MDX Local:
Parses and renders MDX Markdown using the app router.
MDX Remote:
Loads and parses content from virtually any location
Get Started with MDX on Next.js
If you don't already have a Next.js application set up, you can easily create one to follow along with these examples.
npx create-next-app@latest
The process will give you some options. I'm using TailwindCSS default setup but choose what you prefer since this is not a TailwindCSS specific article.
Install the follow pacakges that I'll be using for this article.
Install the following MDX packages.
npm install @next/mdx @mdx-js/loader @mdx-js/react @types/mdx next-mdx-remote remark-frontmatter remark-mdx-frontmatter
MDX Tips and Best Practices
A couple key points that I've learned that can really improve and ensure your success with MDX include:
- Use a common library directory for all of your MDX utils and customizations.
- Try to keep all of the common and configuration code as static and non-async as possible for better bundling and code splitting.
- Keep a common content location under your project root, for example
/content and then have sub-directories for more specific content, like /content/blog or /content/sports.
I will also use the following path alias conventions using Typescript defined in the tsconfig.json file.
tsconfig
{
  "compilerOptions": {
    ...
    "paths": {
        "@/*": [
          "./*"
        ]
    }
    ...
  }
}
A Simple MDX Example
For this demo, I'll create a simple reusable React JSX component that I'll use throughout this article and import it into Markdown content.
To make things more interesting, I'll create a simple Hero component that can be used as a document or blog header.
Hero Example:

Having the ability to add custom React JSX components to a regular Markdown page definitely opens up some possibilities.
MDX Local Setup
The best way to describe the local setup is that it provides the ability to do the following:
- Render an MDX page using the
app router using page.mdx, similar to page.tsx.
- Allows
import and export ESM notation to render MDX.
- Can be setup to support Front Matter but needs to use plugins to parse meta data.
- Supports templates and layout capabilities.
Step 1
Start by modifying the next.config.mjs file and configure some of the plugins we installed earlier.
Local setup requires the use of @next/mdx to add support for .mdx page extensions.
Since the local setup doesn't automatically parse Front Matter meta data, I'll add a couple plugins to provide Front Matter support.
Front Matter is a YAML based meta data added to the top of an MDX page to define simple or complex data objects.
Here's what the next.config.mjs file should look like after the changes.
import withMDX from '@next/mdx';
import remarkFrontmatter from 'remark-frontmatter';
import remarkMdxFrontmatter from 'remark-mdx-frontmatter';
const remarkPlugins = [
remarkFrontmatter,
remarkMdxFrontmatter
];
const withMDX = nextMDX({
extension: /\.mdx?$/,
options: {
scope: {
}
remarkPlugins: [
...remarkPlugins
],
rehypePlugins: [
]
},
});
const nextConfig = {
pageExtensions: ['js', 'jsx', 'mdx', 'ts', 'tsx'],
}
export default withMDX(nextConfig)
Available Plugins
Here's some of other available plugins to enhance Markdown content.
- remarkPlugins - Any ESM module type plugins from Remark. Remark Plugins
- rehypePlugins - Any ESM module type plugins from Rehype. Rehype Plugins
Step 2
Let's create the Hero component. This React component will accept two props:
The background can be an image or defaults to a CSS gradient.
The heroText will just be an overlay on top of the background.
I'll add this component to the /components/mdx directory.
import React, { type CSSProperties } from 'react';

type HeroProps = {
  background: {
    image?: string;
    type: 'gradient' | 'image';
  };
  heroText: string;
};

const Hero = (props: HeroProps) => {
  const {
    background: { image = '', type = 'gradient' },
    heroText = 'Hero Text Here',
  } = props;

  const backgroundStyles: CSSProperties =
    type === 'image'
      ? {
          backgroundImage: `url(${image})`,
          backgroundSize: 'cover',
          aspectRatio: '4/2',
        }
      : {
          height: 400,
          background:
            'linear-gradient(0deg, rgba(112,34,195,1) 0%, rgba(253,187,45,1) 100%)',
        };

  const styles: Record<string, CSSProperties> = {
    section: {
      display: 'flex',
      justifyContent: 'center',
      alignItems: 'center',
      padding: 50,
      ...backgroundStyles,
    },
    heroText: {
      color: '#ffffff',
      fontSize: '4.0rem',
      fontWeight: 700,
    },
  };
  return (
    <section style={styles.section}>
      <div style={styles.heroText}>{heroText}</div>
    </section>
  );
};

export default Hero;
Step 3
This step is essential for local setup and without it your pages will not render JSX components properly.
You'll need to create a file named mdx-components.tsx in the root of the project and add the following function called useMDXComponents.
import type { MDXComponents } from 'mdx/types'

export function useMDXComponents(components: MDXComponents): MDXComponents {
  return {
    ...components,
  }
}
This function returns an object with any custom components you'll want to add to your MDX pages. I'll add the Hero component we defined earlier here.
The other benefits of this function include:
- Override standard HTML Markdown elements like
h1, h2, p, etc.
- Components will be globally available to all MDX content using local strategy.
- No need to use
import to include components, they will already be in the mdx scope.
- You can add an optional
wrapper function to wrap around all your page content.
Here's an example of how to add components.
import React from 'react';
import Hero from '@/components/mdx/hero';
export function useMDXComponents(components: MDXComponents): MDXComponents {
return {
...components,
h1: ({ children, ...props }: React.ComponentPropsWithoutRef<'h1'>) => {
return (
<h1 {...props} className="my-8">
{children}
</h1>
);
},
h2: ({ children, ...props }: React.ComponentPropsWithoutRef<'h2'>) => {
return (
<h2 {...props} className="my-6">
{children}
</h2>
);
},
Hero,
wrapper: ({children}) => {
return <div className="prose">{children}</div>
}
}
}
I'm just adjusting the margin styles here on some of the HTML header tags.
If you're using CSS frameworkss like TailwindCSS or other libraries you can apply those classes or styles as needed to produce any theme look and feel.
As you can see, I've added the prose class from the @tailwindcss/typography plugin to demonstrate how the wrapper can be used.
My preference is to use CSS classes for theming but the option is there to adjust the styles however needed.
Step 4
Create an MDX file under the app router directory with the .mdx extension.
# MDX Demo Page

<Hero background={{ image: '/img/blog/assets/mdx-demo-backdrop.jpg', type: 'image'}} heroText="Home Decor"/>
Note that there's no need to import the Hero component because it's already available.
So the simple Hero demo should looks as follows so far.
 your-project
  ├── app
  │   └── demo
  │       └── page.mdx
  └── components
      └── mdx
          └── hero.tsx
Running the Local MDX Page
If you run the following code in Next.js dev server using npm run dev you'll see the following at localhost:3000/demo.
Output:
One clear take away is that we can now render MDX pages the same way as page.tsx pages that are under the app router in Next.js.
This is a huge advantage because it allows us to write full MDX pages that can be statically generated for faster performance and easy to maintain.
MDX Dynamic Routes
If the MDX page is a dynamic app router path and needs access to the params and searchParams on the route, they are available through the props object.
Here's a couple of variations on how to use page.mdx to access router information from the props, since you might need to conditionally create content at times.
export function ParamsDemo1() {
    return <div>ParamsDemo1</div>
}
export function ParamsDemo2() {
    return <div>ParamsDemo2</div>
}

{props.params.id === '123' ? <ParamsDemo1 /> : <ParamsDemo2 />}
export function SearchParamsDemo1() {
    return <div>SearchParamsDemo1</div>
}
export function SearchParamsDemo2() {
    return <div>SearchParamsDemo2</div>
}

{props.searchParams.id === '123' ? <SearchParamsDemo1 /> : <SearchParamsDemo2 />}
Importing MDX Pages
Whether you use a page.tsx or a page.mdx is up to you but when importing MDX page content there's a couple of benefits.
Any import of .mdx extensions using local MDX, will return a JSX element which accepts the components prop.
For example, I'll use a page.tsx to illustrate how to import and embed MDX content.
import Standard from '@/content/some/path/standard.mdx';
import Premium from '@/content/some/path/premium.mdx';
import PremiumHero from '@/components/mdx/premium'
function Page({
params: { accountType },
}: {
params: { accountType: string | string[] | undefined };
}) {
return (
<>
{accountType === 'premium' ? (
<Premium
components={{
PremiumHero
Product() {
return <span style={{ color: 'gold' }}>Premium Services</span>;
},
wrapper({components, ...rest}) {
return <section style={{backgroundImage: '/premium.jpg'}} {...rest} />
},
}}
/>
) : (
<Standard />
)}
</>
);
}
export default Page;
These props are very useful for altering the HTML and styling output at a nested layer.
Local MDX Front Matter
If you're using Front Matter, all of the Front Matter meta data for page.mdx will be available in the frontmatter object, since we configured the plugins remarkFrontmatter and remarkMdxFrontmatter earlier in next.config.mjs.
---
title: 'MDX with Front Matter'
tags:
 - blue
 - grey
---

Here's the title {frontmatter.title}

The tag first tag is {frontmatter.tags[0]}
By default, any MDX content .mdx page that exports a metadata named export can provide access to metadata.
For example:
export const metadata = {
  title: 'Premium',
  slug: 'premium-content',
  img: '/some/premium/image.png'
}

## Some MDX content
Then just import the named export metadata.
import Standard, {metadata as standardMeta} from '@/content/some/path/standard.mdx';
import Premium, {metadata as premiumdMeta}from '@/content/some/path/premium.mdx';


function Page({params: {type}}: { params: { type: string}}) {
  return (
    <>
      {type === 'premium' ? (
        <div style={{backgroundImage: premiumMeta.img}}>
          <h1>{premiumMeta.title}</h1>
          <Premium/>
        </div>
      ) : (
        <div style={{backgroundImage: standardMeta.img}}>
          <h1>{standardMeta.title}</h1>
          <Standard />
        </div>
      )}
    </>
  );
}

export default Page;
I personally prefer the YAML Front Matter approach at the page level but it's good to have both options for various needs your project might require.
For example, there might be cases where other teams, departments or content authors might maintain this MDX metadata.
Local MDX Layouts
Aside from the designated wrapper key in the components object, with local MDX you can also define layouts.
Consider the following DocumentLayout that we might want to use to wrap a document MDX content page in.
import { PropsWithChildren } from 'react';

export type Document = {
  title?: string;
}

export default function DocumentLayout({
  children,
  title
}: PropsWithChildren & Document) {

  return (
    <article className="prose">
      <h1 className="title">{title}</h1>
      <div className="content">{children}</div>
    </article>
  );
}
Now all we have to do is import the DocumentLayout and export it as the default export and MDX will automatically use it as a layout wrapper.
---
title: 'Layouts and Templates'
---

import DocumentLayout from '@/components/mdx/layouts/document'

export default ({children}) => <DocumentLayout {...frontmatter}>{children}</DocumentLayout>

All of the Markdown content will be wrapped by the layout and passed in as the children.
The DocumentLayout could also be defined in the useMDXComponents functions we defined earlier but just to show some versatility I imported it directly into the MDX page.
Notice how I'm also using the spread operator to pass the frontmatter object into the layout. This is not possible with the wrapper technique because the frontmatter object is not available.
This is one of the benefits to using local MDX.
Remote MDX
So far, all of the MDX content has either been locally added inline or loaded using the import statement, hence the term local. Currently there isn't a way to load content any other way using local MDX.
Now that we've got a pretty good idea of using local MDX, let's see how it compares with the remote strategy.
Remote MDX is a very dynamic approach over the local approach and provides a solution for loading MDX content from other places where it might be located.
What is Remote MDX
It's important to note, remote MDX is not capable of using the import or export statements to load content or even export layouts.
The remote MDX approach is a more programatic way of loading and rendering remote content.
Here are some examples of where content might be located:
- Might be stored and read from a remote database or CMS.
- Could be dynamically created on the fly from a JSON response from an API endpoint.
- Could be read from the underlying file system.
- It could be all of the above
To load content from these sources, we'll use the next-mdx-remote package that was installed earlier.
Remote MDX Setup
The next-mdx-remote package provides some helpers to compile MDX content dynamically.
Since this package originated before Next.js 13 moved to using React Server Components (RSC), the serialize and the <MDXRemote> helpers were primarily used to do the serializing of content.
These can still be used but you will see an error indicating that you need to use the use client since these components use React.useState effects which cannot be used on RSC.
In this example, I will be using the newer RSC capable helpers from the next-mdx-remote/rsc additions.
complileMDX (RSC) - compiles on the server side only<MDXRemote> (RSC) - renders on server side only
It accepts similar options for plugins and components as we saw in the local setup.
import { MDXRemote } from 'next-mdx-remote/rsc';

function Page() {

  const mdxOptions = {
    source,
    options: {
      parseFrontmatter: true,
      mdxOptions: {
        remarkPlugins: [],
        rehypePlugins: []
      },
    },
    components: { },
  };

  return <MDXRemote {...mdxOptions}></MDXRemote>;
}
The <MDXRemote> component does all of the heavy lifting and calls compileMDX behind the scenes.
If you wanted to explicitly call the compileMDX function, here's what that would look like.
import { CompileMDXResult, compileMDX, MDXRemote } from 'next-mdx-remote/rsc';

async function Page() {

  const { frontmatter, content } = await compileMDX({
    source,
    options: {
      parseFrontmatter: true,
      mdxOptions: {
        remarkPlugins: [],
        rehypePlugins: []
      },
    },
    components: { },
  });

  return <>{content}</>;
}
Remote MDX Example
For this section we'll create a documents viewer to load MDX content from the underlying file system based on a slug path param in the url.
This example could be used for something like product information or even online help for that matter. It will consist of following directory structure.
 your-project
  ├── app
  │   └── documents
  │       └── [slug]
  │           └── page.tsx
  ├── components
  │   └── mdx
  │       ├── markdown.tsx
  │       ├── hero.tsx
  │       └── layouts
  │           └── document.tsx
  └── content
      └── documents
          ├── mdx-local.mdx
          └── mdx-remote.mdx
All of the MDX content will now live in the /content/documents directory. Also note, these pages are using the .mdx extension and the actual filename will be used as the slug.
So each page can be viewed and accessed using the localhost:3000/documents/mdx-remote url.
Let's start by adding the app router page.tsx with a dynamic slug path param.
import fs from 'fs';
import path from 'path';
import { MDXRemote } from 'next-mdx-remote/rsc';
import Markdown from '@/components/mdx/markdown';
import Hero from '@/components/mdx/hero';

type Props = {
  params: {
    slug: string;
  };
};

const documents = path.join(process.cwd(), 'content', 'documents');

async function DocumentPage({ params: { slug } }: Props) {

  const getDocumentBySlug = async (slug: string): Promise<string> => {
    const fileName = path.join(documents, `${slug}.mdx`);
    const fileContent = fs.readFileSync(fileName, { encoding: 'utf8' });
    return fileContent;
  };

  const source = await getDocumentBySlug(slug);
  const remoteMdxOptions = {
    source,
    options: {
      parseFrontmatter: true,
      mdxOptions: {
        remarkPlugins: [],
        rehypePlugins: []
      },
    },
    components: {
      ...Markdown,
      Hero
    },
  };

  return <MDXRemote {...remoteMdxOptions}></MDXRemote>;
}

export default DocumentPage;
Next, I'm adding all of the Markdown HTML customized tags in this markdown.tsx file to make it easier to manage any theme changes to the default Markdown tags.
Notice that the Hero, Markdown and any plugins are added to the remoteMdxOptions.
This is a little different from the local approach where we defined it once in next.config.mjs. Using the remote approach gives some flexibility to have different configurations for different use cases.
import React from 'react';

const Markdown = {
  h1: ({ children, ...props }: React.ComponentPropsWithoutRef<'h1'>) => {
    return (
      <h1 {...props} className="my-8">
        {children}
      </h1>
    );
  },
  h2: ({ children, ...props }: React.ComponentPropsWithoutRef<'h2'>) => {
    return (
      <h2 {...props} className="my-6">
        {children}
      </h2>
    );
  },
  h3: ({ children, ...props }: React.ComponentPropsWithoutRef<'h3'>) => {
    return (
      <h2 {...props} className="my-5">
        {children}
      </h2>
    );
  },
  h4: ({ children, ...props }: React.ComponentPropsWithoutRef<'h4'>) => {
    return (
      <h4 {...props} className="my-4">
        {children}
      </h4>
    );
  },
};

export default Markdown;
Here's the MDX content for the two files the DocumentPage will load.
---
title: 'MDX Local Content'
---

<Hero background={{type: 'gradient'}} heroText={frontmatter.title}/>

A simple example of configuring MDX local setup.
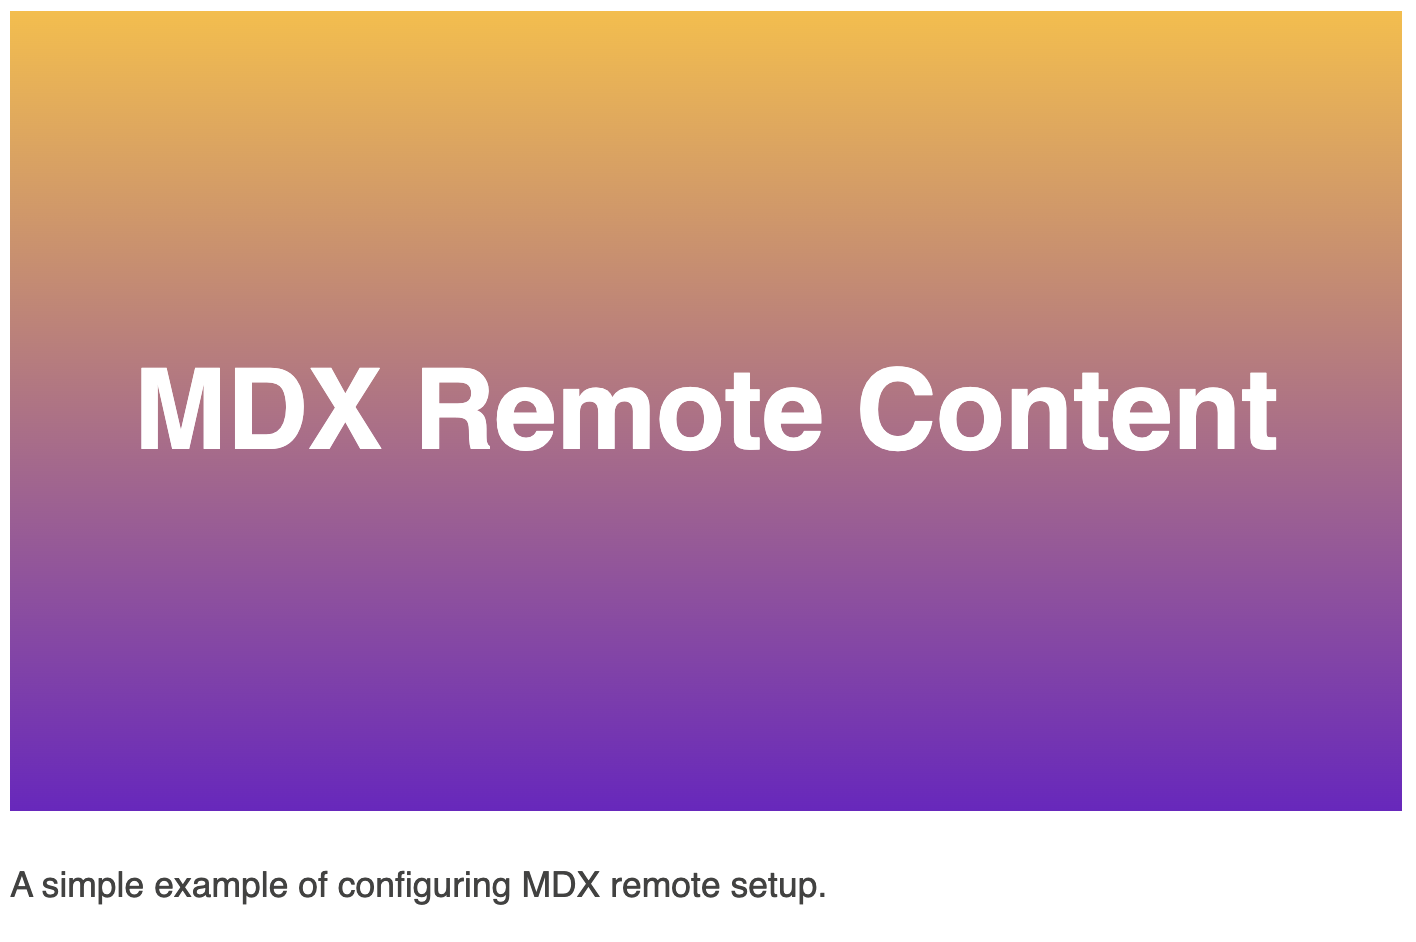
---
title: 'MDX Remote Content'
---
<Hero background={{type: 'gradient'}} heroText={frontmatter.title}/>

A simple example of configuring MDX remote setup.
MDX Remote Output
If you run npm run dev and point your browser to either of the two pages.
localhost:3000/documents/mdx-locallocalhost:3000/documents/mdx-remote
you will see the following rendered HTML output.
Output:
Remote MDX Front Matter
The <MDXRemote> component will automatically parse the frontmatter without the need for additional Front Matter plugins.
As you can see in both of the Markdown pages that I set the value of the heroText prop, to {frontmatter.title} since the frontmatter is available in the MDX content scope now.
Remote MDX Layouts
As far as layouts for remote MDX Markdown, we'll need to be a little more creative since the import and export ESM syntax is not available.
So, even if you tried to export a default layout from the Markdown .mdx content page, it would be ignored when parsing the content.
Remote MDX Layouts
However, we can still reuse the DocumentLayout we defined earlier and use the compileMDX function.
import DocumentLayout from '@/components/mdx/layouts/document';
async function DocumentPage({ params: { slug } }: Props) {
...
const {frontmatter, content} = await compileMDX({
});
return (
<DocumentLayout {...frontmatter}>
{content}
</DocumentLayout>
);
}
The DocumentLayout is not parsed by the next-mdx-remote parser so the content has to be compiled and parsed first to extract the frontmatter. It can then be passed as props to the DocumentLayout.
This has some pretty good advantages since we can swap different layouts for things like BlogLayout or even ProductLayout for example.
Using Wrapper for MDX Layouts
Another option would be to use the wrapper function for layouts but the frontmatter will not be available when using this approach.
This approach would be better suited for cases when you're content is coming from a database or CMS system and the meta data will be supplied by those sources. For example:
import DocumentLayout from '@/components/mdx/layouts/document';
async function DocumentPage({ params: { slug } }: Props) {
const getDocumentBySlug = async (slug: string): Promise<string> => {
return await getDocumentFromApi(slug);
};
const document = await getDocumentBySlug(slug);
const mdxRemoteOptions = {
source: document.source,
components: {
wrapper: ({ children }: PropsWithChildren) => {
return (
<DocumentLayout title={document.title}>{children}<DocumentLayout>
);
},
},
};
return <MDXRemote {...mdxRemoteOptions}></MDXRemote>;
}
This is probably a better approach if your content is not using Front Matter and the page meta data is externally supplied.
Conclusion
That's all for this article and I hope it helps you on your MDX path.
By now you should have a pretty good idea of what MDX is and how it can be applied.
You should also have a good grasp on both ways to setup and use MDX on Next.js. Both options can be used to build great websites, blogs and applications.
There is no doubt in my mind that MDX will continue to flourish. It's definitely a great way to take writing page content to a whole new level and beyond just a README document.