Uploading Made Easy: Exploring Media Features in Payload CMS
Posted on: September 23 2025
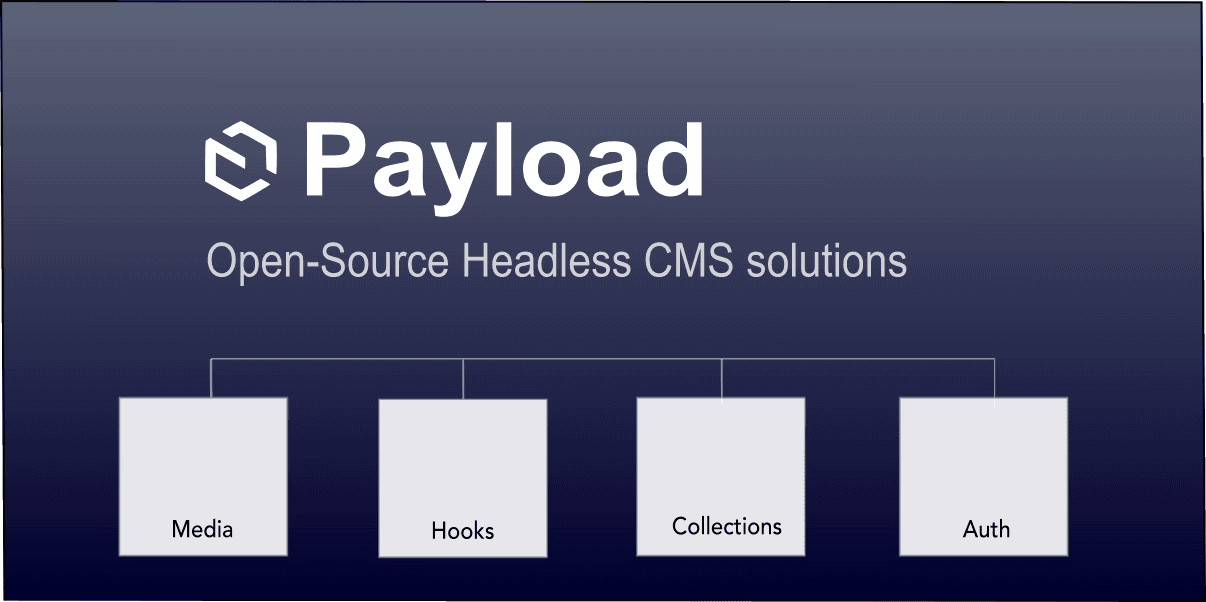
Managing media files is a critical part of any modern content platform, and
Payload CMS makes it easier than ever. In this article, we’ll take a closer
look at how Payload handles file uploads and media management out of the box.
From configuring upload fields to organizing assets in collections, I’ll walk through the core features and show you how to seamlessly integrate media into your content workflows.
In this article, I'll be covering:
- What is the upload field?
- Why are upload fields important?
- How to use upload fields.
- Relationships to upload fields.
- Querying on upload fields.
Whether you're building a Headless CMS stack or just exploring Payload's capabilities, this guide will help you make the most of its powerful media tools.
What is the upload field?
If you've ever tried to build your own upload capable application, then you know how complex it can be. Let's find out how simple Payload CMS makes this process using their built-in upload field.
The upload field in Payload CMS can be added to any Collection to allow content authors to upload and attach files to a given Collection that is configured for upload support.
For example, by simply setting the upload field to true enables file upload support.
Collection with upload support
import type { CollectionConfig } from 'payload';
export const MyPictures: CollectionConfig = {
slug: 'mypictures',
upload: true,
};
Pretty easy right?
In order to upload and store our media files in the Collection, we can simply use the upload field and point to any Collection that has upload support set to true.
Simple upload field
export const Cars: CollectionConfig = {
slug: 'somecollection',
...
fields: [
{
name: 'pictures',
type: 'upload',
relationTo: 'mypictures',
hasMany: true,
}
]
...
Why are upload fields important?
The upload field is probably one of the most important fields when building any Headless CMS application. With very little effort, it immediately provideds the following capabilities:
- Upload media files to any designated Collection.
- Can upload media files locally or to cloud using adapter plugins.
- Automatically creates consistent TypeScript interfaces.
- Easily manage uploaded content through the admin panel.
- Control access to content.
- Image resizing and dimensions for various devices.
Payload's media upload capabilities greatly streamline upload support and allows developers to focus on building apps rather than boilerplate infrastructure.
How to use upload fields
As we saw earlier in the examples, the upload support requires two things:
- A Collection marked with upload support.
- An upload field that points to the target upload destination using the
relationTo property.
Defining an upload Collection
So let's take a look at a more realistic example.
I'll define some Collections to simulate an online used cars website that let's users upload images of cars they are selling.
For example:
- Pictures: The media enabled Collection.
- Cars: The Collection to add car details and images that will point to the Pictures media destination.
Create the upload Collection
Here's the pictures Collection to manage uploads.
Pictures Collection for cars
import type { CollectionConfig } from 'payload';
export const Pictures: CollectionConfig = {
slug: 'pictures',
access: {
read: () => true,
},
upload: true,
};
Create the upload field
Next I'll add the cars Collection that defines the upload field, in addition to other fields to hold details about a car.
The upload field consists of:
- name: the name of the field in the data.
- type: type is set to upload and will provide the upload form field.
- relationTo: Points to the pictures Collection.
- hasMany: Is set to true to allow more than photo to be uploaded.
Cars interface for adding details and images
import type { CollectionConfig } from 'payload';
export const Cars: CollectionConfig = {
slug: 'cars',
admin: {
useAsTitle: 'model',
},
access: {
read: () => true,
},
fields: [
{
name: 'pictures',
type: 'upload',
relationTo: 'pictures',
hasMany: true,
},
{
name: 'make',
label: 'Make',
type: 'text',
},
{
name: 'model',
label: 'Model',
type: 'text',
},
{
name: 'year',
label: 'Year',
type: 'number',
},
{
name: 'mileage',
label: 'Mileage',
type: 'number',
},
{
name: 'price',
label: 'Price',
type: 'number',
},
{
name: 'color',
label: 'Color',
type: 'text',
},
{
name: 'notes',
type: 'richText',
},
],
};
And lastly, we just need to add the new Collections to the main payload.config.js.
export default buildConfig({
collections: [
Cars,
Pictures
],
});
The Admin UI will automatically be generated to manage the cars and pictures Collections.
Here's the cars edit form with the upload field to select photos.

The upload field chooser
The field will have the option to upload new images or select from the existing uploaded file content.
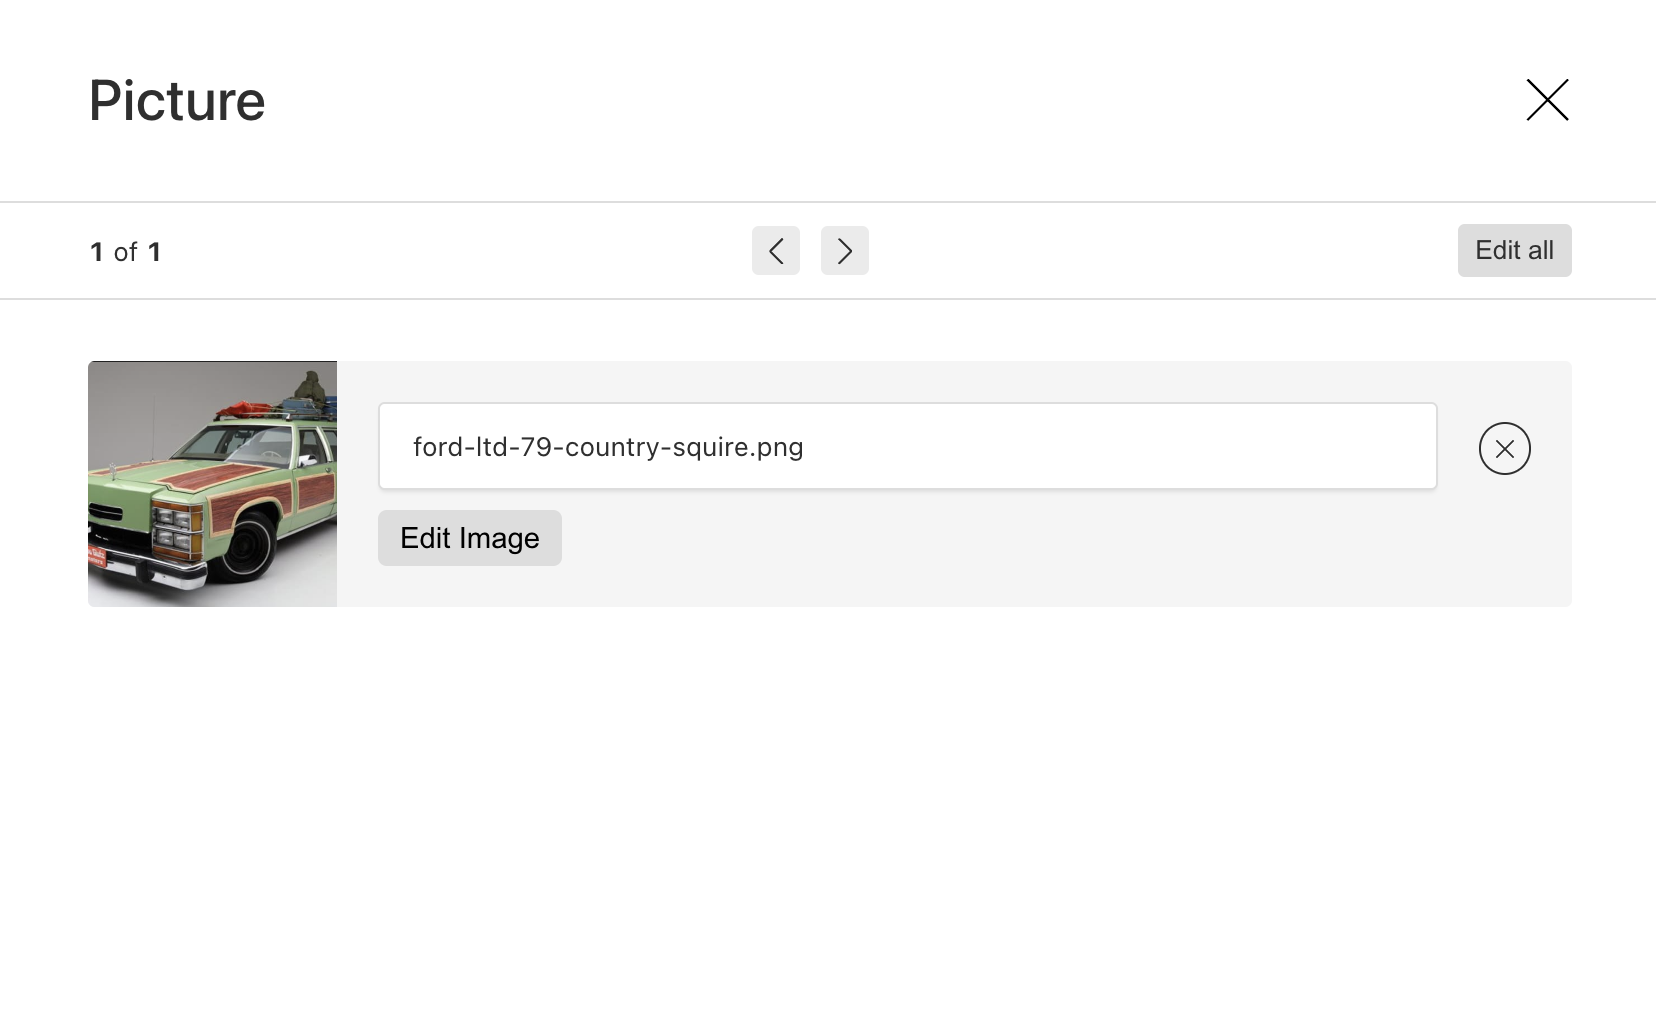
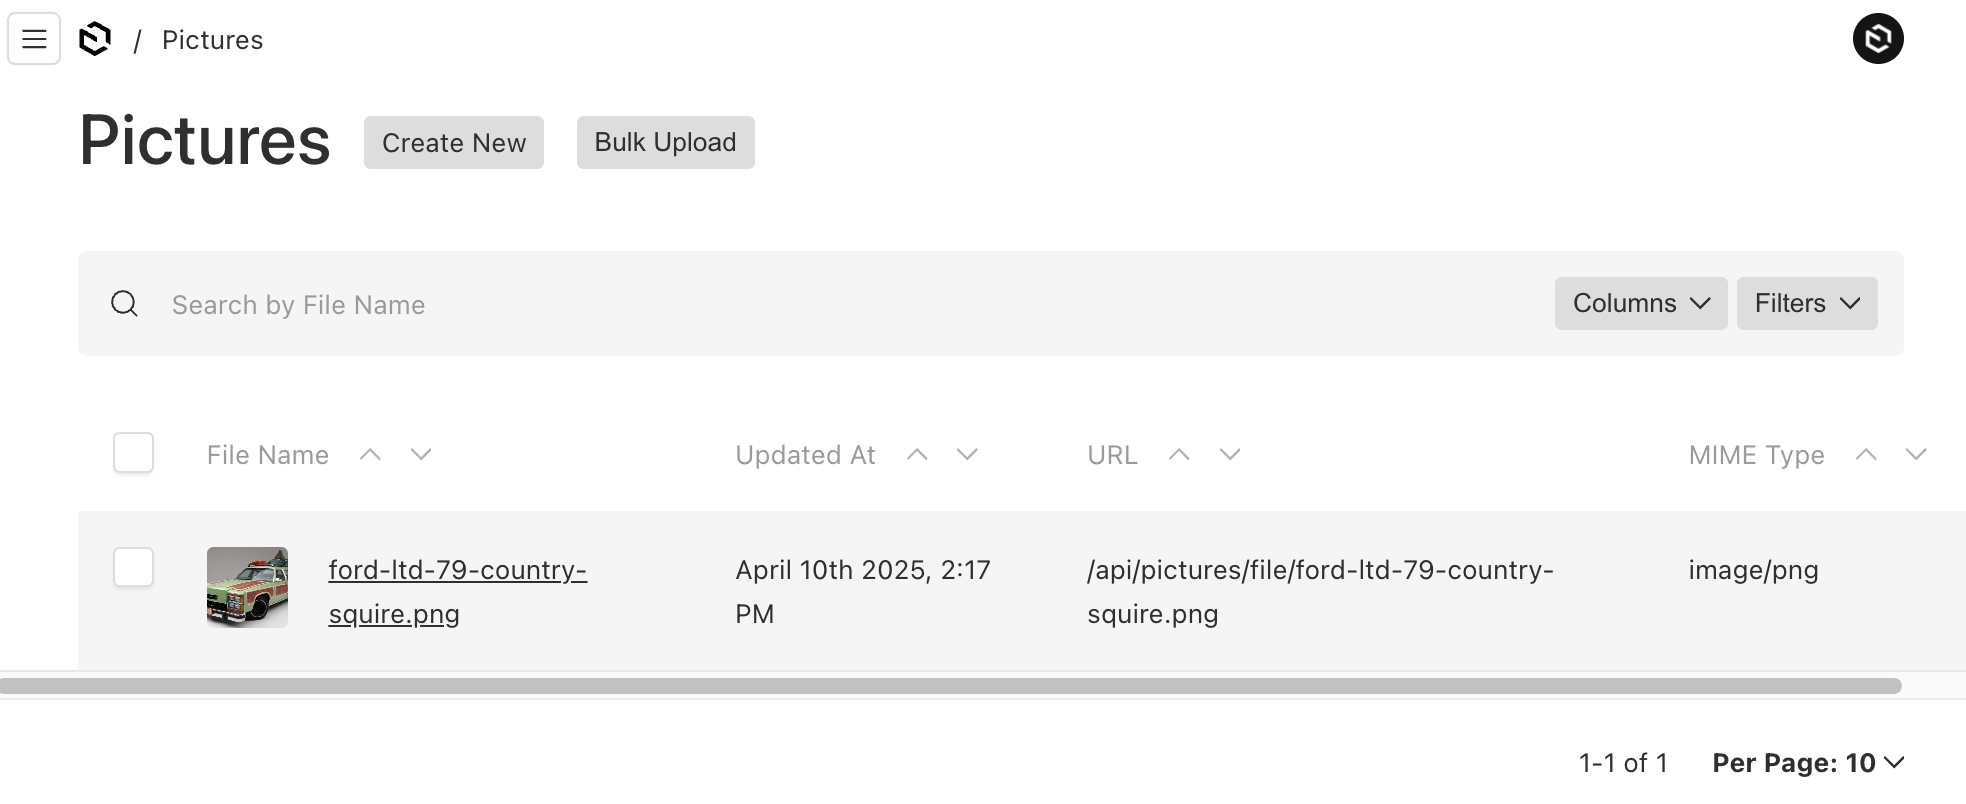
The Pictures repository
Once the photos are uploaded you'll be able to see them in the listing page.
The upload field relationship
One thing to note is that the upload field is a special relationship field, since it requires a relationTo value to be set.
So it's very similar to the relationship with some small differences.
{
fields: [
{
name: 'pictures',
type: 'upload',
relationTo: 'pictures',
hasMany: true,
},
];
}
Displaying a Car's pictures
In order to view the uploaded images, we'll need a React page to do the following:
- Makes a query for a car's make and model.
- Lists any car data associated from the query.
- Iterate through the pictures array and display each picture using a some grid CSS.
Building a details page with Next.js
Here's a simple server-side rendered Next.js page to query the car data and display the car's pictures.
For the UI, I'm using the following:
- Tailwind CSS utility classes for styling.
- Using Payload
@payloadcms/richtext-lexical package for deserializing the saved rich text content, which is saved in AST format in the database.
- A query helper
qs-esm to stringify queries.
import React from 'react';
import { stringify } from 'qs-esm';
import { Car as CarType } from '@payload-types';
import { Where } from 'payload';
import { RichText } from '@payloadcms/richtext-lexical/react';
import { SerializedEditorState } from '@payloadcms/richtext-lexical/lexical';

const query: Where = {
  make: {
    equals: 'Ford LTD',
  },
  and: [
    {
      model: {
        equals: 'Country Squire',
      },
    },
  ],
};

export default async function Page() {
  const stringifiedQuery = stringify(query, { addQueryPrefix: true });
  const res = await fetch(`http://localhost:3000/api/cars${stringifiedQuery}`, {
    method: 'GET',
  });
  const data = await res.json();

  const car: CarType = data?.docs?.[0];

  const { model, price, make, year, mileage, pictures, notes } = car;

  return (
    <div className="flex-col justify-evenly p-5">
      <h1>For Sale</h1>
      <div className="flex-col">
        <div className="grid grid-cols-2 gap-3 w-1/2 mb-5">
          <div className="col">Model</div>
          <div className="col">{model}</div>
          <div className="col">Make</div>
          <div className="col">{make}</div>
          <div className="col">Year</div>
          <div className="col">{year}</div>
          <div className="col">Mileage</div>
          <div className="col">{mileage}</div>
          <div className="col">Price</div>
          <div className="col">{price}</div>
        </div>
        <div>
          <RichText data={notes as SerializedEditorState} />
        </div>
      </div>
      <div className="grid grid-cols-2">
        {pictures &&
          pictures.map((picture) => {
            if (picture && typeof picture === 'object') {
              const { url } = picture;
              return <img src={`http://localhost:3000${url}`}/>;
            }
            return null;
          })}
      </div>
    </div>
  );
}
Query response data
Here's an abbreviated version of the query response with the omission of the nested notes and date fields:
- The
pictures field key is returned as an array since it was set to upload many.
- Each
pictures array item provides the essential image info for optimal rendering.
{
"docs": [
{
"make": "Ford LTD ",
"model": "Country Squire",
"mileage": 200000,
"color": "Metalic Pea",
"year": 1979,
"notes": {
},
"pictures": [
{
"filename": "ford-ltd-79-country-squire.png",
"mimeType": "image/png",
"filesize": 1158455,
"width": 1578,
"height": 884,
"focalX": 50,
"focalY": 50,
"id": "67f8356b290d04d676c4f5be",
"url": "/api/pictures/file/ford-ltd-79-country-squire.png",
"thumbnailURL": null
}
],
"price": 2000,
"id": "67f8280f290d04d676c4ec5a"
}
]
}
Viewing the car details page
Here's the rendered car details page content showing the upload pictures below the car information.

In Conclusion
Even though this article just touched the surface of what Payload's media Collections can do, it gives a good idea of how things come together end to end.
Building any SaaS app these days will always require the capbility to upload content in some way. The Payload framework provides extensive support for these types of operations in a consistent way.
Here's some key benefits of Payload Collection media support:
- Media content doesn't need to live in one large bucket, it can be broken up into more manageable media Collections.
- Each media Collection can directly store its content to the cloud using adapters to each cloud platform.
- Upload Collections were designed to directly serve resources to users using access control or token access.
- Payload upload capabilities support multi-tenant capabilities allowing tenants to manage their own content.
- By leveraging upload Collections effectively it can immensely speed up your development efforts.
I hope this article has helped to scratch the surface using Payload CMS media and uploading features.