Payload CMS Collections: How They Streamline Content Management
Payload CMS Collections: How They Streamline Content Management
Posted on: April 04 2025
By David Becker
With Payload CMS 3.0, Collections have received a major upgrade, making it easier than ever to organize, manage, and design data models for any business. Using the latest release, I'll show how Collections can greatly streamline content managment.
In this article I'm going to build a college course Collections model to manage students, teachers, courses and more.
This exercise will emphasize the flexibility of Collections and content workflows and cover the following:
What are Collections?
How to create Collections
Collection relationship and join usage
How to query Collections with relationships
How Collections build amazing admin interfaces
Getting Started
If you would like to follow along, you can generate a Payload project with the following command.
Bash
1npx create-payload-app
Overview of Collections
Let's start by getting the basic idea of what a Collection is and why they are at the core of Payload.
What is a Collection?
A Collection is essentially a grouping of field types that map to a database record. Payload uses these field mappings to build a model representation called a schema.
Collections provide a handle to the schema mapping but can do much more than simple database mapping.
Payload uses the term document to refer to a record which is a term used in relational databases.
The key benefits of the generated schema include:
Automatically generates powerful Admin UI pages for managing content.
Generates all the needed TypeScript interfaces.
Generates a GraphQL schema for building powerful queries.
Creates consistent interfaces for document relationships.
Provides interfaces for media and content upload handling.
Generates local, REST and GraphQL endpoint API's.
Uses the schema to validate data.
Collections are strongly typed
Payload CMS is a TypeScript rich framework, built with consistency in mind.
This allows developers to build Collection models without the need to define any typing which if written by hand could lead to inconsistent and duplicate types.
So in this article we'll take a look at some common Collection models and patterns to get a general feel for how to use them in a practical way.
Building a School Course Schema
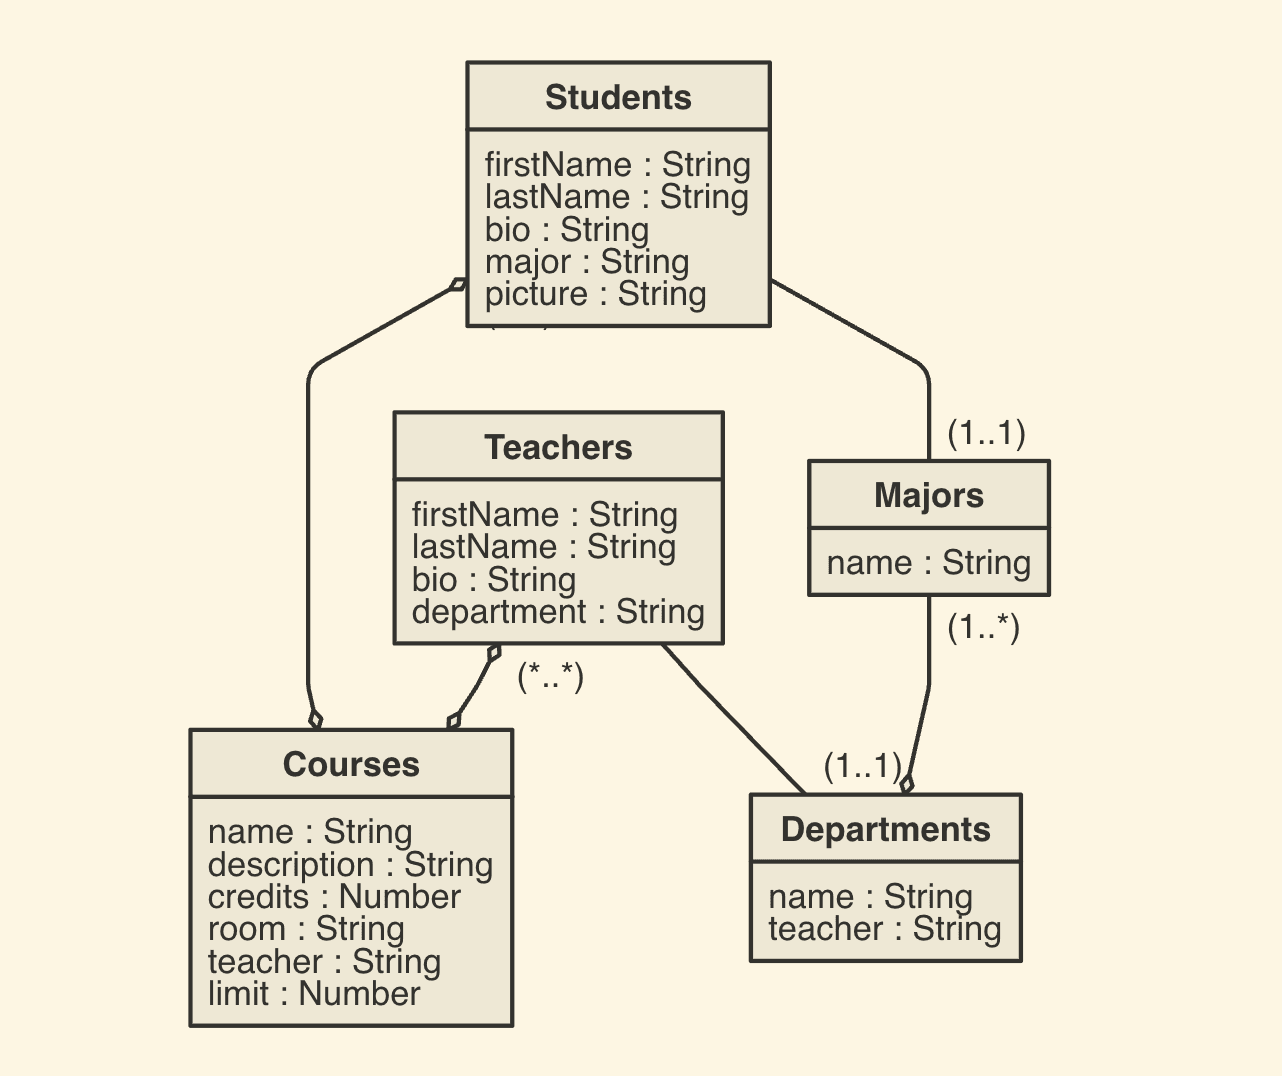
The first step is to have a visual representation and roadmap of what to build. Here's the schema design that I'll be using.
Each block in the diagram represents a Collection that will be defined. The connecting lines represent the relationships between each Collection.
A full tutorial on how to use the new Payload CMS join relationship field.
Aug 11, 2025By David Becker
Stay in the loop
Get the latest articles delivered to your inbox. No spam, unsubscribe anytime.
Analyzing the schema
Let's analyze the schema and how each Collection will relate to the other.
Students: Each student can pick many courses (many-to-many) and have only one major (one-to-one).
Teachers: Each teacher can teach many courses (many-to-many) and only be assigned to one department (one-to-one).
Courses: Each course can have many students (many-to-many) and only have one assigned teacher to a course (one-to-one).
Departments: Each department can be associated with many majors (one-to-many)
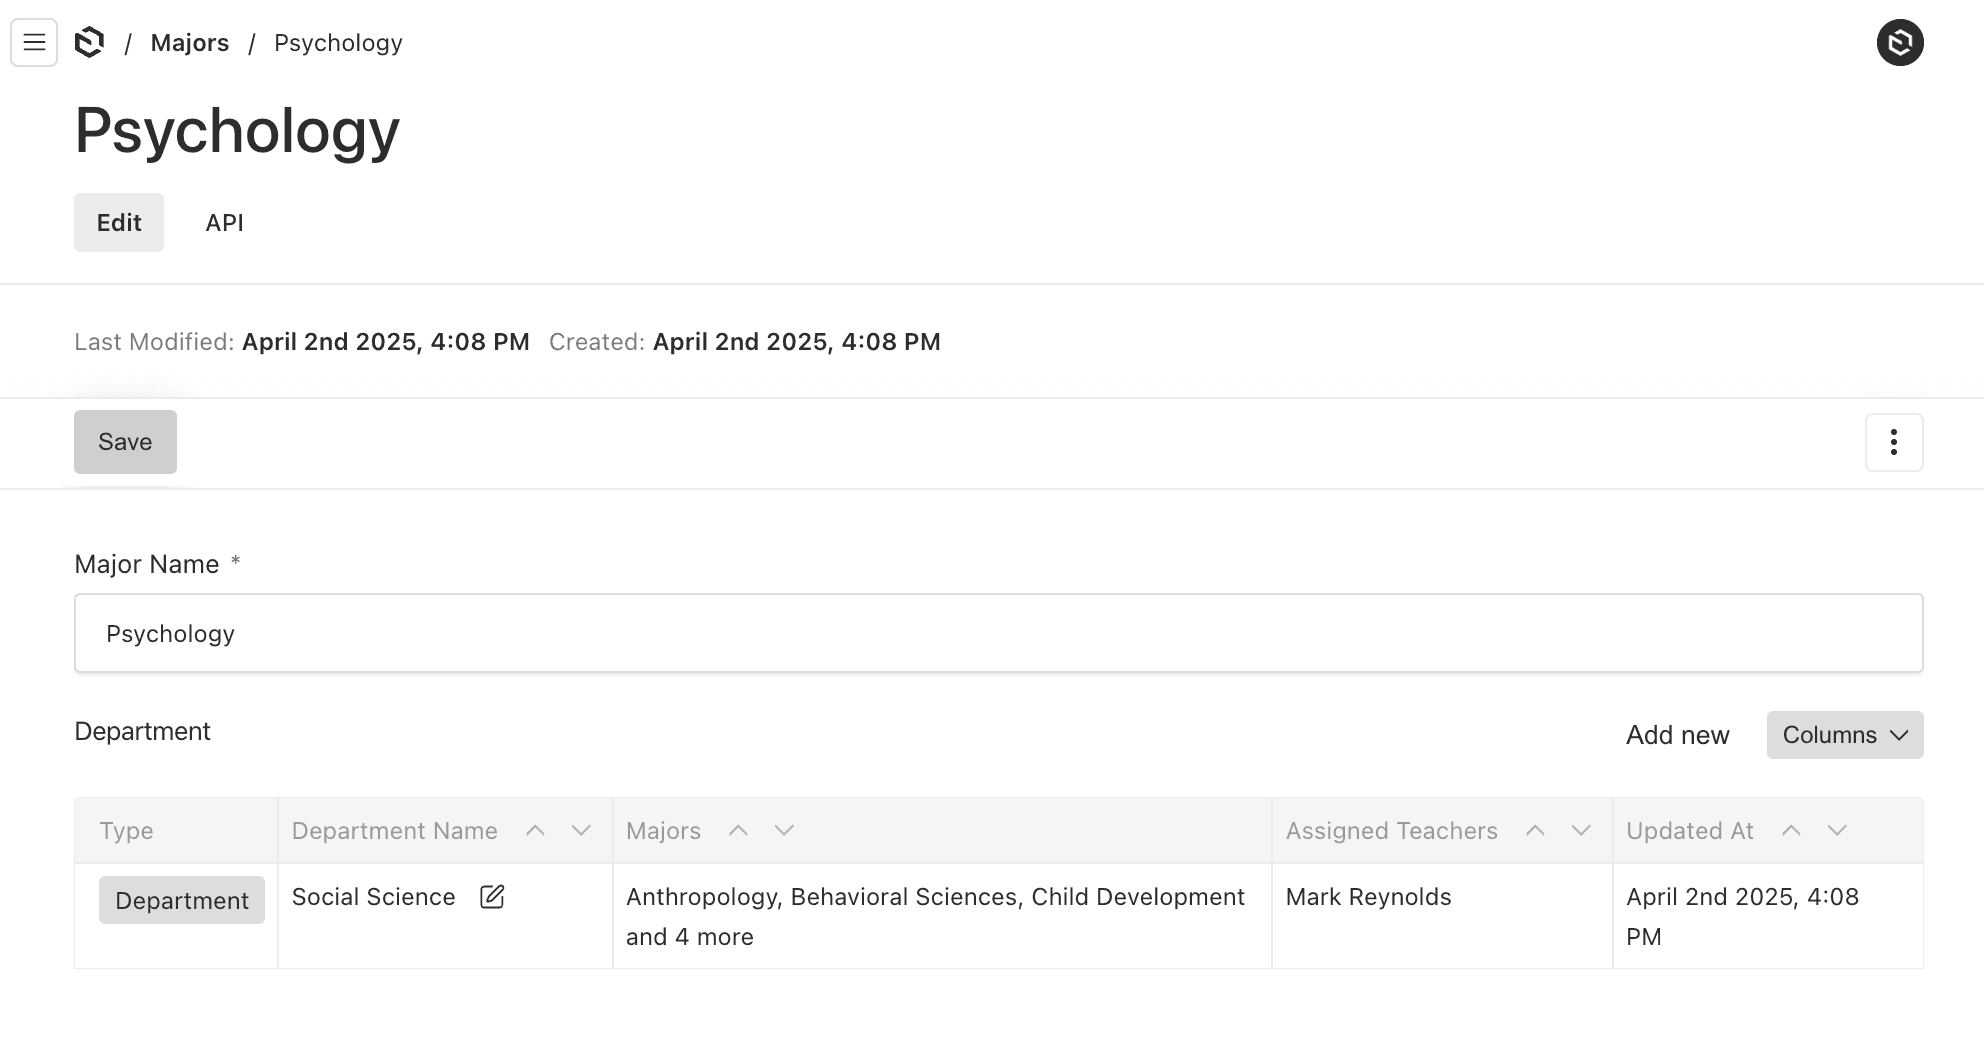
Majors: Each major can have many students (many-to-many) and only fall under one department (many-to-one).
Pictures: An upload Collection to store all of the student and teacher profile pictures.
Payload Collection realtionships
In this exercise, I'll be using some of the key relationship fields in Payload, including:
relationship: A one directional relationship linking one Collection to another.
join: A new feature which offers support for bi-directional relationship queries.
The owning side of relationships
One thing to keep in mind is that Payload uses the relationship field as the owning side in the relationship.
This means that even though the relationship and the join will be used together, the relationship side still makes all the modifications to the Collections.
Why use a join field?
The join will provide bi-directional query support to the adjoining Collections.
The join field doesn't have to really be used in this case and you could only use the relationship field to do the job but it will provide a lot more visibility in the Admin UI pages.
This is very beneficial for content managers to have greater visibility. Also, there are times when developers need the inverse relationship data to build pages.
Join relationships can be taxing
One thing to be cautious of when using a join is that it will increase the size of query responses because it loads the relationships too, even if setting depth = 0.
The Admin UI will handle these concerns but when you build your own custom pages and query with joins, it's worth considering using GraphQL for more optimized and tailored queries.
So the students configuration defines the following fields:
picture: Creates a relationship to allow for photo upload and storage.
firstName: Text field for first name.
lastName: Text field for last name.
fullName: A hidden field that has a hook to store the full name before any updates so it can be used as a title.
bio: A rich text field for bio content and information.
courses: A relationship field to assign students to many courses.
major: A relationship field to set the student to a single major.
Collections provide a way to define the model and structure of data so it can be managed through the Admin UI, however, custom pages will use the API's to build customer facing pages.
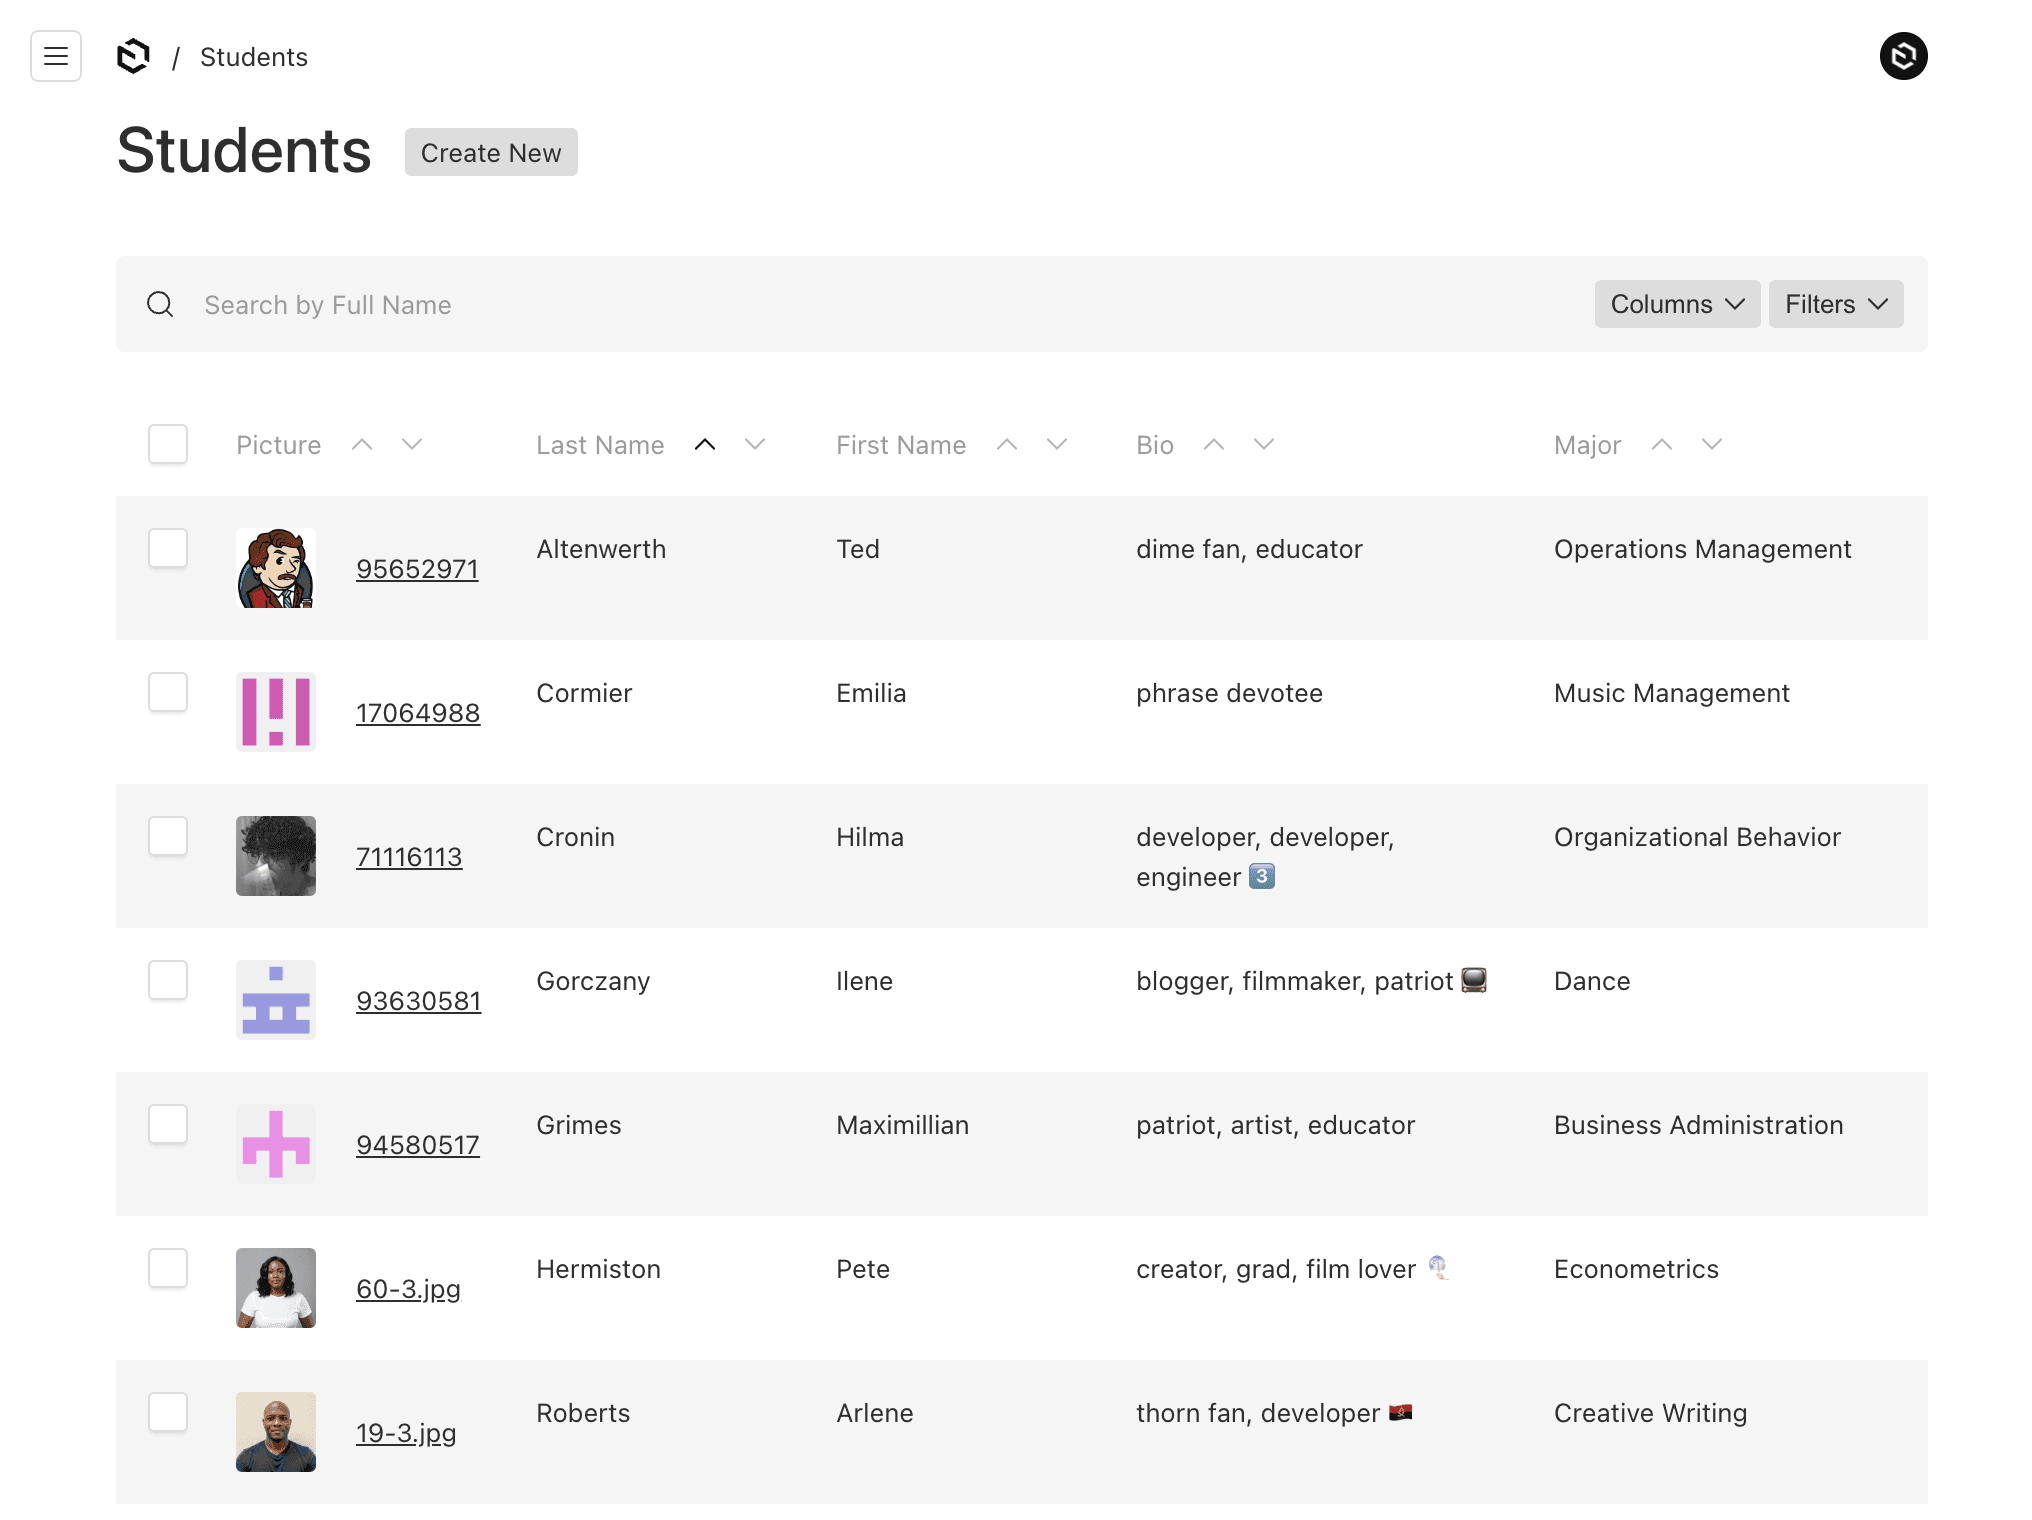
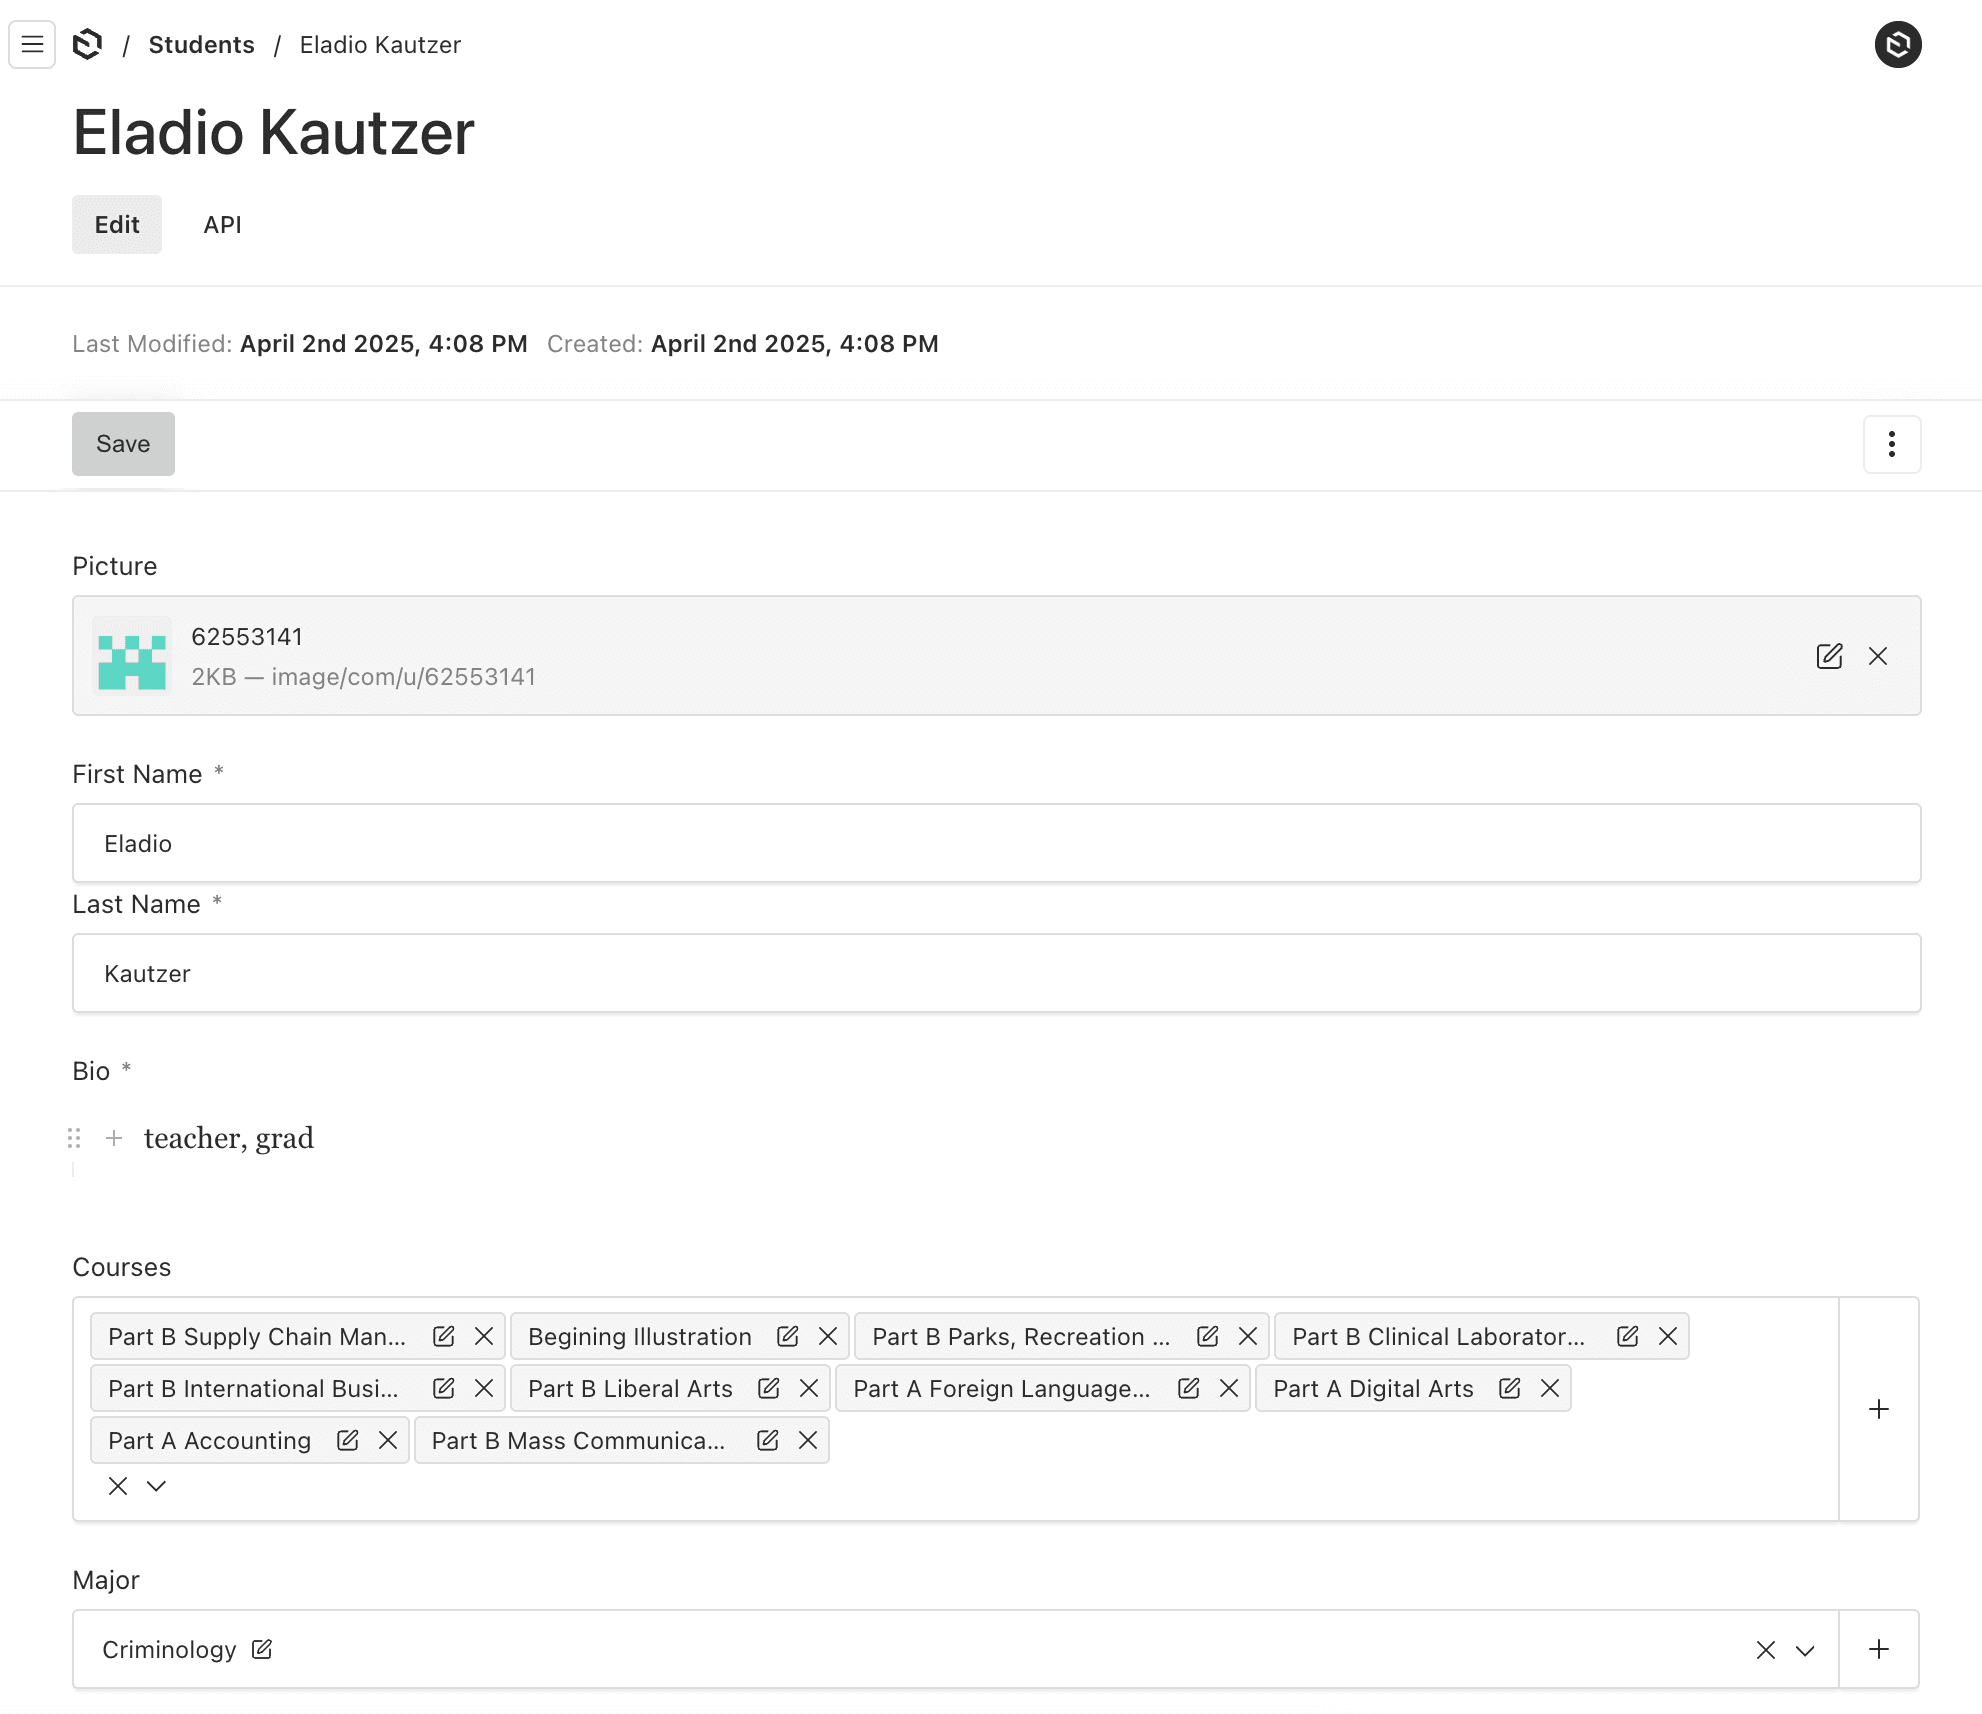
Generated Students Admin UI
I seeded the database with some random fake mock data to provide a more realistic demo but here's what the Admin UI will generate for the Students Collection.
By clicking on one of the table rows it will show the edit details page for a student.
As you can see the courses and the major can be selected and removed by the owning relationship side.
Querying the API for Students
Using the REST query and depth set to 0, with two relationship fields courses and major.
The Teachers configuration defines the following fields:
picture: Creates a relationship to allow for photo upload and storage.
firstName: Text field for first name.
lastName: Text field for last name.
fullName: A hidden field that has a hook to store the full name before any updates so it can be used as a title.
bio: A rich text field for bio content and information.
courses: A join field, to see which courses a teacher has been assigned to. The Courses Collection will have the relationship field to manage the assignment.
department: A join field, to see which department a teacher is assigned to. The Departments Collection will have the relationship field to assign this value.
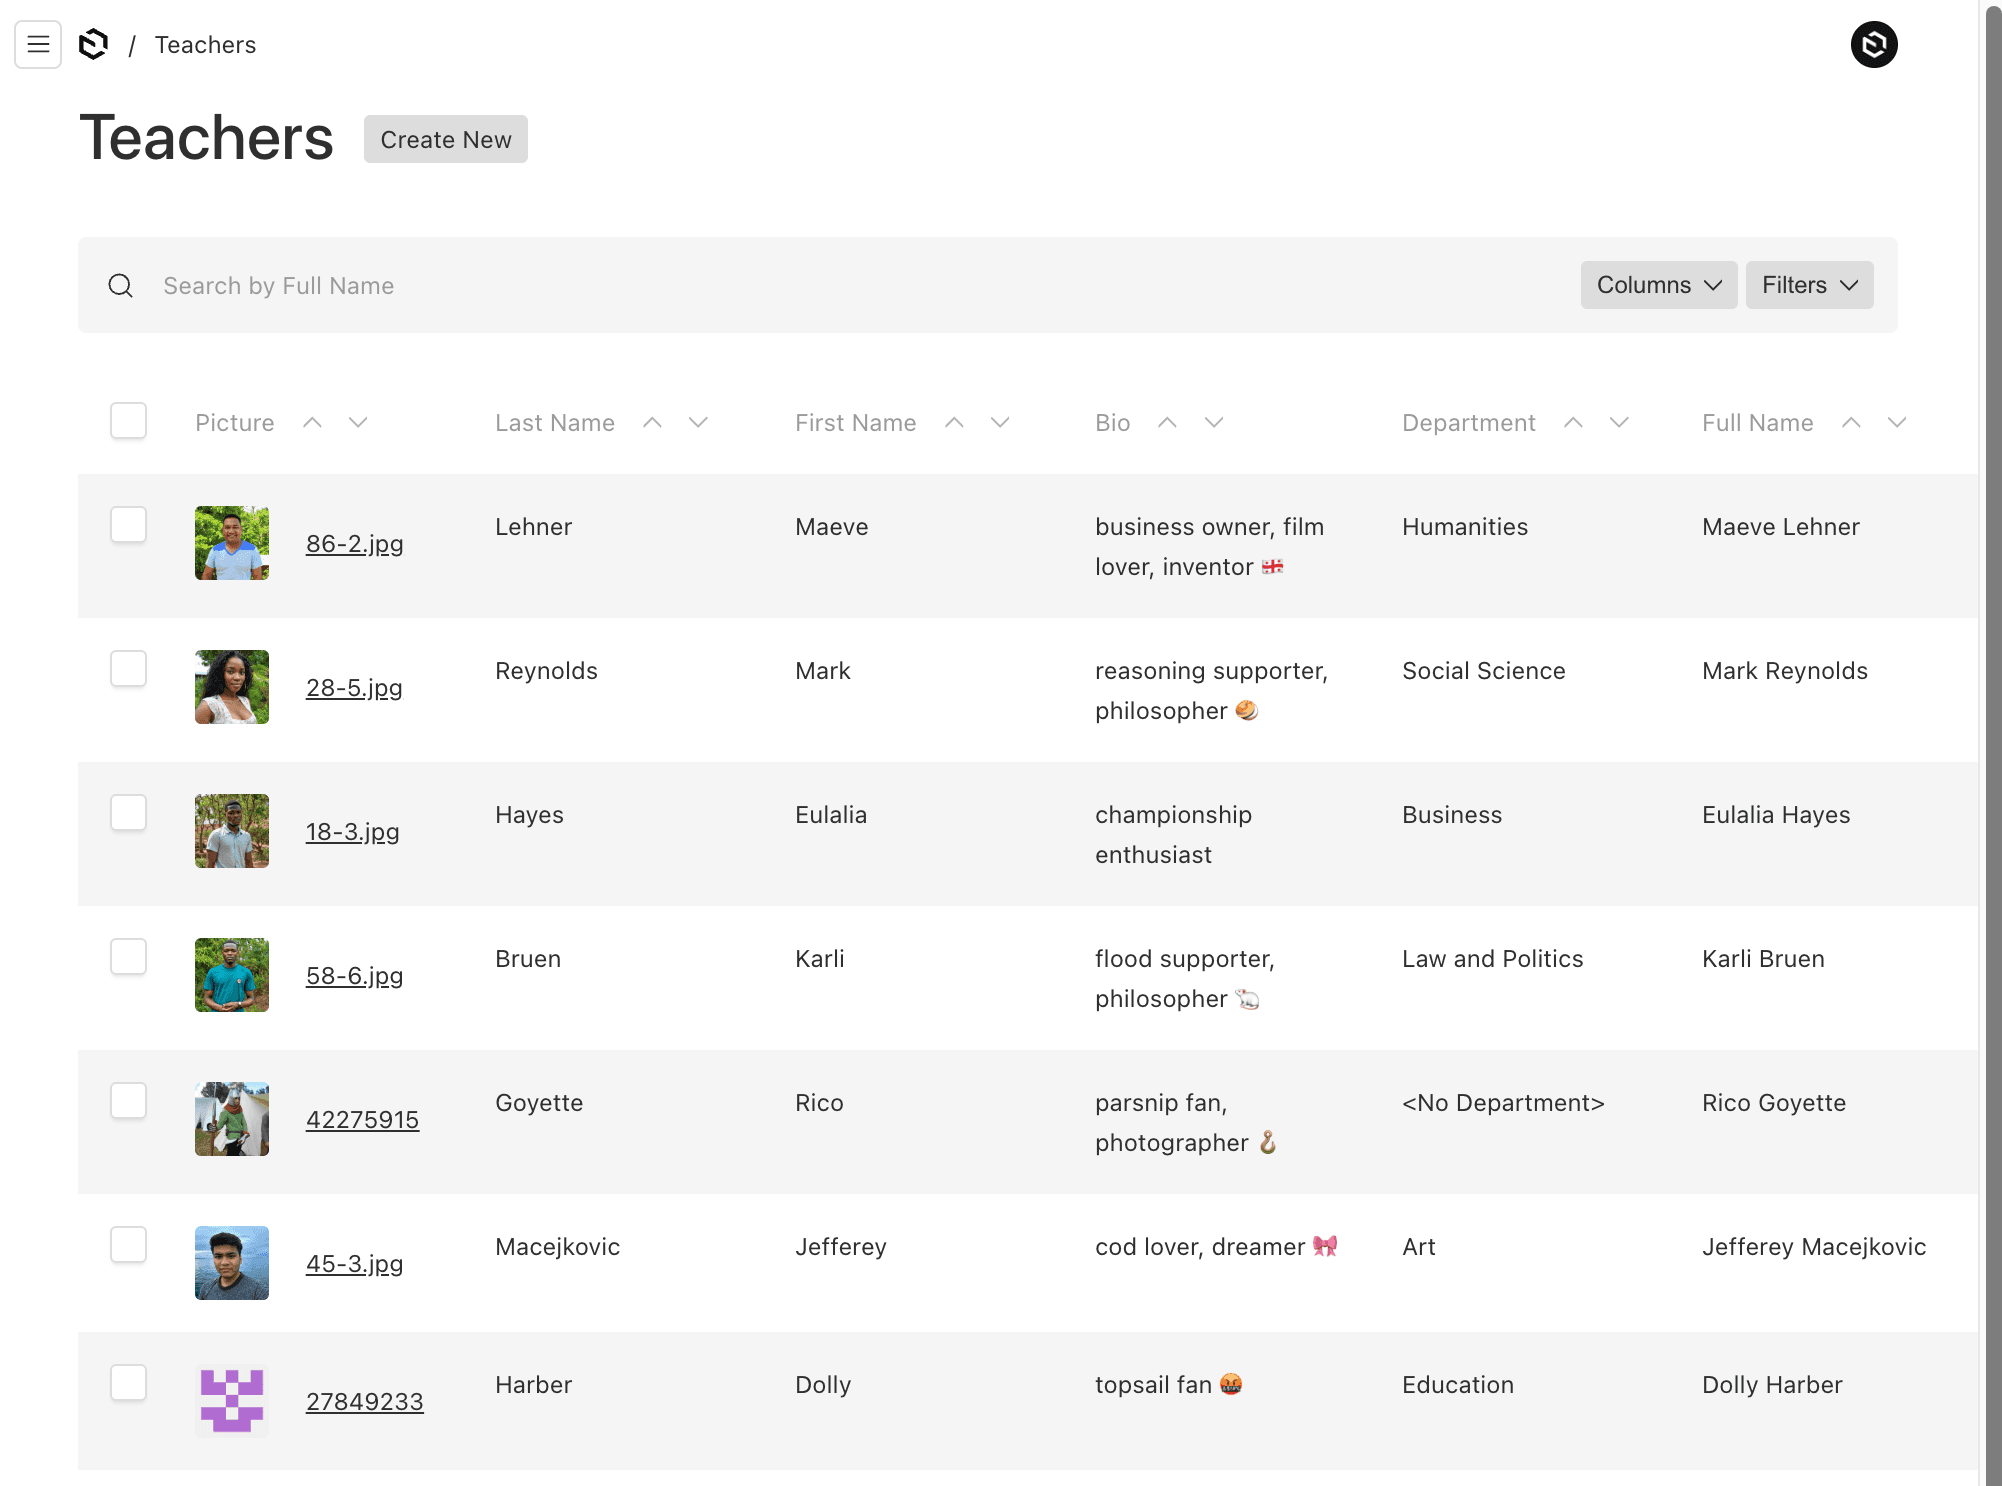
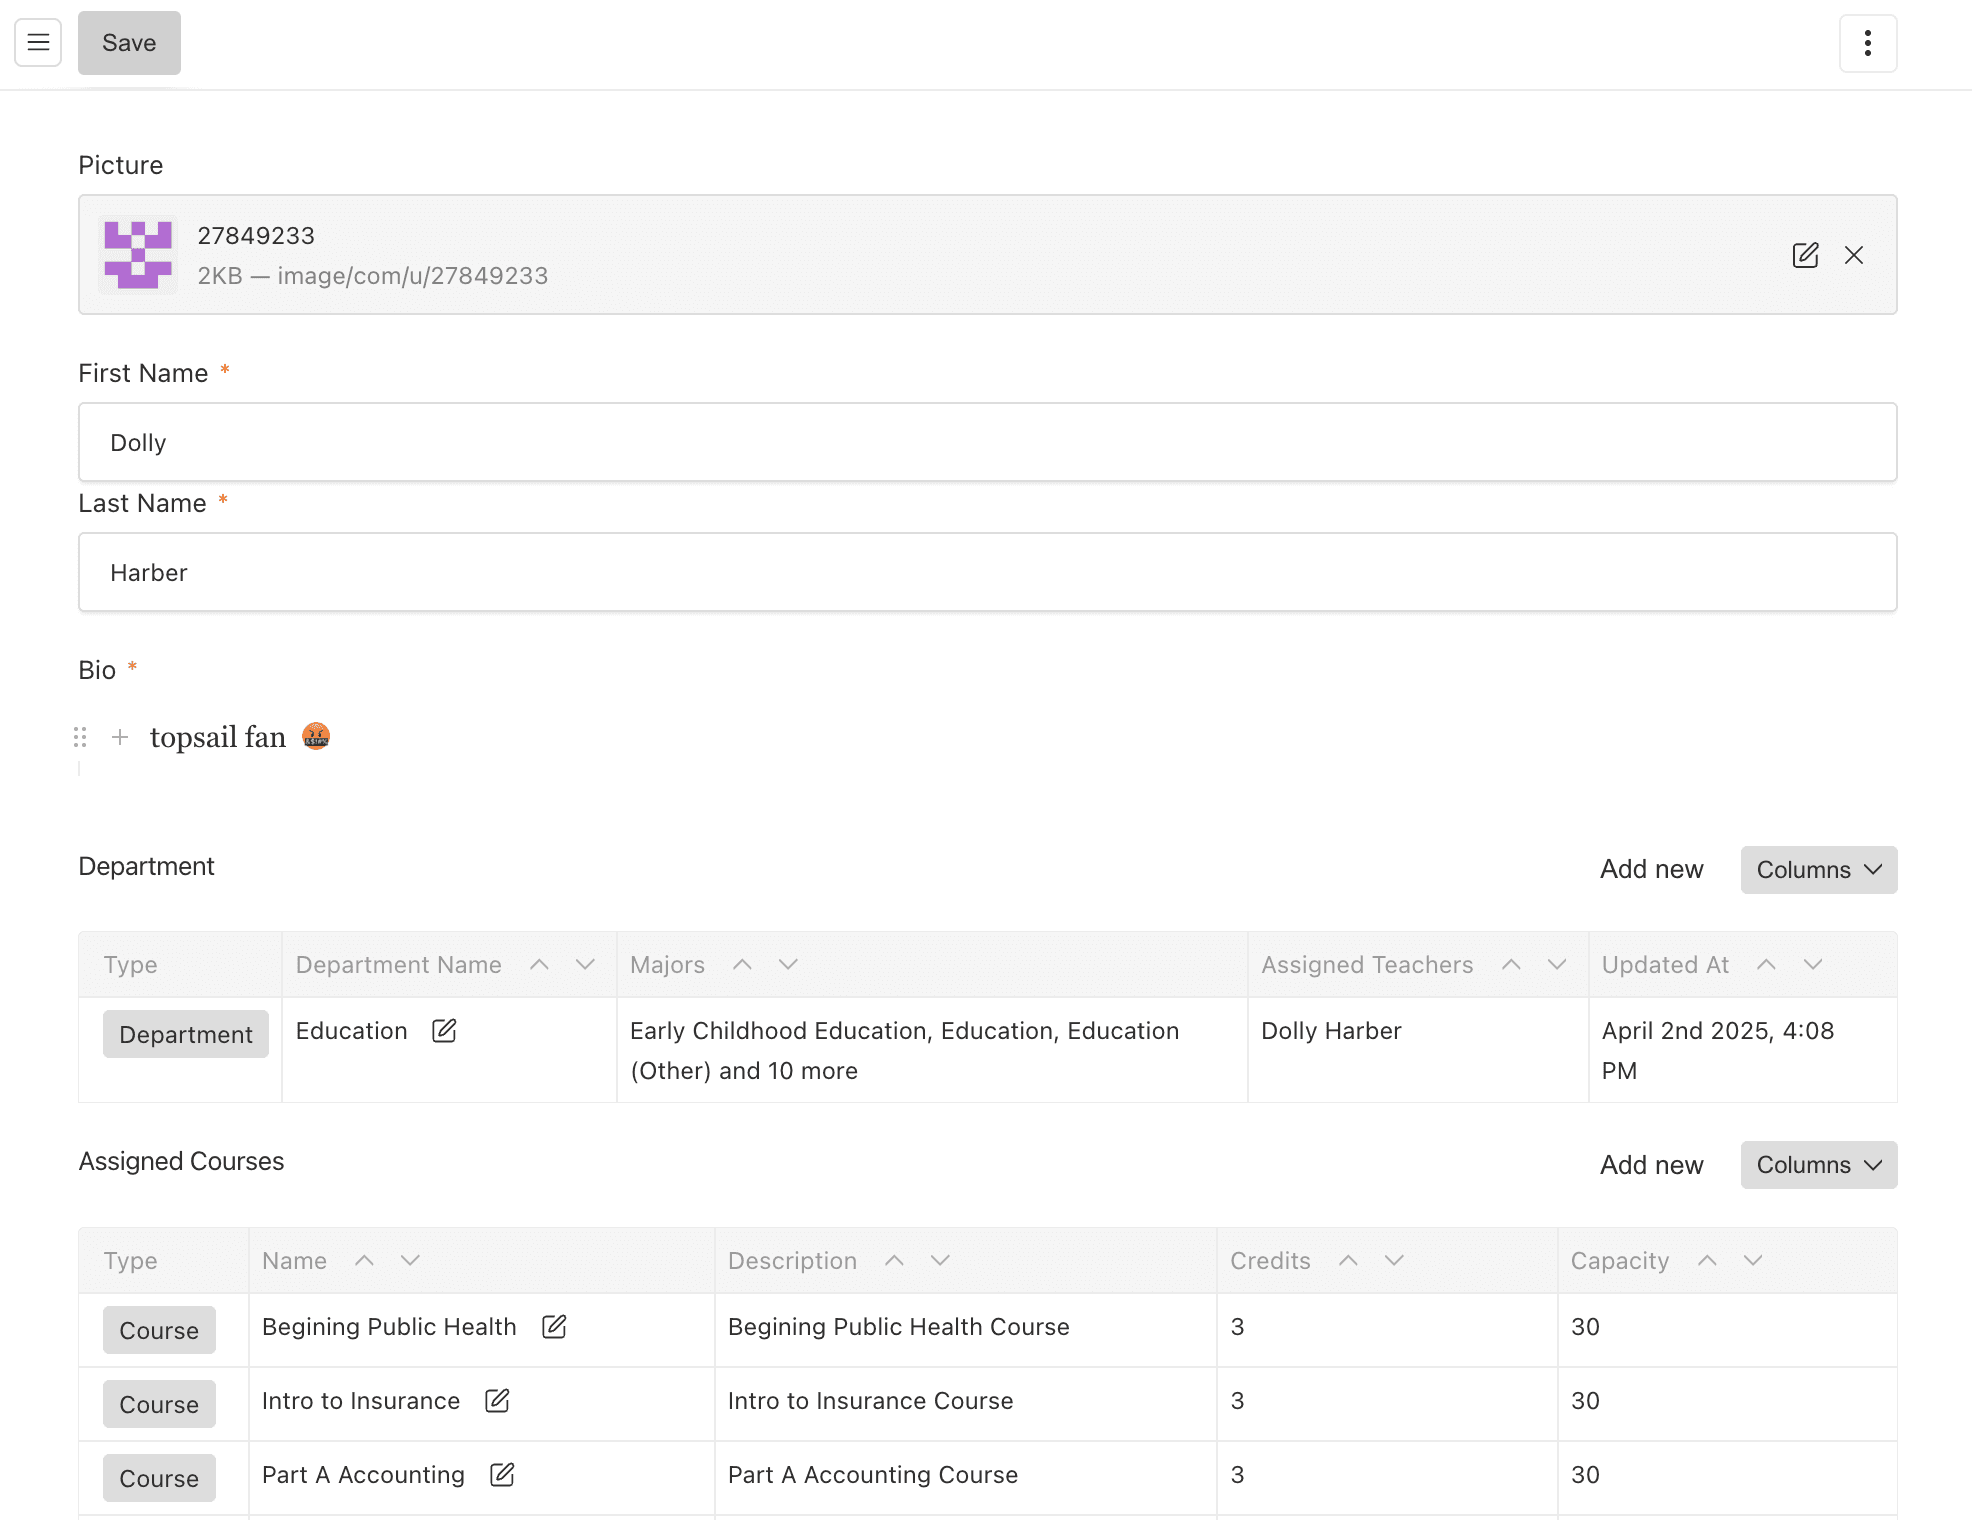
Generated Teachers Admin UI
Here's the listing page of teachers using seeded mock data.
As we start to add the other Collections, we'll see how the relationships come together.
Notice how the join fields for the department and courses field are read only
Querying the API for Teachers
Using the REST query and depth set to 0, with two join fields department and assignedCourses.
I'll add the Pictures Collection since both the student and teacher Collections use this field to upload their profile picture.
Profile picture Collection configuration
TypeScript
1importtype{ CollectionConfig }from'payload'
2
3exportconst Pictures: CollectionConfig ={
4 slug:'pictures',
5 access:{
6read:()=>true,
7},
8 fields:[],
9 upload:true,
10}
The Pictures Collection doesn't contain any fields but they could be added if needed but only needs to set the following:
upload: Set to true to tell Payload to manage file uploads and content storage.
Using a different upload Collection versus using the default media Collection will give some isolation so web assets don't get mixed with the school profile pictures.
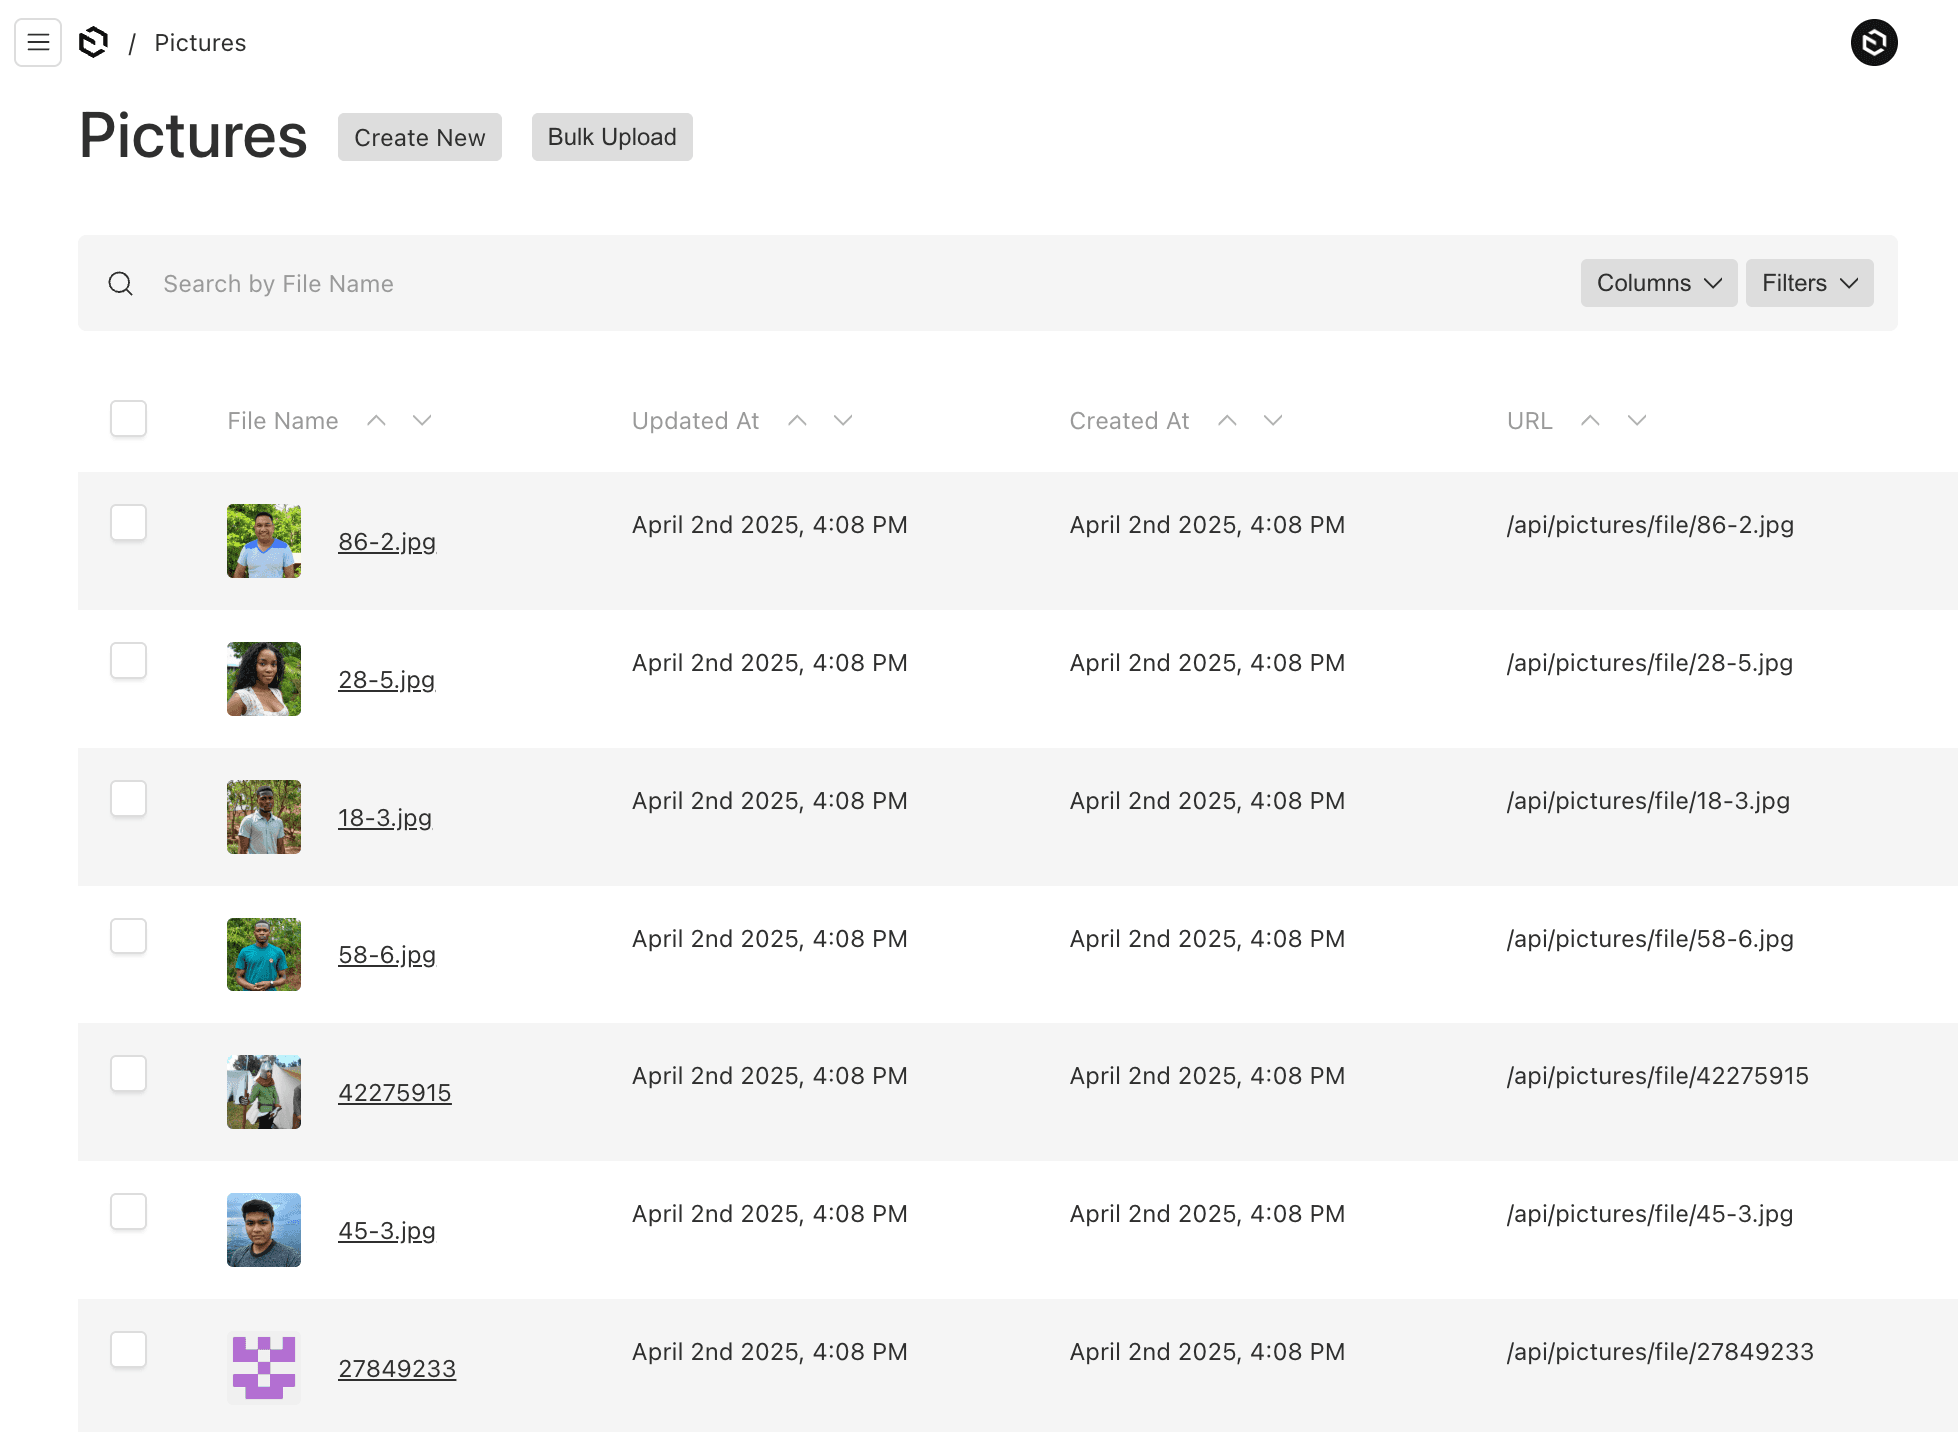
Generated Pictures Admin UI
Here's the listing page for Pictures.
Defining the Courses Collection
The Courses Collection will start to tie things together, since the students and teachers reference this Collection in relationships.
Courses Collection configuration
TypeScript
1importtype{ CollectionConfig }from'payload'
2
3exportconst Courses: CollectionConfig ={
4 slug:'courses',
5 admin:{
6 useAsTitle:'name',
7},
8 fields:[
9{
10 name:'name',
11 type:'text',
12 required:true,
13},
14{
15 name:'description',
16 type:'text',
17},
18{
19 name:'credits',
20 type:'number',
21 defaultValue:3,
22},
23{
24 name:'capacity',
25 type:'number',
26 defaultValue:30,
27},
28{
29 name:'teacher',
30 type:'relationship',
31 relationTo:'teachers',
32 hasMany:false,
33},
34{
35 name:'enrolledStudents',
36 type:'join',
37 collection:'students',
38 on:'courses',
39},
40],
41}
Analyzing the Courses Collection
The Courses configuration defines the following fields:
name: Text field for the name of the course.
description: Text field for the course description.
credits: A number field for amount of credits for the course.
capacity: A number field to hold the maximum student enrollment.
teacher: A relationship field to add a single teacher to be assigned to each course.
enrolledStudents: A join field, to see which students have enrolled in this course.
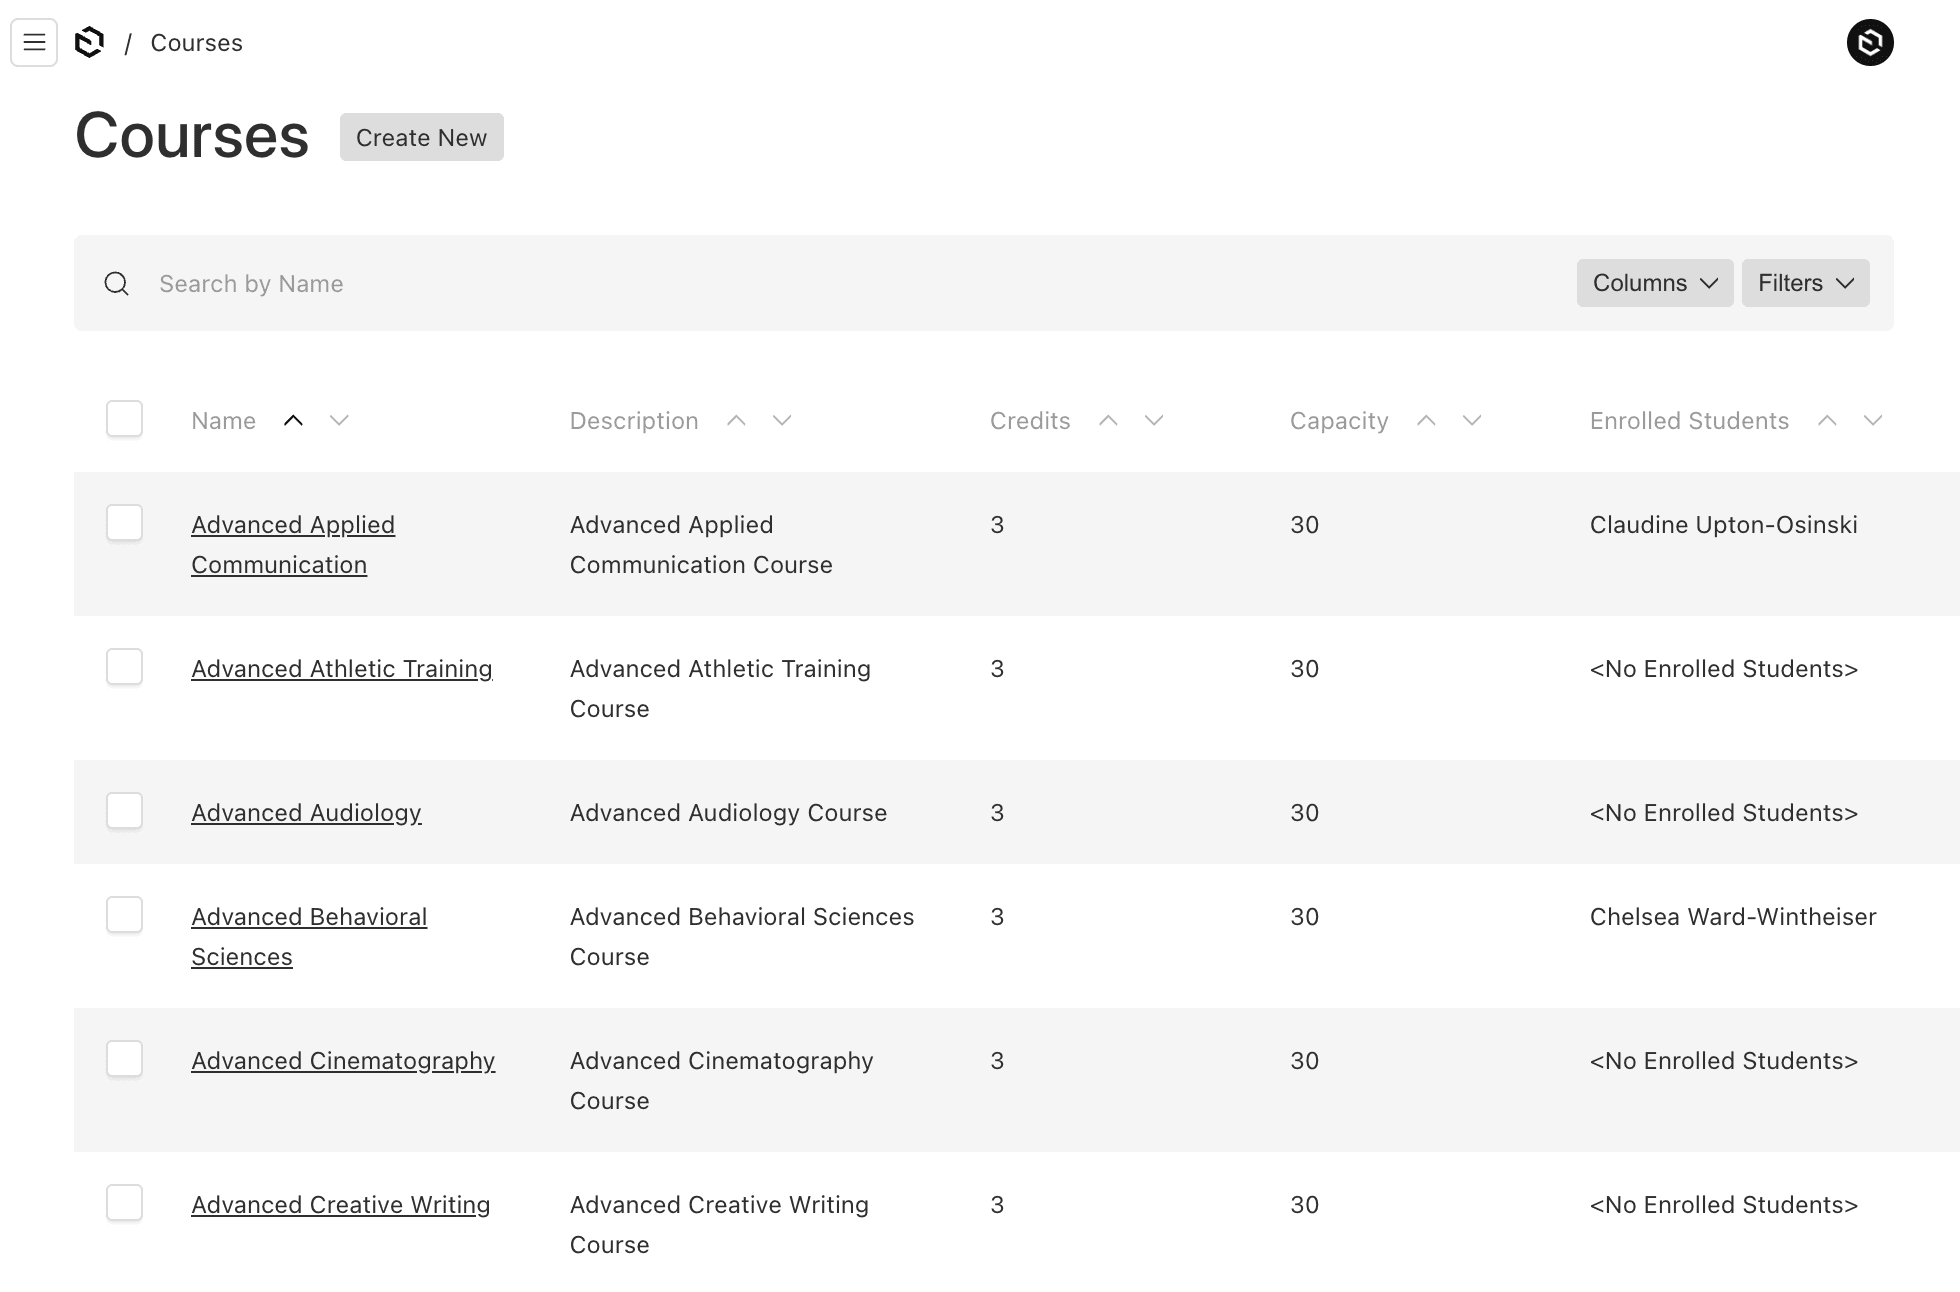
Generated Courses Admin UI
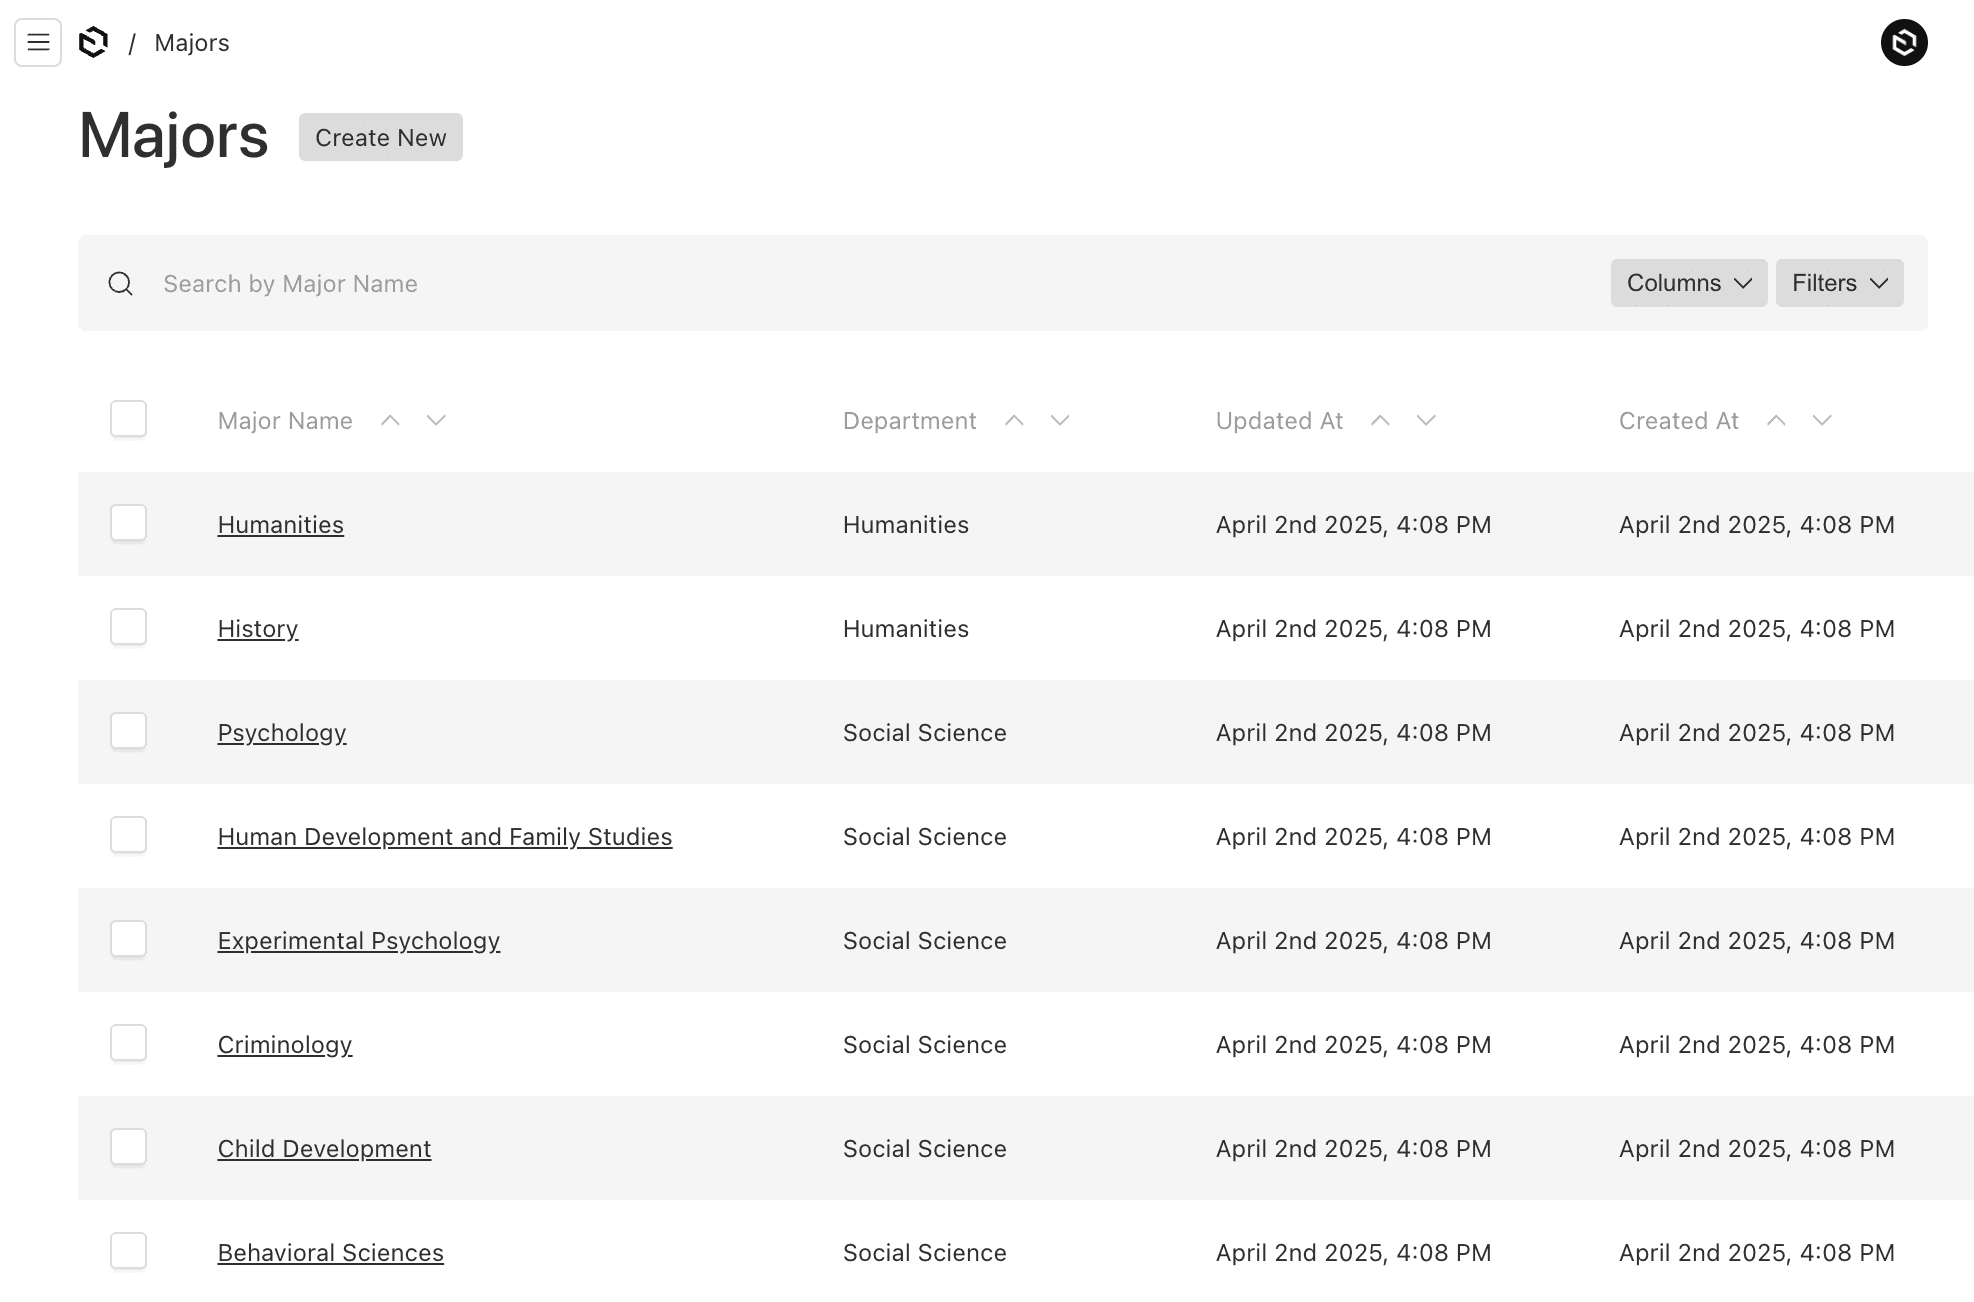
Here's the listing page for Courses with some seeded mock data.
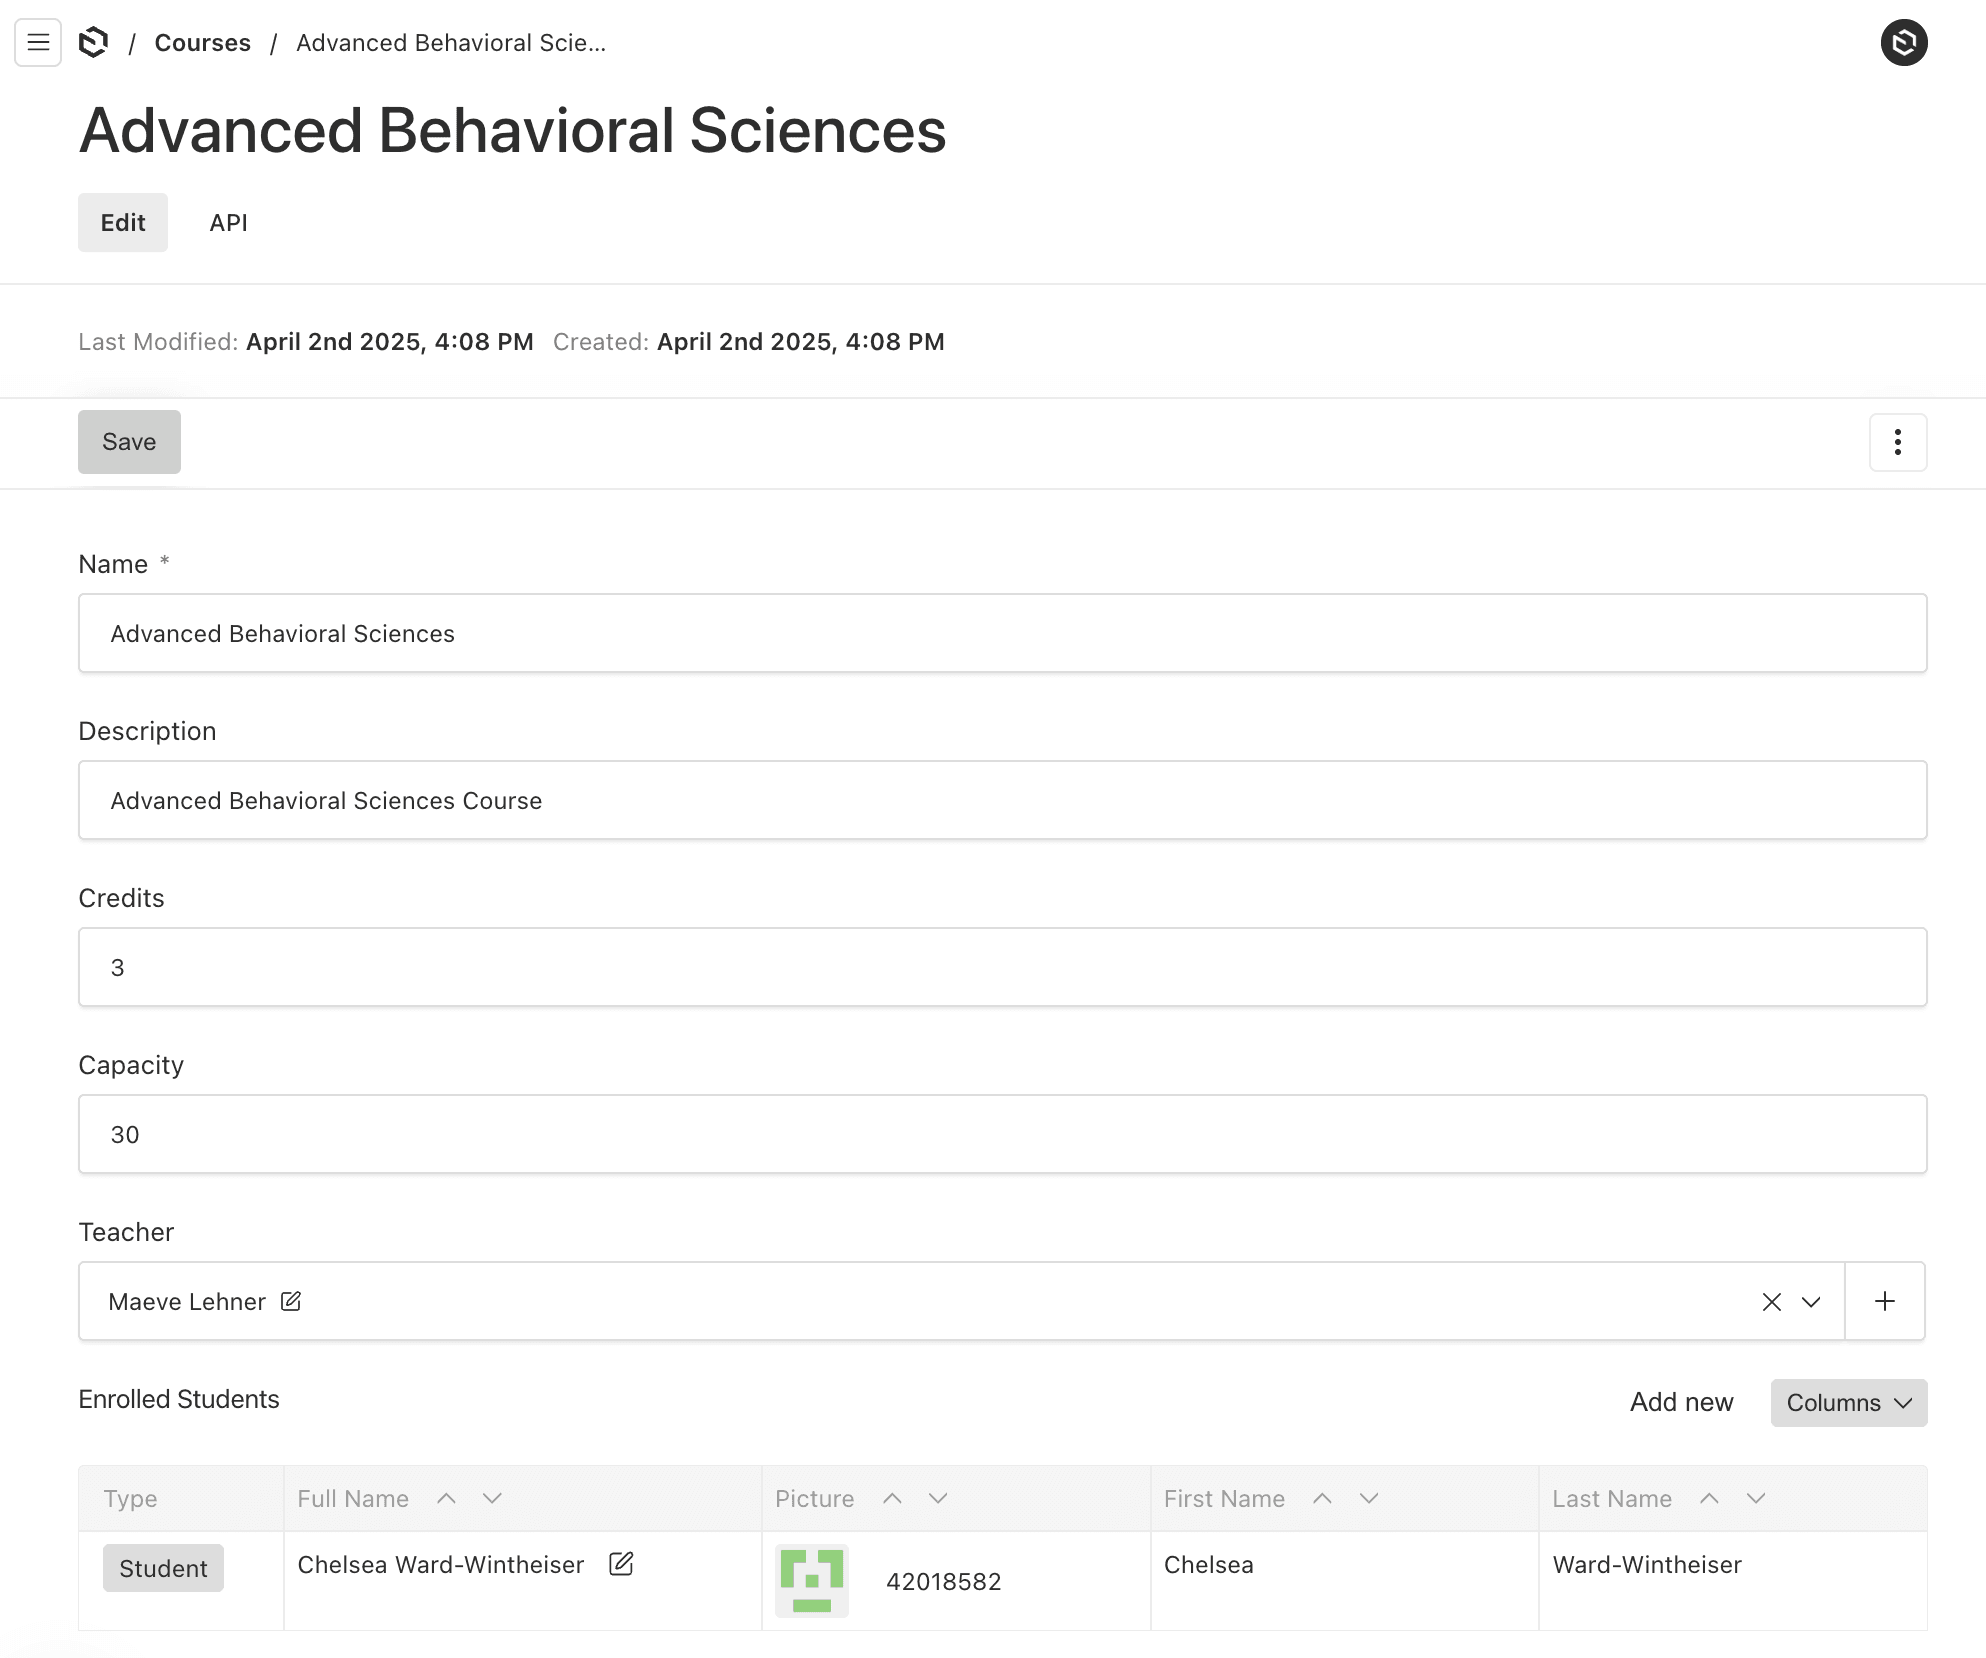
By selecting a row, you can edit the course details and set a teacher to be assigned to the course.
The admin page also shows the students that have been enrolled which is really one of the best features of using the join field.
Querying the API for Courses
Using the REST query and depth set to 0, with one relationship field teacher and one join field enrolledStudents.